In this video, you will learn the best practice of setting up your computer for image editing and how to build a “set it and forget it” backup plan so you will never lose an image again.
In this video, you will learn the best practice of setting up your computer for image editing and how to build a “set it and forget it” backup plan so you will never lose an image again.
Our own Director of Education, Vanelli, is also a Drobo Ambassador. He uses Luminar as an image editor example and Drobo as a storage and backup solution example. If you use different image editing software other than Luminar, or a different backup solution other than Drobo, don’t worry, the concepts you will learn can be modified to fit your needs. Now, let’s get started.
What is Luminar and How Luminar Interacts with Files on Your Hard Drive
Luminar is an image editing and photo management program designed for anyone who loves photography or just like taking photos.
Its intuitive design and powerful AI tools like:
- AI Enhancer
- AI Sky Replacement
- AI Skin
- and Portrait Enhancer
make visual art creation accessible to everyone. And we believe that everyone is an artist.
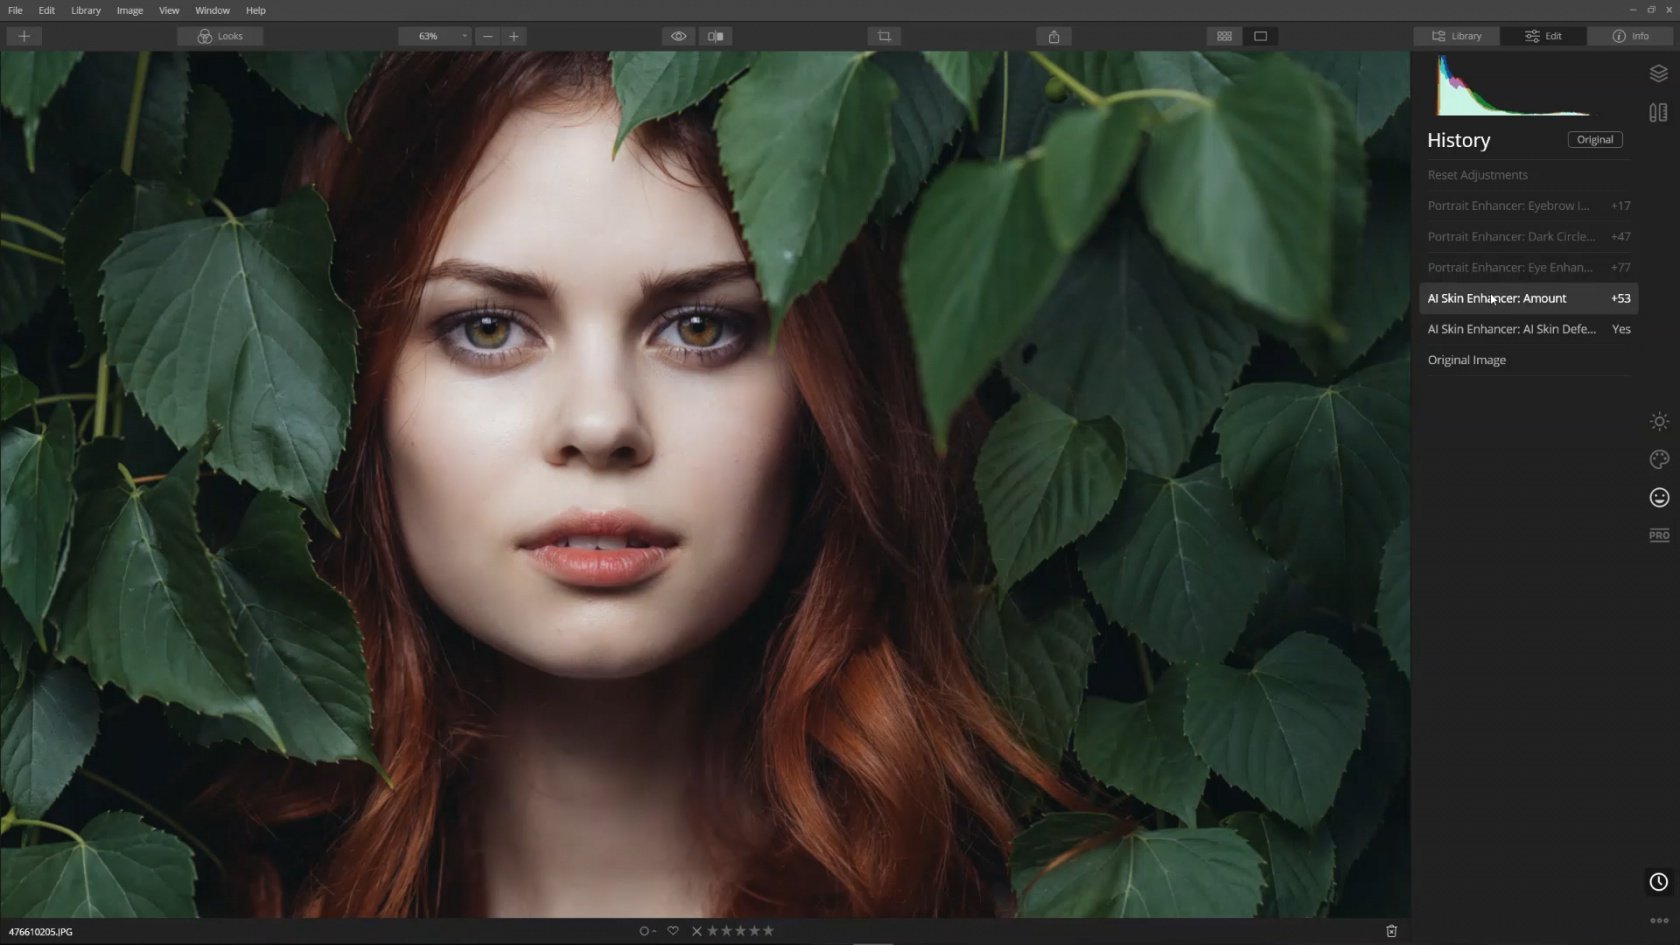
All the changes you’ve seen are non-destructive meaning the original image hasn’t changed. We can undo any edits we have made at any stage using the history tool.
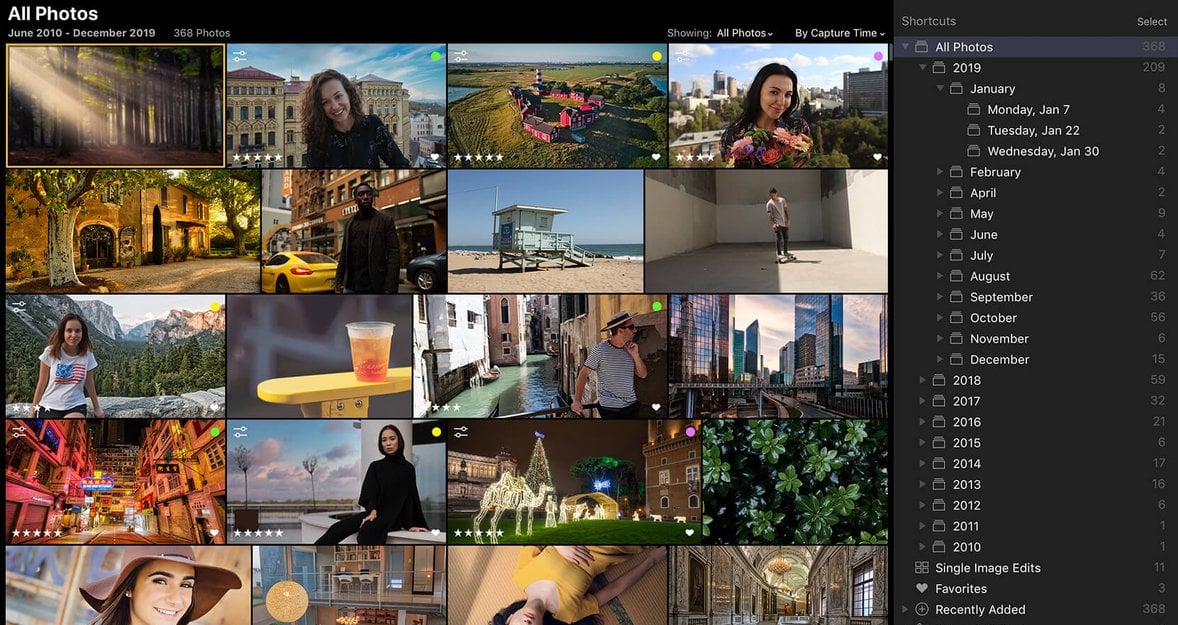
To make this possible, Luminar uses a catalog to store a reference to the location of folders and subfolders that contain your images on your computer, including external drives and cloud-based storage. It also stores any changes you've made, any labels or ratings you added to the image. So your images are stored exactly where you have them on your hard drive. You can move, add, delete or rename an image — either from Luminar or your computer — and both Luminar and your computer will stay in full sync.
The Best Location To Store Your Luminar Catalog
It’s best to store your Luminar catalog on your fastest hard drive. Normally this is an internal drive that also has your operating system on it. If this is a solid-state drive — normally referred to as SSD — then it’s even better. These are currently the fastest drives. Unfortunately, they are also the most expensive and have limited storage. Usually, just the operating system and programs are stored on this drive. To avoid running out of disk space, photos and other files should be stored on external drives.
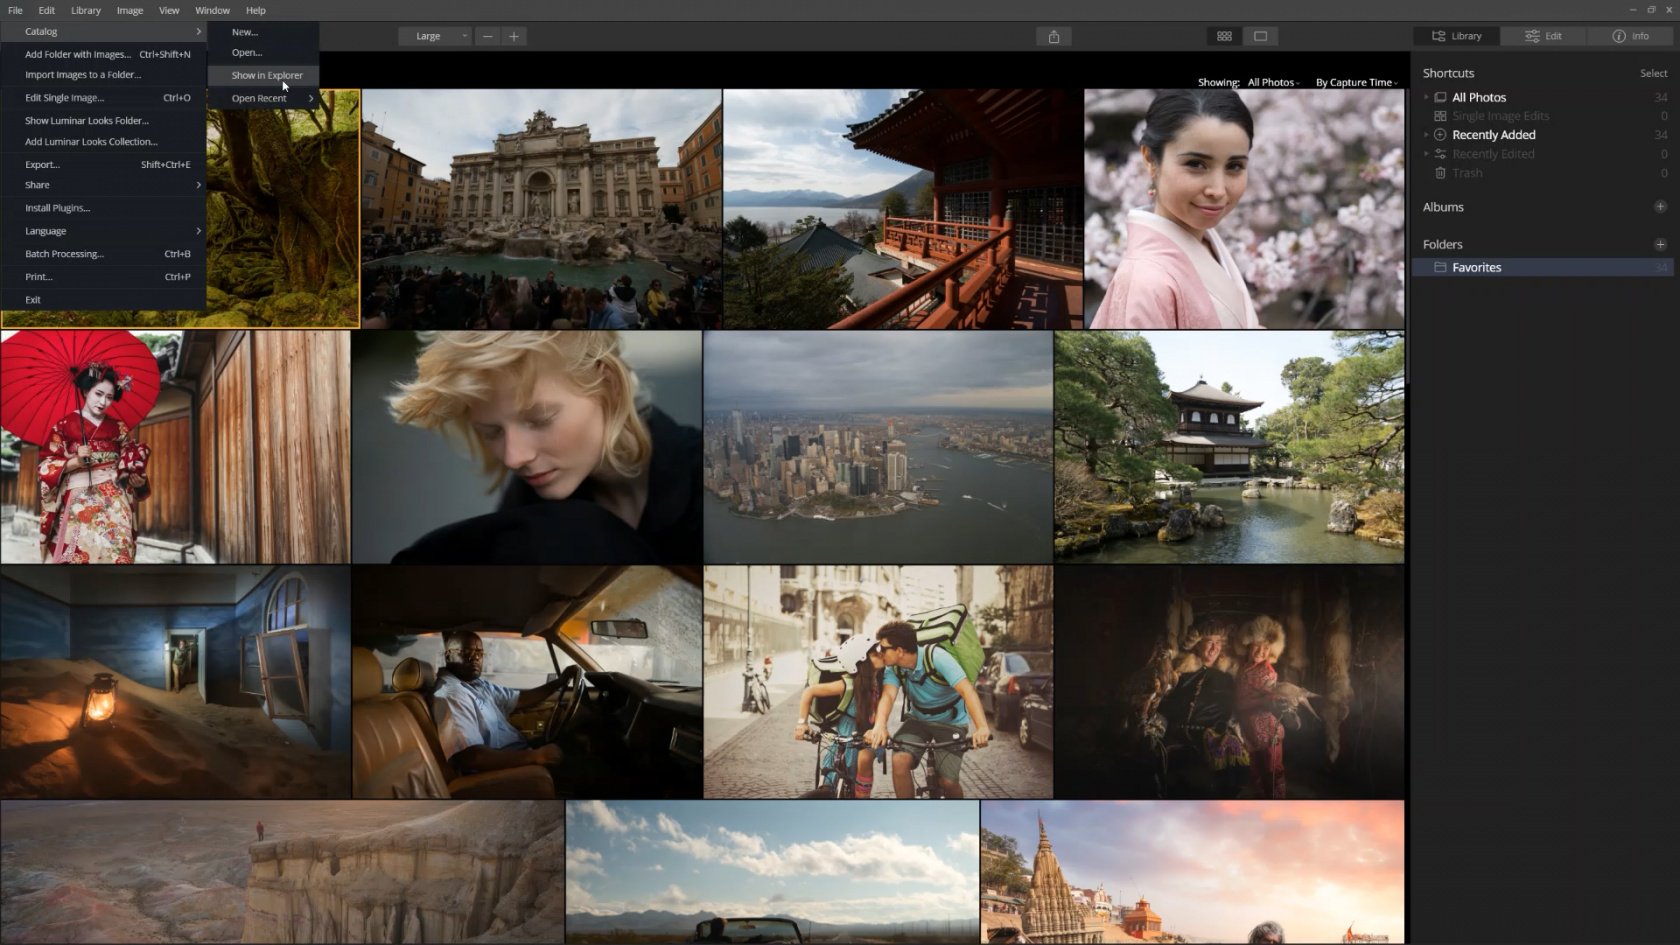
To understand how we are organizing and keep track of our Luminar catalogs, let’s create a new catalog on our fastest drive. Here you can see I already have a few catalogs in this folder. Create a new catalog and name it My Main Collection. Luminar creates a new empty catalog. From here, we can add a folder of images. The first time adding images takes a little longer because Luminar is creating thumbnails of the images to make previewing faster.
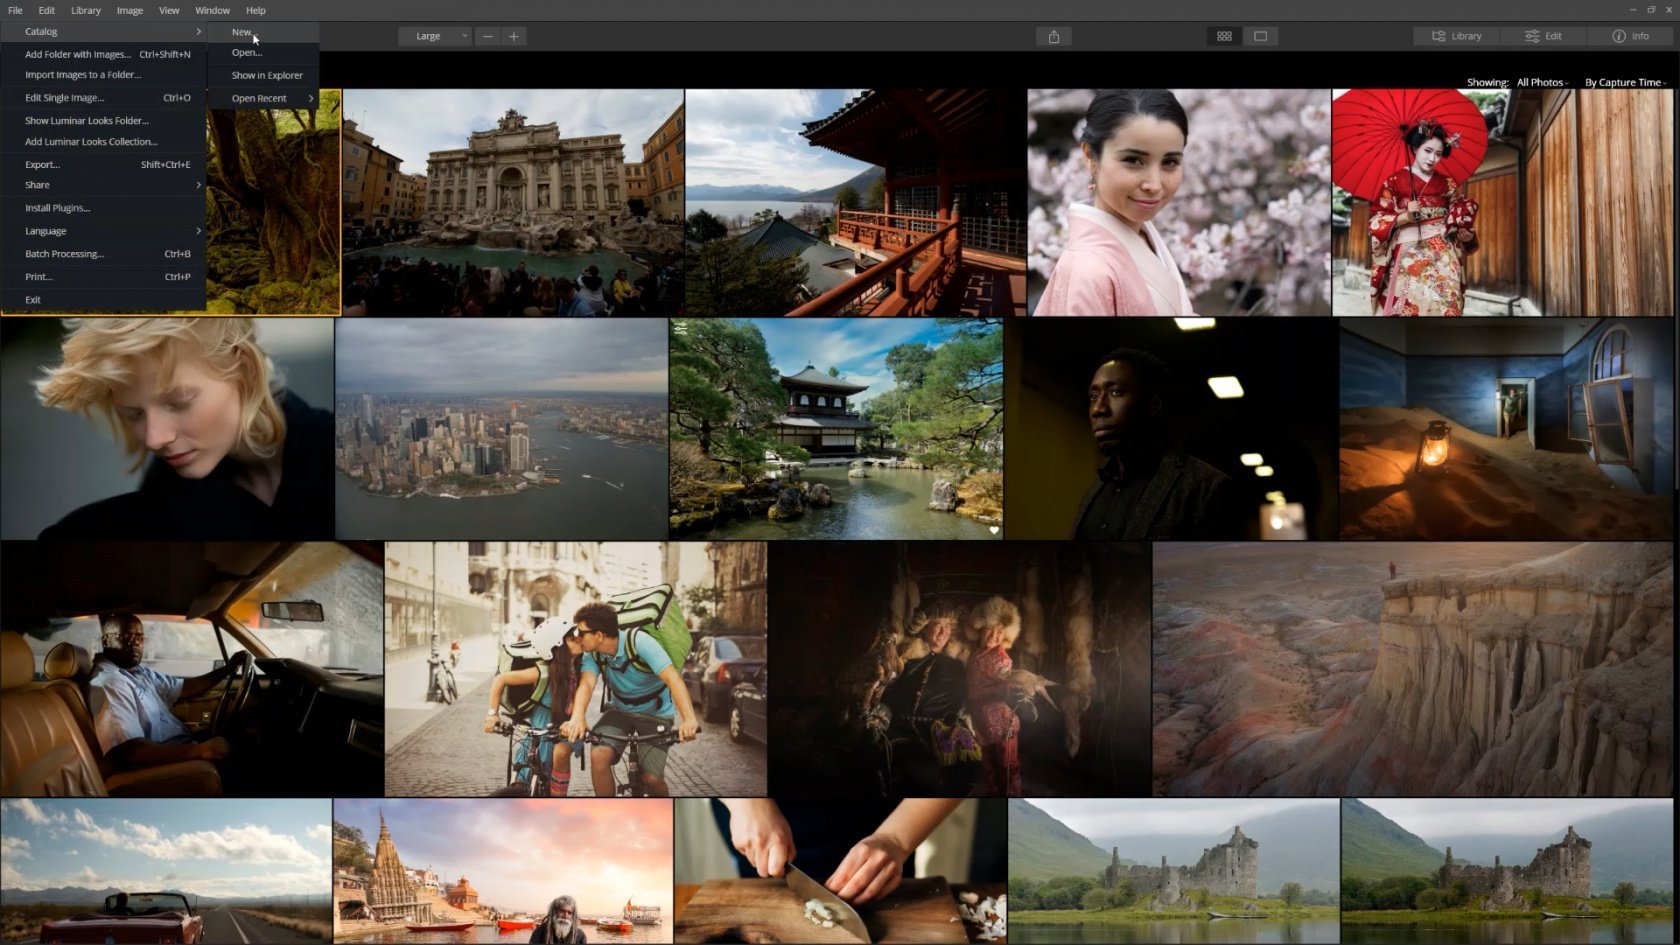
We can locate our catalogs from the file menu by choosing Find in Explorer (Win) or Finder (Mac). Luminar neatly organized the catalog file along with a few other folders in its own subfolder. Notice the backup folder. Luminar automatically creates a backup of the catalog to keep it running smoothly. For extra safety, still include this entire folder when backing up your hard drives.
The Benefits Of Direct-Attached Storage
A Direct-attached Storage device, or DAS for short, are external drives that are used to extend your storage needs. Typically, these drives are not as fast as an internal drive, especially a solid-state drive or SSD. They offer lots of storage at a very affordable price. When selecting hard drives for your DAS, spend the extra money on faster 7200 RPM hard drives and look for USB-C or Thunderbolt connections. You can get away with using USB 3, but you will experience better performance with USB-C or Thunderbolt connections.
If you have more than 4TB of data, you should consider investing in a RAID enclosure. This is where Drobo comes in. Drobo solves the three major storage challenges in one device – it has built-in data protection, its capacity adjustment grows with your needs. You need more storage, add another or a larger hard drive. And last, ease of use.
If you are using a single external drive and it fails, you lose everything you created since the last backup. And you won’t be able to resume work until you get a copy of your backup onto a new drive. That means you could lose hours of work and more hours before you can continue to work as it’s rebuilding the drive. With Drobo, the drives are hot-swappable. If a drive fails, you will be notified by a red light or even an email and you simply remove and replace the drive. Zero downtime. I recommend the 5D3 because it’s really fast and easy to use. Plus, fast storage improves speed when using image editing software such as Luminar.
Look how fast we can add images stored on a Drobo to our library. The same images added from a UBS drive is much slower. This is very helpful when previewing images with a client. We don’t have to wait for the next image to load. You will also notice selecting, rating, and deleting images are much faster too.
Save Countless Hours Editing Images Using Luminar
We created a new Luminar catalog and stored it on our fastest internal drive. Now let’s add a folder of images stored on an external drive to our catalog. Browse through the images and press the letter P to Flag or “Pick” a few of our favorites to edit.
Before we begin editing, I want to point out that Skylum’s goal is to offer a different approach to editing our photos. So, Luminar was designed to be purpose-centric rather than tool-centric. Instead of spending hours learning how to adjust tool sliders or masking in the exact order to get the results you want, you just look at the image and think about the result you want. Luminar’s tools will then guide you. Here are a few examples.
- AI Accent. This image needs to be processed to bring out hidden details. So use AI Accent. Notice how we processed the image with just one slider. Now the sky could use a little enhancing too, so adjust AI Sky Enhancer. Let’s review the original image and now the enhanced.
- AI Structure. The background of this image could use more structure to make it appear sharper. Noticed how AI Structure didn’t affect the subject’s skin so we don’t have to spend time masking out the effect.

Let’s jump ahead to the creative tools.
- AI Sky Replacement. Watch how easy it is to replace this blown out sky with a new one. Now, relight the scene just a touch to take on the light qualities of the new sky.
Let’s zoom in 200%. Wow, look how incredible it replaced the sky within the trees and look, there are no halos. All this from just one click. We can continue to make adjusts.
- AI Enhancer will bring out more detail, tone, and depth.
- AI Sky Enhancer will enhance the sky a little more.
Look at the difference between the original and the enhanced version. The most impressive part, No complicated masking or brushes were involved.

Let’s check out a few portrait tools.
- AI Skin Enhancer: Removing blemishes and soften skin without making it look fake is really easy with AI Skin Enhancer.
- Portrait Enhancer: Use Portrait enhancer really enhance the eyes, remove the dark circles under her eyes, and add a little light to draw attention to her face.

As a portrait photographer, I would spend a lot of time manually removing blemishes one by one or smoothing skin. Now I can add the power of AI to my own Looks and apply it to single or multiple images. Here is an example.
We can use one of the many Luminar Looks that come with the program or a Luminar Look we created on our own. Look how the AI portrait tools were used along with AI Sky Replacement.
We can continue to save even more time by applying a Look to one image and then synchronizing the Look with multiple images. I love how the AI tools analyze each image independently and make the proper adjustments based on my settings.
Luminar’s purpose-centric approach along with revolutionary tools and AI technology gives anyone super-powers to be creative and save countless hours editing images. I like this different approach to editing photos.
Building A Set It And Forget It 3-2-1 Backup Plan
As photographers, we’ve spent hours taking photos and processing them using image editing programs such as Luminar. It would be a shame to lose these precious images because of a hard drive failure, a natural disaster or even worse, a theft. We can avoid this by building a set it and forget it 3-2-1 Backup plan.
The 3-2-1 Backup concept is simple — 3 copies of your data: 2 stored locally, 1 stored offsite preferably in a cloud service like Backblaze or CrashPlan. It’s a concept that has worked great for me for many years.
2 copies stored locally on two different media
The first step is to decide what type of media you plan on using for your backup. The “Store on two different media” concept isn’t about choosing two different TYPES of media. It means to make two identical copies of your files stored on two separate devices. This way, if you have a hardware failure, you can continue working while rebuilding the other device. If you have less than 4TB of data, I suggest using two external hard drives. One should be a fast 7200 RPM drive that requires power from a wall outlet. The other can be a portable hard drive that is powered by your USB 3 port. This setup is useful if you are using a laptop as your main computer. You can take this portable drive with you and sync it when you get back. You will sacrifice some speed for portability.
If you are a power user and have more than 4TB of data, it’s time to invest in a RAID system such as Drobo. There are many options. If you are on a budget, I suggest one Drobo 5D3 and one external 8 or 10TB hard drive. Use the fast Drobo as your main storage drive and the slower external drive for backing up. Save your money for a second Drobo because eventually, you will fill the 10TB drive. You can always repurpose the external drive by removing it from the enclosure and using it in the new Drobo.
If want access to your images from any location, you will need Network Attached Storage, NAS for short. Drobo has a very fast 5N2 NAS that can be included in the 321 backup plan. This will give you access to all your images no matter where you are. I would still use the fast 5D3 as the main storage device and the 5N2 as the backup. If you are running a network where everyone needs access to the images, then switch and use the 5N2 as the main storage device. You will sacrifice some speed.
1 copy stored offsite
The best solution for offsite backup is cloud-based. CrashPlan and BackBlaze are two very popular cloud-based backup companies.
They are different from Amazon, Google Drive or DropBox. Cloud-based backup companies are specifically designed for backing up large amounts of data. They create a compressed copy of every file; deleted files, multiple changes to that file, and every file you ever created. As you can imagine this will require more storage than your original hard drive and it can only be read or restored with software.
The downside with a cloud-based backup is that it takes a long time to backup your entire system — it took me six months! An alternative is seeding. Seeding is when the company sends you a hard drive and you copy your data and send it back to them. It’s faster but it may cost extra.
Set it and forget it: Synchronize the local and cloud-based drives
Backing up the cloud-based drive is simple and is included in your fee. Just download the software, select the local backup drive, and choose when to start the backup. Make sure to include the Luminar Catalog folder.
Synchronizing the local drives requires backup software. There are a few free utilities that can do this, but I recommend spending a few dollars and get a pro version.
Drobo has its own utility called Retrospect that’s cross-platform which I would recommend. SyncBack Pro for Windows and Carbon Copy Cloner for Mac are a few other 3rd party solutions.
Let’s review a few disaster scenarios
Scenario 1: One of the local external hard drives fails.
Solution: Use the second local sync drive as the new working drive, then replace and rebuild the second drive. This will take about 15 minutes. If you are using a Drobo, just replace the bad drive and Drobo will automatically rebuild the drive. This results in zero downtime.
Scenario 2: You delete an important file from one drive and it deletes it from the second.
Solution: Restore just that file from the cloud-based backup using their online tools.
Scenario 3: The drives are stolen or destroyed in a major catastrophe.
Solution: Restore from the cloud-based backup. This will take a long time, so start with the most important files first
Ending thoughts
We covered a lot in this video and you may have to review it again for some of the concepts to sink in. Just know, both Skylum and Drobo are here to help and they take great pride in education. Check out their education section or join their Facebook groups for more knowledge. If you have additional questions, feel free to post them in the comments below. We try our best to answer each question and a lot of times our own members jump in to answer questions and share their knowledge.