Zone Photography: Understanding The Full Range Of Tones
September 10, 2025
If you’ve ever missed a shot because your autofocus lagged, learning how to zone focus changes everything.
When I learned zone photography, it felt like someone handed me a map for light. Before that, I guessed at exposure and hoped for the best. Now I decide where highlights, midtones, and shadows should fall before I press the shutter. This small change made a big difference in my work. I see the frame as tones first, shapes second. That mindset is what I teach beginners.
What Zone Photography Means
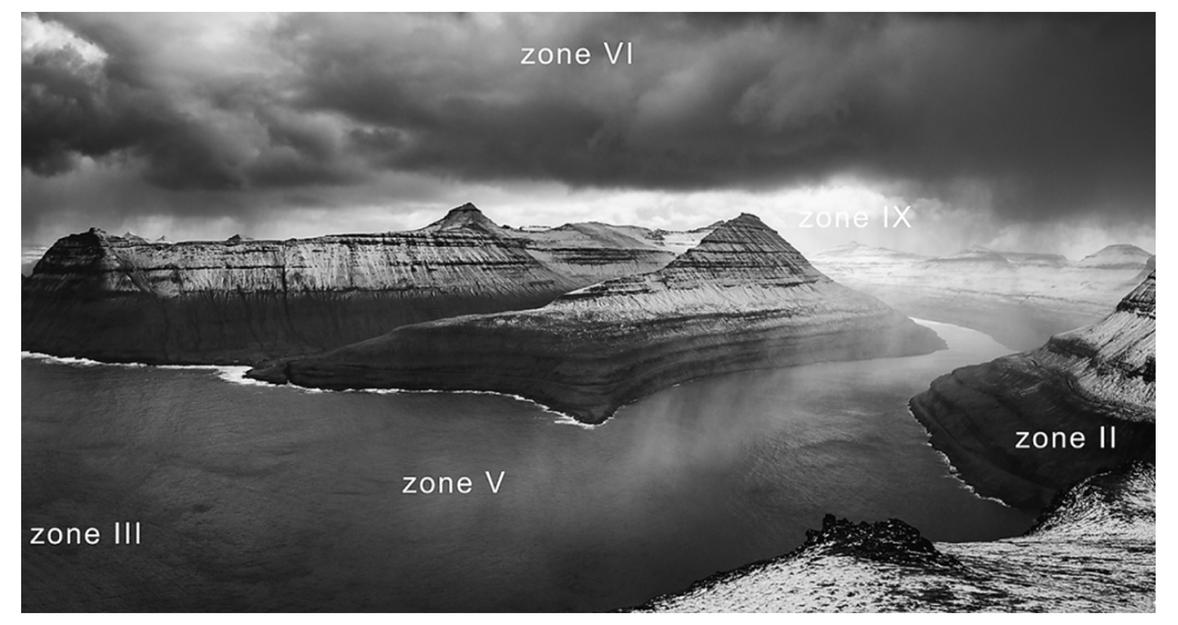
The Zone System created by Ansel Adams divides tonal range into zones from 0 (pure black) to 10 (pure white). Zone V is middle gray. For a beginner, you only need to understand three things: where your darkest important tone should sit, where your brightest important tone should sit, and which areas must keep texture. I decided those three before I meter.
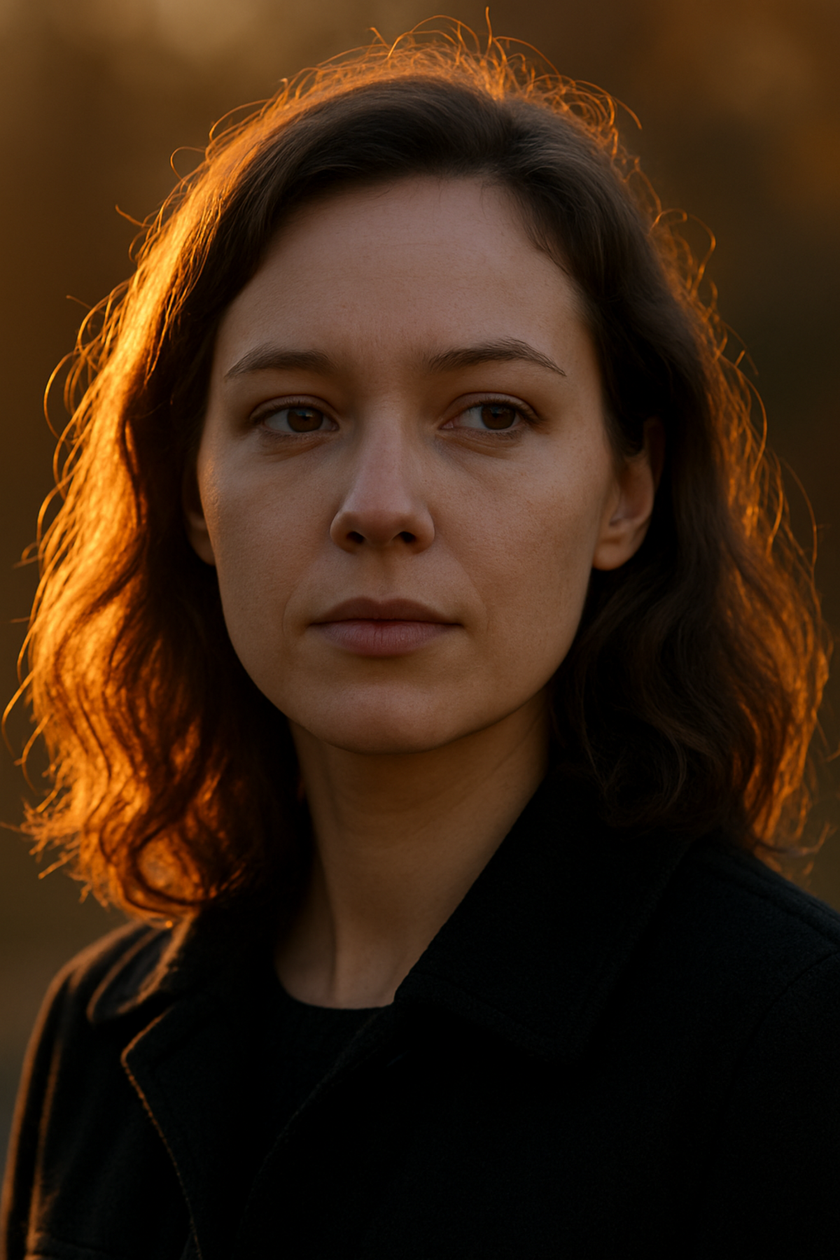
Simple example: I want a portrait that feels dimensional. I chose eyes at Zone V so they read naturally. I let hair or jacket fall into Zone III so the subject feels grounded. I protect a rim highlight at Zone VIII so it reads bright but not blown. That decision happens fast once you practice a little.
A very short checklist I use on every shoot:
Spot-meter the single most important tone (often an eye or a cheek).
Decide which zone the tone should be in.
Adjust exposure (exposure compensation, ISO, shutter speed) until the meter matches your chosen zone.
Those three steps will handle 90% of basic cases for beginners.
How I Shoot: Practical Steps You Can Use Today
 I keep camera settings simple. I use spot metering a lot. I use the histogram as a quick sanity check. And I make one exposure choice per shot: which tone to protect. That choice guides everything else.
Step-by-step routine I use in the field:
Choose an aperture for the depth of field I want.
Spot-meter the most important tone.
Shift exposure so that the tone lands on the zone I picked.
Take the picture and check the histogram or highlight warning.
Adjust if needed.
Concrete camera settings I often use:
Street (fast): 35mm, f/5.6, 1/500s, ISO 400. Focus set by distance for quick shooting.
Portrait (golden hour): 50mm, f/2.8–1.8, 1/200–1/500s, ISO 200–800.
Landscape: 24–35mm, f/8–11, 1/60–1/125s, ISO 100.
If you want to move faster, learn the zone focusing technique. For street work, I pre-set focus and aperture so I don’t hunt for focus. That way, when a moment appears, I only worry about exposure and composition. If you want to know exactly how to zone focus, practice this: pick an aperture and focal length, learn the distance range that will be acceptably sharp, and set the focus ring to that range. Then shoot. Repeat until it feels natural.
Your AI-Powered Photo Editor for MacOS and Windows
Discover Now!Why I sometimes use the zone focusing technique instead of autofocus:
Autofocus hunts in low light.
It saves fractions of a second on the street.
It forces me to think about depth and distance, not just focus points.
Quick Rules For Exposure Choices
You don’t need to memorize zones to get good results. Use rules that fit how you shoot.
My simple rules:
If skin detail matters, spot-meter skin and place it in Zone V–VI.
If a highlight must keep texture, place it in Zone VII–VIII and protect it with exposure compensation.
If you want silhouettes, decide that and let the background highlights clip.
Examples from real shoots:
Backlit portrait: I metered the cheek and added +1 stop to keep the rim light bright. Settings ended up 1/500s, f/4, ISO 200. The face had texture. The rim stayed bright without blowout.
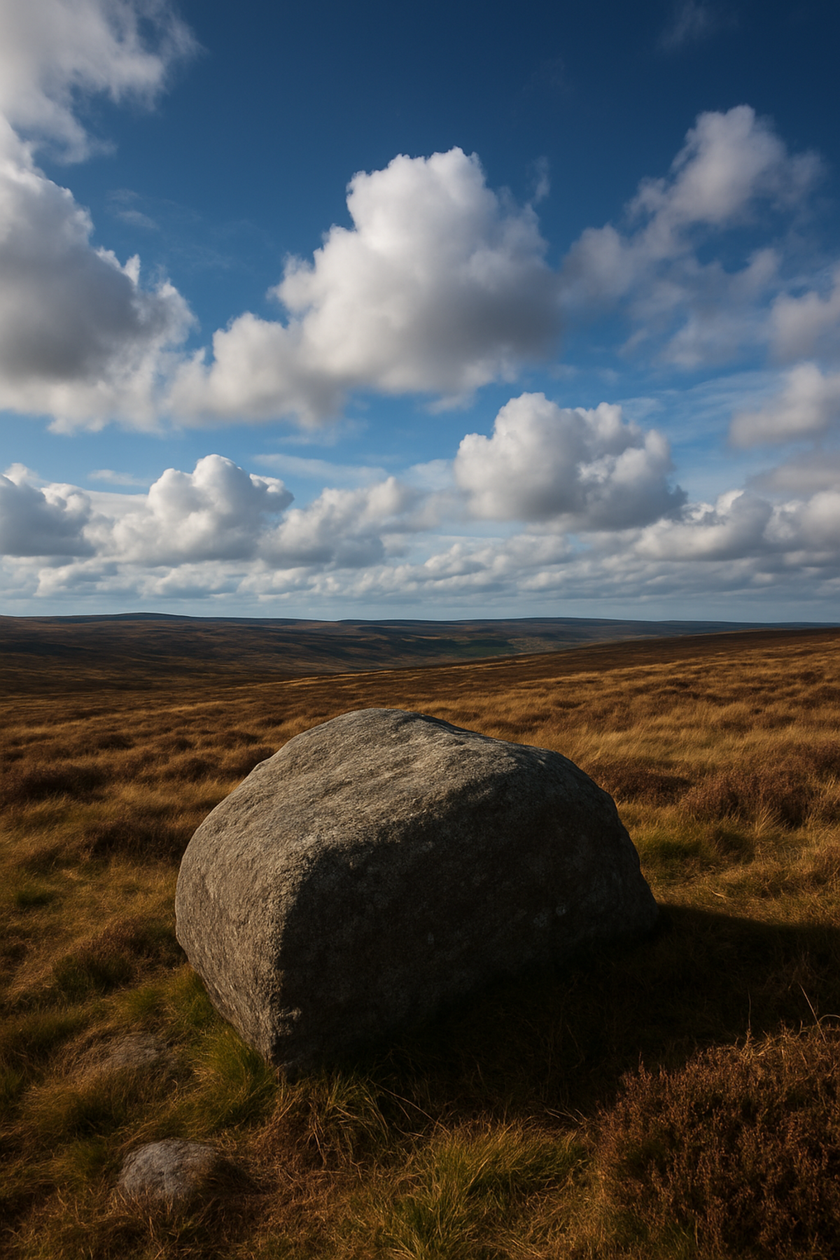
Cloudy landscape: I metered an important foreground rock and set the exposure so it sat in Zone IV. That allowed the sky to breathe and kept cloud detail. I used f/11 and ISO 100.


Simple Editing And Composition Tips
 I keep editing minimally. I shoot RAW because it gives me room to nudge tones without destroying detail. When I edit, I focus on three things: protect highlights, open shadows when needed, and keep skin natural.
A few concrete editing moves I make:
Pull highlights down a stop or two if needed.
Raise shadows a little to reveal texture.
Use local masks to brighten an eye or darken a distracting patch.
If I want to make the midtones read cleaner without adding grit, I will selectively emphasize picture areas that benefit from structure — for example, a textured wall behind a subject — while preserving skin smoothness. I do this with masked adjustments so only the background texture changes, not the subject’s skin.
I also work in a RAW photo editor when I need more precise control. RAW gives me to adjust a skin tone by a full stop without risking blown highlight. It makes practicing the Zone System much more forgiving. You can experiment freely and discover how far you can push each stop before the file starts to break.
For composition, tone guides placement. Bright spots pull the eye. If a highlight is too close to the edge, I move it until it supports the subject. Sometimes I use small AI suggestions to test crops. Those photo composition tools are useful when you want quick alternatives. I never follow them blindly — they only show options I then judge.
Common Beginner Mistakes And Quick Fixes
 Mistakes happen, and most can be fixed right there with a small adjustment.
The Myth Of “Fix It In Post”
Beginners often tell themselves they can “fix it in post,” and at first, that feels like a life raft. I used to think the same. But I learned the hard way that some problems aren’t really fixable after the fact. When a highlight is clipped to pure white in camera, there’s no detail left to pull back—no texture, no subtle color — just blown pixels. The same goes for a shadow that’s been underexposed by several stops: you can lift it in RAW, but you’ll also lift noise and lose fine edge detail. So I try to make the right exposure decision in-camera first, then use RAW adjustments to refine, not rescue, the image.
Why Autofocus Isn’t Enough
Trusting autofocus over tone is another trap. Autofocus finds sharpness; it doesn’t care whether the face sits in a good tonal range. I’ve shot portraits where the AF locked perfectly on the ear, but the face was exposed as a silhouette because the camera metered for a bright window behind the subject.
That taught me to separate the two decisions. I set focus (or use zone focusing when I need speed), then I spot-meter the most important tone — usually the eyes — and change exposure so that tone lands where I want it. On a recent café portrait, I set exposure so the eye hit middle gray (Zone V), then confirmed focus on the eye. The result read like a real face in three dimensions, not a dark outline.
Redefine Your Photos with Black and White Filter
Try it NowSaving Highlights Before It’s Too Late
When I see highlight blinkies on the LCD, I don’t hope they’ll behave in RAW. I reduce exposure by a predictable amount — often one stop — by increasing shutter speed (for example, from 1/250s to 1/500s) or dialing in -1 EV. After that, I bring shadows back in RAW by a stop or two, but only as far as the file’s noise floor allows. If the highlights are the only thing I want bright, I’ll meter them and protect them, knowingly accepting darker shadows.
Final Words
Start small. Practice the three-step field routine until it’s second nature: meter, decide zone, expose. Use simple apertures and speeds. Try a few exercises each week. When you edit, be gentle and targeted.
Zone thinking turned my photos from good guesses into deliberate choices. It will do the same for you. Keep the camera in hand, test a little, and let the zones become your guide. Over time, you’ll begin to recognize tones before even lifting the camera. That habit is what makes each frame feel intentional instead of accidental.