Portrait Lighting: Guide to Perfect Portrait Photography
Last Updated on September 24, 2025
Learn portrait lighting basics with practical setups and tips. Discover how angles, distance, and shadows shape mood and features for stunning portrait photography.
Light is used to define the face, mood, and story. Here, we will take a straightforward and practical approach in this portrait lighting guide: what the light does to features, how distance and angle affect the feel, and how to keep shadows under control without any fuss. You can shoot by a window at home or in a narrow studio corner, but you will also learn the precise steps that render portrait light clear and repeatable.
We’ll walk through real setups, show where to place stands, and explain why small tweaks matter. If you’re also upgrading your gear, take a look at the best cameras for portraits.
By the end, lighting for portrait photography will feel natural — you’ll know how to guide the light so it flatters skin, defines shape, and matches the mood you want.
What is Portrait Lighting?
 Portrait lighting is how you shape light and shadow on a face by controlling the source’s size, distance, and angle. The goal is to manage direction, quality, and contrast while keeping color temperature balanced for natural skin tones. Common portrait lighting schemes involve repeatable positions of lights and reflectors: place the main light slightly above eye level, add or remove fill for mood, and adjust the angle/height to refine catchlights while lighting portraits.
Less Time Editing, More Time Creating
Try Aperty NowWhy Lighting is Essential in Portrait Photography
Good portrait photo lighting defines facial structure, highlights the eyes, and sets the mood of a portrait. A broad or narrow light orientation subtly changes how wide the face appears. Diffusion or polarizing filters help manage shine, while accurate white balance ensures true-to-life color. Solid portrait lighting techniques reduce the need for heavy retouching and make editing with a free photo editor for beginners faster and more consistent.
Natural vs Artificial Light in Portrait Photography
Natural light (light overcast or window) is soft, flattering, and requires regulation with reflectors, diffusion, or negative fill. It should also be set to a white balance that is true to skin. 
Modifiers like softboxes, umbrellas, and grids let you tune contrast and spill — this keeps lighting for portraits practical. You can mix sources too: match color temperatures with gels or a custom WB for tidy results; in harsh sun, use flash as fill to reduce contrast for clean on-location shots.
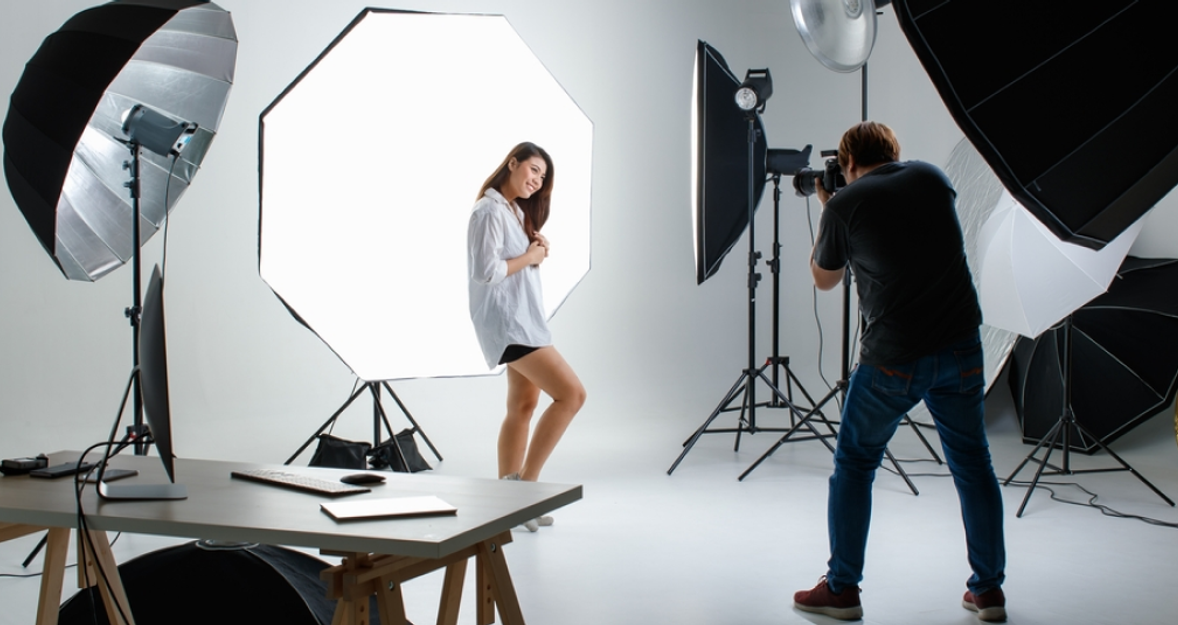
Portrait Lighting Setup: Everything You Need to Know
 A solid portrait lighting setup is less about fancy gear and more about repeatable positions. Determine your main light's height (slightly above eye level), distance (closer for a softer skin tone), and angle (from 30° to 60° off-axis for a natural shape). Then choose a fill method — reflector, second light, or none — to set the mood. Background control comes last: move your subject, flag the spill, or add a small source to separate hair and shoulders.
Keep it portable: one stand per light, sandbags for safety, and a simple modifier that fits your space. As you grow, add a grid to tighten the spill or a larger softbox for families. A measured, step-by-step lighting setup for portraits translates well from a living room to a rented studio. Plan your entire workflow too — capture clean images, then refine skin tone and contrast in Luminar Neo for a tidy handoff.
Before building a more complex lighting setup for portrait photography, lock in your base exposure. Use manual power on strobes or fixed output on LEDs, then fine-tune with subject distance rather than chasing dials. This habit enables later tweaks to be made quickly and maintains a consistent look throughout a session.
Key Components of a Portrait Lighting Setup
Think of your portrait kit as four essential elements — key, fill, rim, and background. By adding or removing them, you can build a flexible setup that works in almost any room. This structure makes portrait lighting easy to repeat, adjust, and control.
1. Key Light
This is your main source and the anchor of any portrait light setup. Place it slightly above eye level and 30-60° to the side, so the nose shadow is short, and the eyes hold a bright catchlight. Move the light closer for softer skin; pull it back for more shape. A medium softbox with a grid limits spill and keeps the cheeks defined.
Many beginners search for light portrait photography tips; the simplest is this: use one soft light, shoot close in, and set the power to a consistent level. Shoot a quick test frame and check tones in your photo editor to confirm you’re in the right range before adding anything else.
2. Fill Light
Fill controls contrast. Start with a white reflector opposite the main light to lift shadows without changing the style. If you need more control, use a second light at low power and keep it near the camera axis. Tiny power changes (or shifting the reflector distance) make a big difference to cheek and jaw shadows.
When your portrait photography lighting setup feels too harsh, bring the fill closer rather than cranking up the power — distance affects quality and keeps the look smooth. This gentle approach to portrait photography lighting keeps editing time short and skin tones steady.
3. Rim Light
The rim (or hair) light outlines the head and shoulders, giving you clean separation from the background. Aim a small, controlled source from behind at a 45° angle so that it grazes the hair and edges of the face. Add a grid to prevent flare and position it slightly higher than the subject’s crown.
Rim is part of classic portrait photography lighting techniques — subtle, tidy, and repeatable. If a highlight spills onto the ear or shoulder, mask it during retouch using layer masking. For quick portrait lighting examples, try one frame with rim on, one off, and compare how the outline changes mood and depth.
4. Background Light
A background light sets the scene. Place a small source low and behind the subject, aimed at the backdrop to create a gentle glow, or flag it for a vignette effect. Adjust distance to control the size of the hotspot; gels can match wall color or add a subtle tone.
This step is particularly helpful for portrait light photography when your backdrop appears dull, and it prevents the head from blending into dark walls. If flyaway hairs or stray objects in the background pull attention, you can clean them later with an AI background remover. Keep the beam tight to avoid flare on the lens — that’s tidy lighting portrait without extra fuss.
Best Lighting Setup for Portrait Photography
Every strong lighting setup starts with the key light. Once that’s in place, you can adjust contrast with fill, add separation with rim, and shape the background. Let’s walk through the most common setups step by step.
Bring Emotional Depth to Your Portraits with Bokeh Effect
Discover How1. One-Light Portrait Setup
Best for natural, intimate portraits or when shooting in a small space.
Start simple: place a medium softbox 30-45° from the camera, feathered slightly past the face to smooth out hotspots. Add a white reflector on the shadow side to gently lift contrast, or use black foam board to deepen shadows. Check the height by looking for bright catchlights in the eyes and a short, neat nose shadow.
2. Two-Light Portrait Setup
Works well when you want either subtle polish (fill) or dramatic separation (rim).
After setting your key light, you can add a soft frontal fill at low power to gently open the shadows without flattening the face. Alternatively, you can place a gridded rim light 45° from behind to outline the hair and shoulders, creating clean separation from the background. In both cases, use flags to control spill and gels or a custom white balance to keep colors consistent.


3. Three-Point Lighting Setup
A balanced, versatile setup that suits most professional portraits.
Here you use three lights: a main to shape the face, a gentle front fill to brighten eye sockets, and a rim to lift the subject off the backdrop. For glasses glare, raise the main and tilt it downward, or switch sides and ask your subject to turn their chin slightly. If the rim light spills onto the wall, add a flag to block it.
4. High-Key vs Low-Key Lighting
High-key is ideal for clean, airy portraits; low-key for dramatic, atmospheric shots.
High-key lighting utilizes a luminous background and generous fill, keeping shadows minimal. Add a background light when a clean, white backdrop is required. Low-key lighting relies on a dark backdrop, side flags, and a tight, directional key so the face holds shape while the frame stays moody. In both styles, control highlights on the forehead, nose, and chin, and monitor the catchlights.
Portrait Lighting Techniques
Portrait lighting patterns are simple setups you can repeat in any shoot. They all begin with the key light slightly above eye level — watch the nose shadow and catchlights — then adjust distance and angle to control softness and contrast. Lock exposure and make small height or angle tweaks; tiny shifts can change cheek shape, eye sparkle, and overall mood. Below are the most common patterns, each with its own effect and best use.
1. Butterfly Lighting
This pattern is a favorite in beauty and fashion because it makes faces look smooth and balanced. To achieve it, place a soft, frontal light just above eye level, angled down toward the nose. You’ll see a small butterfly-shaped shadow under the nose and even light across the cheeks. Add a reflector under the chin if you want to lift mid-tones and refine the jaw.
This setup pairs especially well with classic photo poses for women, where a slight head tilt or chin adjustment enhances the flattering effect of the light.
2. Loop Lighting
To create a loop, move the key light 30–45° to the side and slightly above eye level. A tiny shadow will “loop” down from the nostril without touching the cheek. Keep the lamp from going too high, or you’ll darken the eye sockets. Photographers love loop lighting for its flexibility — it flatters most face shapes and works in everything from casual headshots to corporate portraits.
Add Depth, Glow, and Natural Highlights with Studio Light AI
TRY IT NOW!3. Rembrandt Lighting
Named after the painter, this style adds drama. Shift the light farther to the side and a bit higher until a triangle of light appears on the far cheek. The trick is to keep it small and close to the eye area — too big and you lose the mood. It’s perfect when you want portraits with a cinematic or classical touch.
4. Split Lighting
Sometimes you need power and edge. Put the light at a right angle (90°) to the subject so one half of the face glows and the other falls into shadow. Lower the source a little to keep a lively catchlight in the eye. Flags can make the shadow side more dramatic, while a reflector will soften it for a friendlier result.
5. Broad and Short Lighting
Here, the magic comes from how the subject turns. In broad lighting, the cheek facing the camera is lit — the face looks wider and more open. In short lighting, the cheek turned away is lit, leaving the visible side darker and slimmer. These two small shifts change the mood completely: broad feels approachable, short feels more refined and mysterious.
6. Rim Lighting
Use rim light when you want your subject to pop off the background. Place a controlled source just behind and to the side so it grazes hair and shoulders. A grid or barn doors keep it neat, and raising it slightly above the crown avoids flare. Many editorial portraits rely on this glow around the edges for polish.
7. Profile Lighting
In a profile shot, light needs to outline features clearly. Position the lamp so it runs along the forehead, nose, and lips, creating a crisp silhouette. Adjust the background to make the outline stand out by adjusting the darkness or lightness. A subtle head tilt can often improve the way the nose overlaps the far cheek. This setup gives portraits a sculptural, artistic feel.
8. Backlighting
For portraits with glow, place the light directly behind the subject. It can produce a halo, flare, or rim — depending on how you control it. Use a flag to block haze, and add a reflector in front to keep the eyes visible. Expose for the face to lift the background white, or for the rim to capture warm sunsets or colorful gels.
Perfecting Your Portrait Photography Lighting
 Think in simple steps: place, test, adjust. Start with the mood you want, pick a pattern, and set the main light just above eye level, feathered slightly across the face. Watch the catchlights and the nose shadow, then add fill, rim, or background glow only if the shot calls for it. When you need to change softness or contrast, move the light before touching the power.
Keep your colors consistent with matching temperatures or a custom white balance — and if you’re updating your gear, skim the best cameras for portraits. Guide your subject’s pose while shaping the light, making one adjustment at a time. Finish with a clean edit: natural skin tones, controlled highlights, and just enough local fixes to refine. With this workflow, your portraits will stay consistent no matter where you shoot.