Chocolate Photography: Making Shots Look Irresistible
December 03, 2025

Learn how to take stunning chocolate photos with this guide! It is filled with practical techniques that will help you capture eye-catching images for social media! Keep reading!
Some would say chocolate is a creation of the gods. And they are right! Today, we will learn the skills needed to photograph this heavenly treat. Whether you are a professional photographer or a business owner looking to snap stunning product shots, continue reading because we've prepared information that will be useful for any level of experience!
You will learn how to make the perfect shot with a camera, but you should also remember that you can achieve great results with your phone! All it takes is a desire and some experimenting!
So, let's enter this world of chocolate product photography and learn how to capture its beauty and convey its taste!
How to Prepare
 The allure of chocolate bar photography comes with its own set of challenges, largely due to how sensitive chocolate is to its surroundings. It’s about your skill with a camera and the environment, which plays a big part, too.
First things first, keep your chocolate stored in a cool, dry place away from any sunlight. You might think the fridge is a safe bet, but be wary — the humidity can introduce unwanted moisture on your precious chocolate. If moisture does appear, gently dab it off before you start shooting.
When setting up your shooting space, make sure it’s no warmer than 20°C to avoid any melting disasters. For those who love the details, opt for dark chocolate. It’s not just delicious — it melts slower, giving you more time to work.
You should handle your chocolate with care. Always use clean latex gloves or tweezers to adjust your chocolate on set. The goal is to keep those smudges and fingerprints off your star subject. After all, even the most delicious chocolate won’t look appealing if it’s not presented flawlessly. But if you still notice imperfections on your product, image retouching will fix it, no worries!
Overall, a spotless chocolate bar shows its true beauty and taste better through your photos. Let's set everything perfectly and demonstrate to the world how delicious chocolate can be so they will want to buy a piece immediately!
Equipment Needed
If You Shoot with A Smartphone:
A Phone: Android or iPhone, whichever you have at hand.
Special App: You can download a camera app with DSLR-like controls to adjust exposure, focus, and more, giving you more control over your photographs.
Phone Stand: This is essential for keeping your pictures steady and sharp, especially when taking close-ups.
Macro Lens: This is a good addition if you aim to capture the intricate details of your creations. It's not necessary, but this lens will definitely be a plus!
For the Camera Shoot:
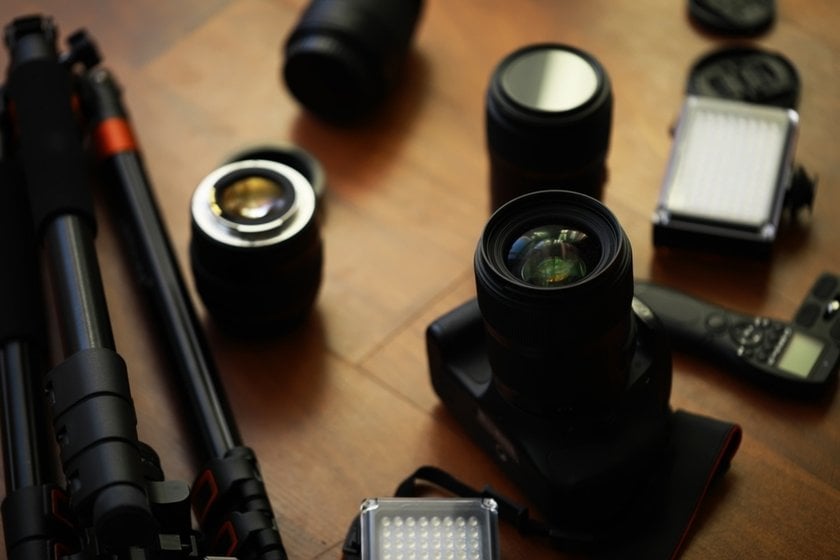
Camera: Depending on your preferences, it can be a DSLR or mirrorless. Both types offer the control and quality you need to make those chocolates look irresistible.
Lenses: You've got options here. Use a macro lens to capture the tiniest details that make your chocolate practically jump off the page. Or, opt for versatile choices like a 35mm or 50mm for great all-around performance. A telephoto lens is another great choice because its softer focus creates a more enticing and dreamy look.
Tripod: Use it for the same reason as in the smartphone setup — if you want your pictures crystal clear without any blur!
Remote Shutter Release: Why do you need it? To avoid touching the camera and ruining your perfect setup, you should just set everything, step back, press the remote, and voilà! Your image comes out just as you intended: smooth and sharp.
Reflector: This is simple but can soften or enhance natural light.
Extra batteries or a charger: A dead battery can cut your creativity short, so pack an extra battery or a portable charger!
Equip yourself with these tools, and you’re all set! Go capture chocolate that looks so good that everyone will want to taste it!
Lighting and Composition
Lighting for food photography and its composition are also things to consider for your chocolate photography ideas. Here’s how to make your shots stand out:
Your AI-Powered Photo Editor for MacOS and Windows
Discover Now!Light It Right
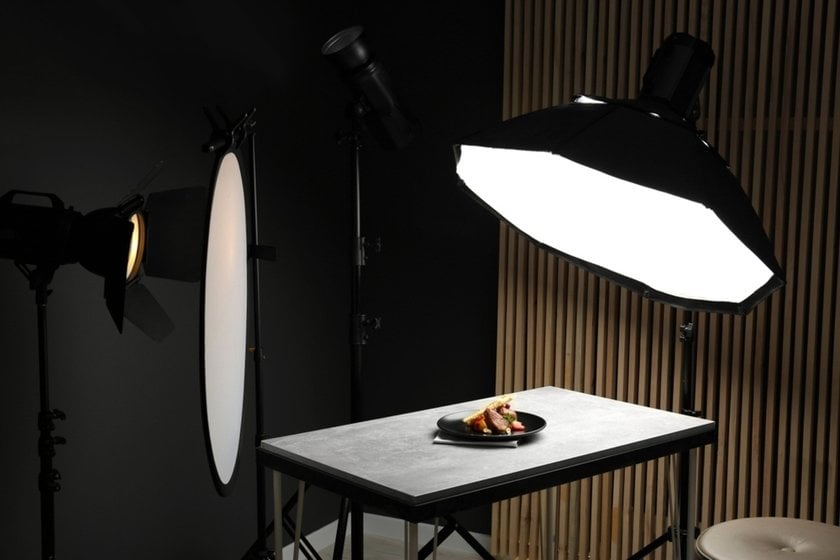
Against the Grain: Illuminate the texture of your chocolate by lighting it from an angle. This highlights the intricate designs and makes those breaks or cuts you've created really pop.
Natural Light is Best: Avoid direct sunlight, which can ruin your chocolate and create harsh shadows. Instead, we recommend you stick to the soft light of early morning or late afternoon to give chocolate a perfect glow.
Keep it Cool and Diffused: Bright yet diffused light is ideal, whether you're shooting indoors or outside. It enhances the natural beauty of your product without overwhelming the details.
Ditch the Flash: Direct flash can reflect off your chocolate's glossy surface, which leads to overexposure and harsh contrasts. If you need extra light, consider using continuous lighting, but be cautious of the heat because it can melt your main subject, too!
Set the Scene
Rule of Thirds: Position your chocolate at the intersections of your frame’s grid, drawing the viewer’s eye and adding interest to your composition.
Fill the Frame: Close up on your chocolate to capture every detail, eliminating distracting backgrounds and focusing solely on the product. Check out the best food photography backdrops from our previous post!
Use Shapes: Compose your chocolate in groups or patterns like triangles, lines, and diagonals to create an appealing setup.
Remember to experiment with different angles and settings to see what works best for your chocolate. Also, shoot multiple photos to have a variety of options. This way, you can ensure your chocolate looks as tempting through the lens as it does in real life!
Chocolate Editing
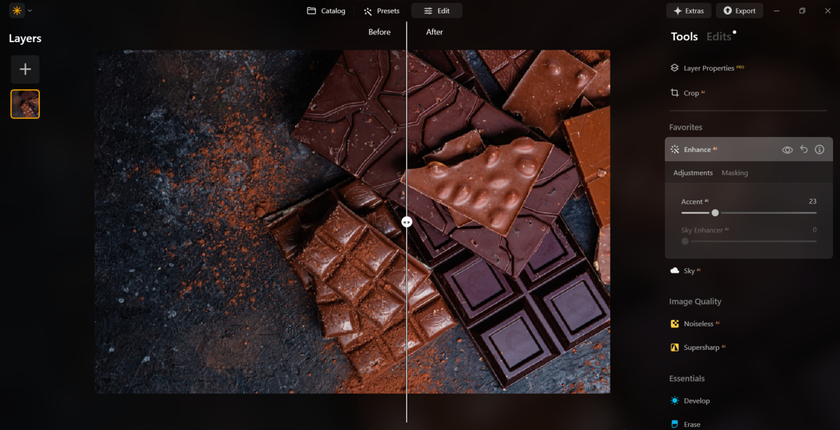
Food photo editing is your opportunity to make the photographs you've taken stunning and realistic! Sometimes, we cannot recreate that perfect glow or remove drops where they do not belong, and the chocolate already starts melting before we can fix it in real life. For that, we use a photo editor, and one we recommend is Luminar Neo. It is based on AI; thus, editing is quick and super simple!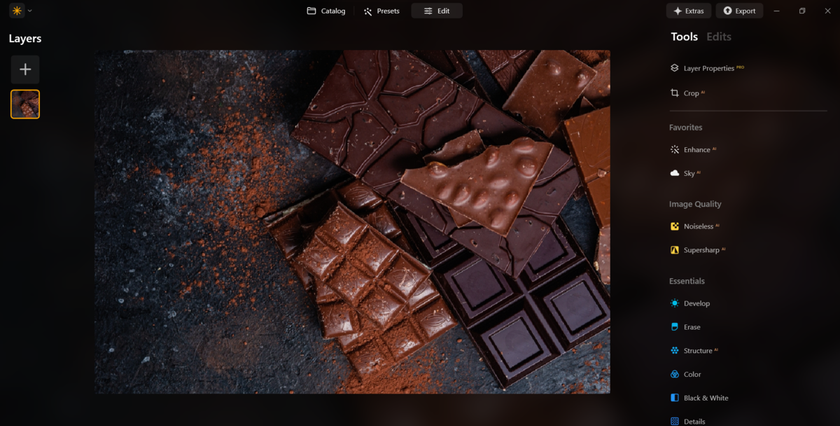
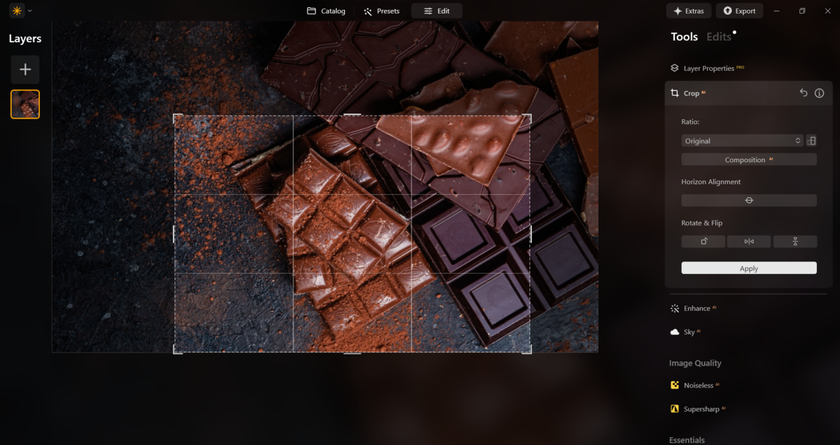
You can correct shadows and highlights with Accent AI to make the picture look deeper or use smart cropping with Crop AI to accentuate exactly the part that will draw the viewer's attention the most.
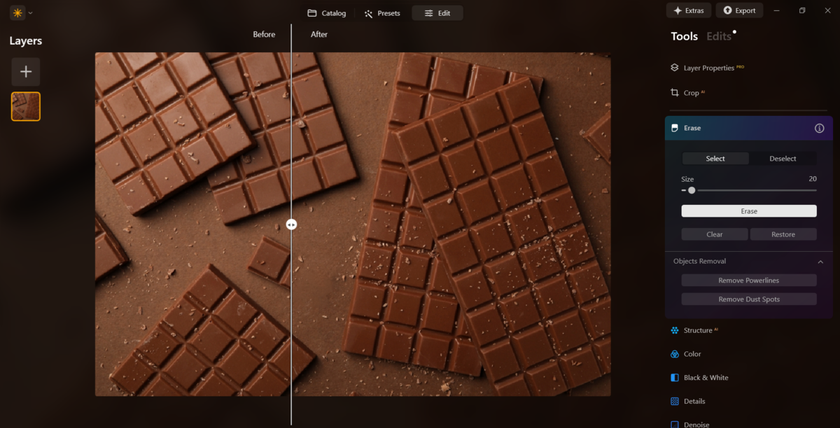
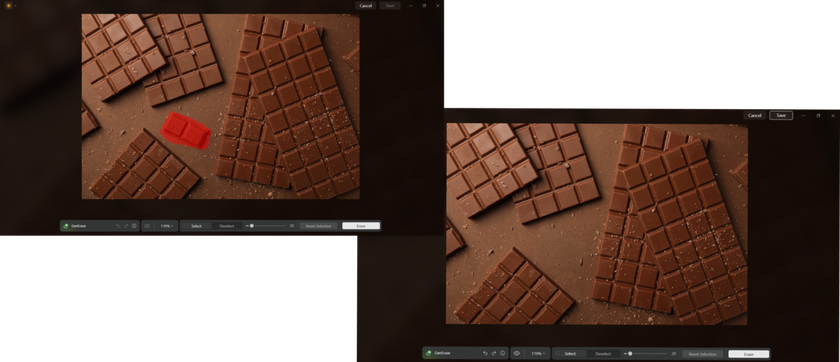
If something in your picture doesn't belong there, you can use the Erase Tool or GenErase, which will not only erase but also fill the space with a pattern that fits.
There are many features to explore; go to our website and read about all of them, then decide which ones you need the most for your chocolate shots!
More Tips
 Capturing the perfect shot of chocolate can feel like trying to preserve a moment before it melts away — quite literally! Let’s explore some essential tips to perfect your chocolate photography:
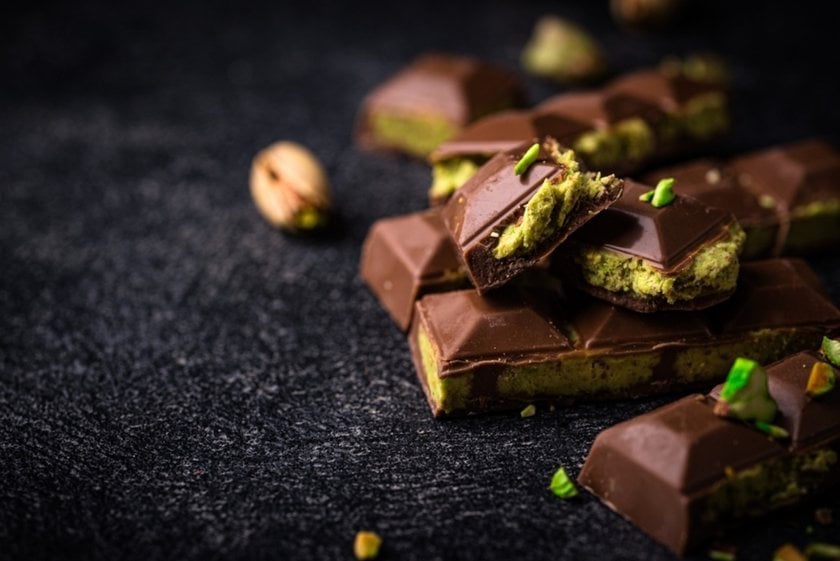
Specular Highlights: Proper lighting can transform your chocolate photos. Setting up lights to create specular highlights will help give your chocolate a dynamic, lively look, preventing it from appearing flat and dull.
Capturing Texture: The allure of chocolate goes beyond taste; it’s also about its captivating texture. Fine-tune your lighting, sometimes lowering it more than usual, to bring out the rich details — those crinkles and crunches that make your mouth water.
Creating Layers: Chocolate photographs shouldn’t be flat. You can enhance your photos by layering elements like chocolate shavings, dusted cocoa, or thoughtful props that complete the story you’re telling.
Complementary Colors: Color theory is a powerful way that you should consider, too. Pair your chocolate with complementary shades such as cool blues or vibrant greens to create contrast. Brown pairs nicely with other shades of brown, and it also works well with lighter tones like pale yellow or beige. Plus, brown color can look striking when matched with simple shades such as black, white, and various types of gray. By the way, you can enhance the colors with an image saturation editor if you think it’s going to complement the chocolate better!
With these chocolate photography tips, you're right on your way to capturing these cocoa delights in a way that's as rich and appealing as their flavor!
Conclusion
 Wrapping up this guide, think of every photo you snap as a potential superstar on your social media feed. Whether it’s for your personal blog or your business’s Instagram page, the skills you've learned today are your golden ticket to capturing images that are not just eye-catching but truly irresistible!
With a bit of practice and creativity, your chocolate photographs could become the talk of the town — or at least the talk of the timeline! So keep those cameras clicking and maybe, your next chocolate shot will be the one that goes viral!