Hyperfocal Distance Photography: From Theory To Practice
September 12, 2025

Calculating hyperfocal distance once felt complicated, but now it’s a small step that saves me hours of trial and error.
Hyperfocal distance initially felt like a secret — until I started testing it and realized it’s just practical math plus a little habit. Now I use it whenever I want, both near and far, to read well in the same frame. I’ll break it down step-by-step so you can try it tomorrow. In a few minutes of practice, you can set it up by eye or with a small chart, keeping you from missing fleeting light. Once you get comfortable, it becomes a reflex — focus, once, frame, and shoot. After a few tries, it feels automatic, letting fast choices on the trail beat fiddling while the light moves.
What Is Hyperfocal Distance?
 Hyperfocal distance is the focus point that makes the largest part of a photo look sharp. Picture a landscape where you want both nearby items (flowers or rocks) and faraway features (mountains or sky) to be clear. If the focus is only on the foreground, the background will blur; if it’s only on the background, the foreground will blur. Focusing on the hyperfocal distance puts an “in-between” point where both near and far parts of the scene appear acceptably sharp. When both foreground and background are sharp, evaluating your composition perspective and framing the shot more effectively is easier.
To make this easier, photographers often use a hyperfocal distance chart. The chart shows how far to focus depending on your lens and aperture. For example, it might say that with a 24mm lens at f/11, the ideal focus distance is around 2 meters. This way, you don’t have to guess—you simply check the chart, set your focus, and know that the foreground and background will look sharp in your photo.
Carrying a small printed chart or a phone app makes checking hyperfocal distances quick and portable in the field. Capturing sharp details is just the first step — increasing contrast afterward can bring out textures and depth across the entire image.
When to Use Hyperfocal Distance
Hyperfocal distance is ideal in situations where keeping both the foreground and background reasonably sharp matters.
Landscapes with depth: When you want everything from nearby rocks or flowers to distant mountains in focus.

Leading lines: Roads, trails, or rivers that guide the eye from the foreground into the distance.

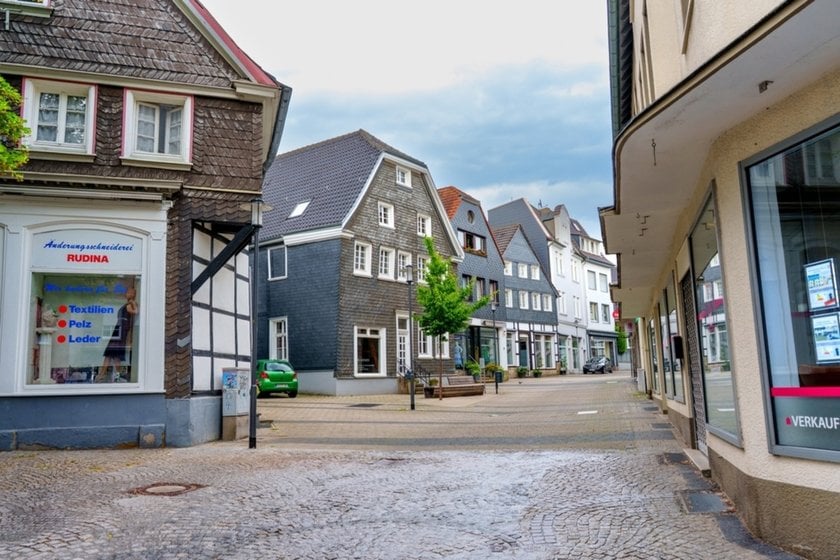
Urban or street scenes: Keeping details of nearby storefronts and faraway buildings sharp.
Sunrise or sunset shots: Preserving texture in foreground elements while capturing the horizon clearly.

Travel photography: When you want quick shots that show the entire scene without missing fleeting moments.

Wide-angle shots: Especially at small apertures, where you want edge-to-edge clarity without focus stacking.

Scenes with multiple layers: Trees, hills, or objects at different distances all contribute to the composition.


Note that wider-angle lenses and smaller apertures naturally increase depth of field, so hyperfocal techniques work especially well with wide shots. Hyperfocal distance saves time in the field by letting the whole scene stay in focus without constant refocusing. It’s a practical way to keep images sharp and complete when light is changing or there’s only a brief moment to frame the shot.
Your AI-Powered Photo Editor for MacOS and Windows
Discover Now!When Not to Use It
 There are times when hyperfocal focus isn’t the best choice:
For shallow, selective focus, such as portraits or a single flower.
When pixel-perfect sharpness across the entire frame is needed for large prints, focus stacking works better.
If lens aberrations at wide apertures reduce edge sharpness, even when the subject is technically in focus.
Focusing on a key subject is more important than the overall depth of field for fast-moving subjects, like sports or wildlife.
When shooting at very long focal lengths, where depth of field is naturally very shallow, the hyperfocal distance has little effect.
In these cases, hyperfocal distance can work against the image you want to create. Choosing the right technique depends on the subject, the lens, and the photo you aim for.
Hyperfocal Distance Made Simple: Field Methods
Charts and formulas are useful for the theory, but in the field, most photographers use quick, practical methods. Still, knowing the hyperfocal distance formula helps when precise focus distances are needed. Each approach trades speed for accuracy, so choose the method that fits the scene and your working pace.
1. Using a Focusing Scale
 Older manual lenses often feature distance and depth-of-field scales right on the barrel. The hyperfocal distance can be set almost instantly by aligning the infinity mark with the chosen aperture mark. For example, aligning the marks with a 35mm lens at f/16 ensures that everything from a few meters away to infinity is acceptably sharp. This method is fast and reliable, but modern autofocus lenses rarely include such scales.
2. The Double Distance Method
 A common rule of thumb is to focus twice the distance of the nearest subject that needs to remain sharp. If the closest element is at 10 meters, focusing at 20 meters keeps both the foreground and the background acceptably sharp. It’s not mathematically perfect, but it works well for many real-world scenarios and is quick to apply without tools.
3. The Live View Infinity Focus Method
 Live view magnification is one of the most precise ways to focus, especially in low light or when planning large, high-resolution prints. Focus on infinity first, then slowly back off until the nearest foreground element looks sharp in the magnified view. This gives very accurate results. The technique is slower and usually needs a tripod, but it’s ideal for long exposures and detailed landscapes.
4. The Blur Focus Method
 Focus on the foreground until it looks sharp and the background just starts to soften, then ease the focus back a little. This quick, “by-eye” method is great for travel or street photography when speed matters more than technical perfection — not exact, but usually sharp enough for everyday shots.
5. Split-Screen Focusing
 Many modern cameras include focus peaking or split-screen aids. These tools highlight areas in focus, making it easier to judge when foreground and background fall within the sharp zone. It’s a contemporary adaptation of classic focusing screens, effective for quick adjustments, though not always perfectly precise.
Your Tool for Revealing Photo Structure Effortlessly
Discover!Level of Precision
 The choice of method depends on the final output:
A quick double-distance estimate or a fast live view check is usually sufficient for small prints or social media.
For high-resolution landscapes, stopping down the aperture, confirming focus through magnified live view, or even using focus stacking ensures edge-to-edge sharpness. Even with careful focusing, final tweaks can be made in RAW image editing software to fine-tune sharpness and exposure.
For high-detail work, use a tripod, low ISO, and mirror lock or an electronic shutter to avoid tiny vibrations that blur detail. In practice, it’s worth remembering that different situations require different levels of effort. A quick focus guess is fine for a casual snapshot on a hike, but a gallery print may require careful calculations, charts, and several test shots. The key is balancing time, technical precision, and the creative vision.
In a Nutshell
Mastering hyperfocal distance changed how I shoot landscapes and travel scenes. It freed me from micro-adjusting focus for every element and gave me reliable results when light was fleeting. Start with a chart, practice the live view check, and test a few scenes at different apertures.
Once the concept of understanding hyperfocal distance clicks, you’ll spend less time worrying about focus and more time composing shots that tell the story you saw at the moment. Use these methods, pick the one that fits your pace, and soon hyperfocal focusing will be second nature — a small technical move that opens up creative possibilities.