iPhone Green Screen: Step-By-Step Guide For Beginners
October 24, 2025
Learn how to use green screen on iPhone step by step. Discover simple tips for lighting, setup, and background replacement.
Green screen (a.k.a. chroma key) lets you replace a solid color background with any scene you like—no studio required. On iPhone, it’s perfect for quick product clips, social intros, and classroom projects when you can’t control location. This guide keeps it simple and shows exactly how to shoot and swap backgrounds cleanly.
How Green Screen Works
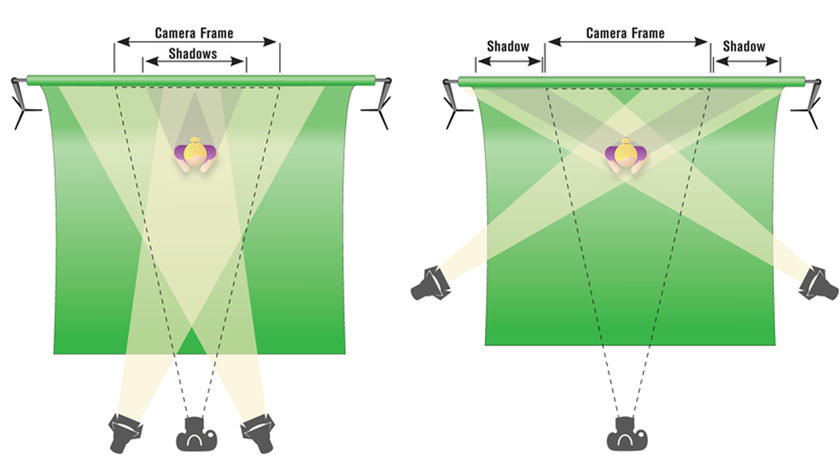 Chroma keying tells your editor to treat one key color (usually green) as transparent, revealing a new background behind your subject. The cleaner that color is, the better the result. Aim for three basics: even light on the backdrop, separation between subject and background, and no green clothing.
If stray reflections show up on skin or hair, that’s spill—tame it by moving the subject farther from the screen and using soft lights from the sides. Whether you’re learning how to film green screen on iPhone or finishing a quick reel, think “flat backdrop, subject lit like the final scene,” and you’ll save time later.
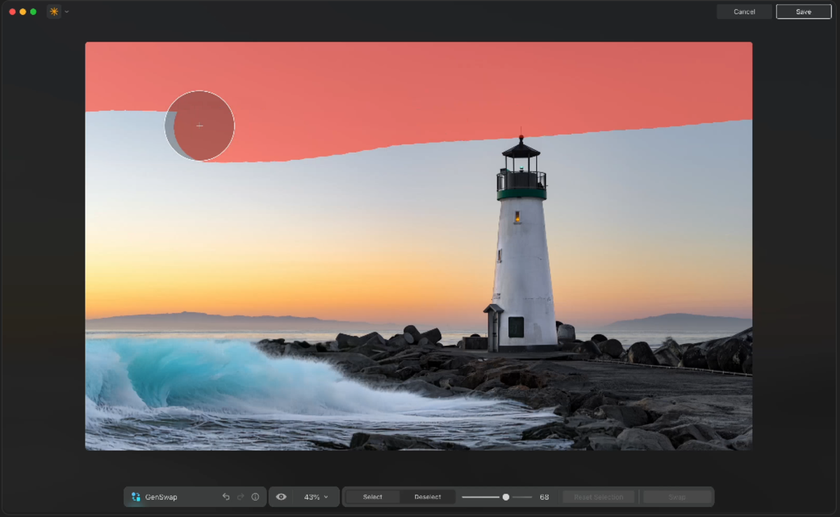
Boost Your Image’s Visual Appeal with a Transparent Background
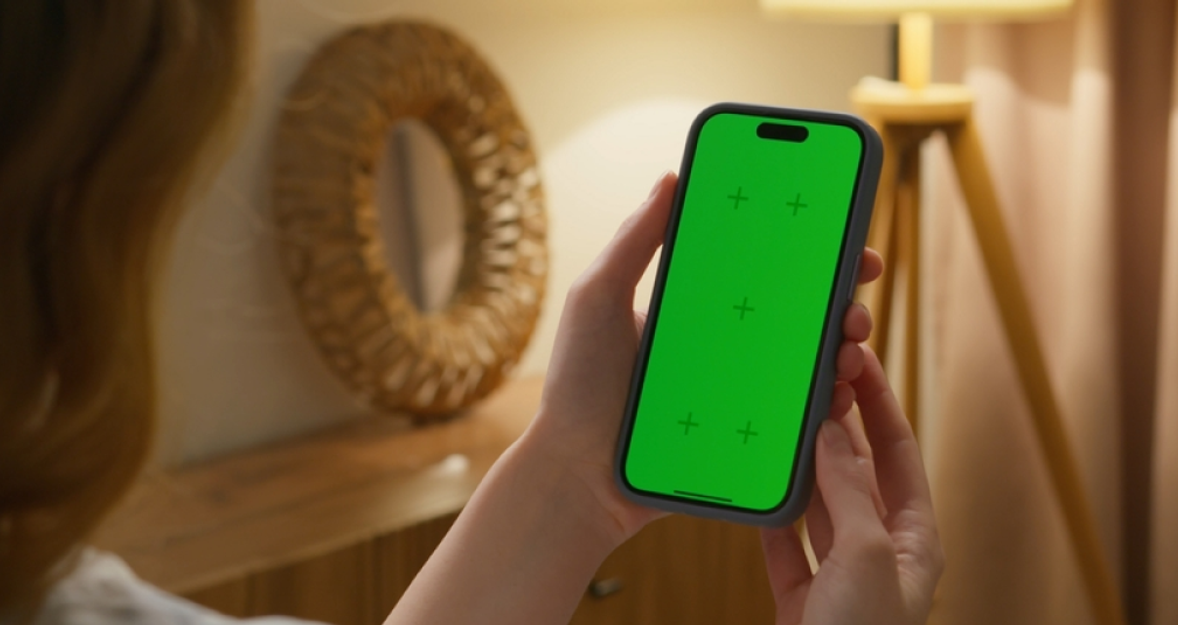
Try in Luminar NeoHow to Use Green Screen on iPhone
 You can key footage on iPhone in a few reliable ways—choose the one that matches your deadline and the control you need.
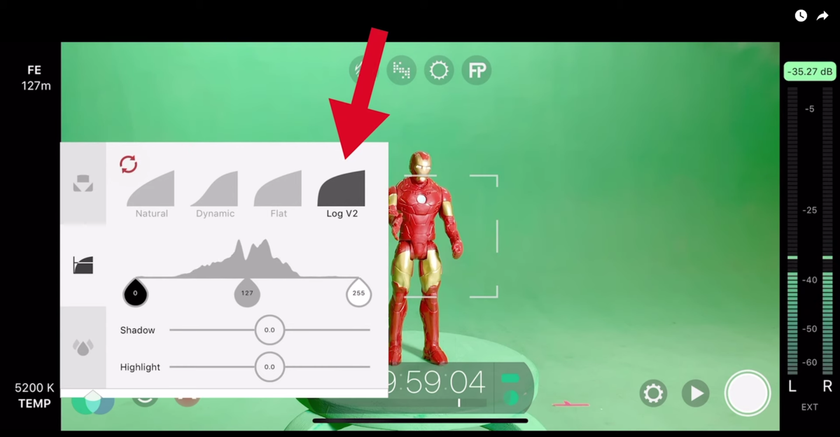
All-in-one mobile editors. Many video apps let you drop a green clip on top of a new background, then pick “Chroma/Key.” Adjust tolerance until the green vanishes, then refine edges and reduce spill. This is the fastest way to learn how to use green screen on iPhone for simple talking heads, reels, or product demos.
Shoot on iPhone, key on desktop. Record clean 4K, lock exposure/focus, and keep shutter near 1/60-1/120. Send clips to your NLE (Final Cut, Premiere, DaVinci). Desktop keys give finer control for hair, glass, and shadows, which is handy if the screen wasn’t lit perfectly.
Hybrid: mobile key + desktop polish. Do the rough key on your phone so you can preview timing and blocking on set, then export a high-quality file. Later, refine edges, color, and light matching on a computer. This approach gives you quick creative checks without locking you into a rushed result.
Best Green Screen Photo App for iPhone
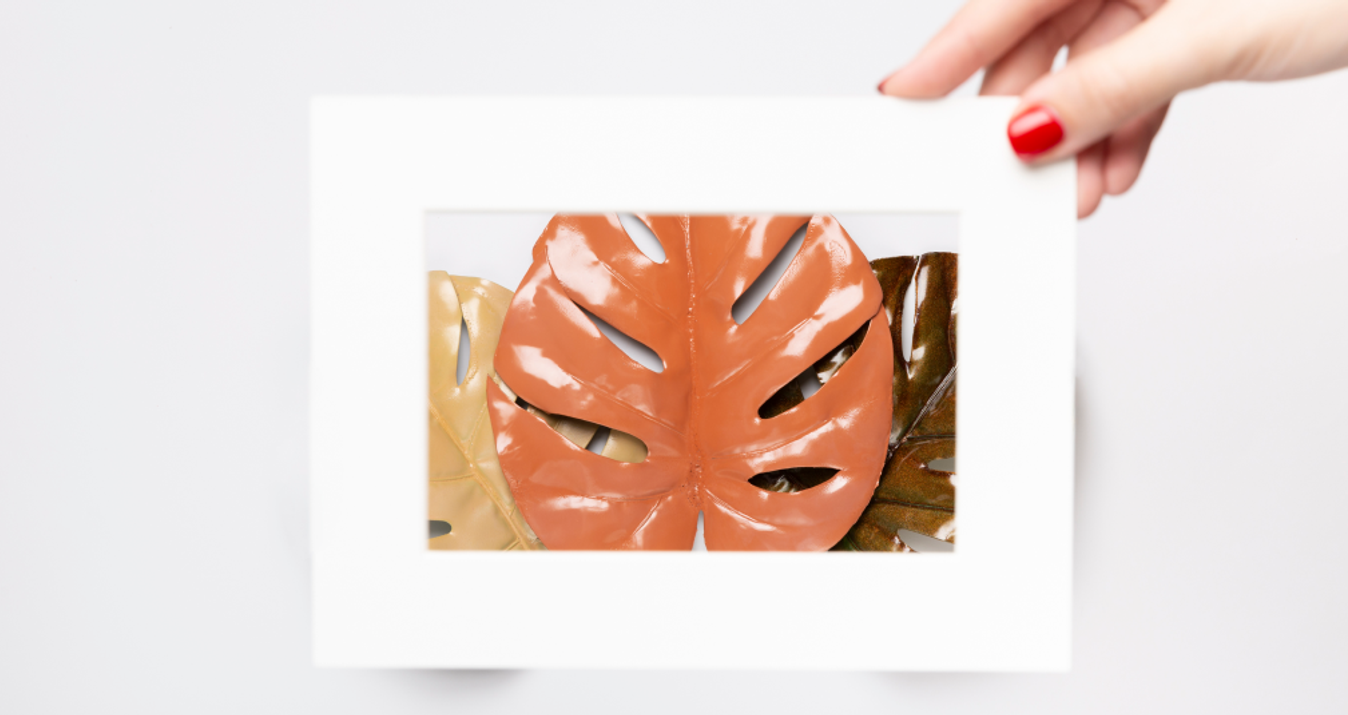
If you’re compositing stills, the best workflow is “shoot flat, key precisely, then stylize.” Look for green screen apps that support edge-aware selections, feathering, and spill suppression. That’s how the best green screen photo app for iPhone earns its keep: believable hairlines, clean shadows, and exports that don’t band or posterize.
Some tools market themselves as the best chroma key app for iPhone, but what actually matters is mask control (brush sizes, auto-detect subject), layered editing, and non-destructive tweaks so you can change the background after color work. When you’re comparing options, try a tricky photo (flyaway hair, glass rim) and see which app holds the edge detail. For a deeper cutout workflow, you can explore an image cut out approach mid-composite:
How to Use Green Screen in iMovie on iPhone
Apple’s built-in route is surprisingly capable for simple clips:
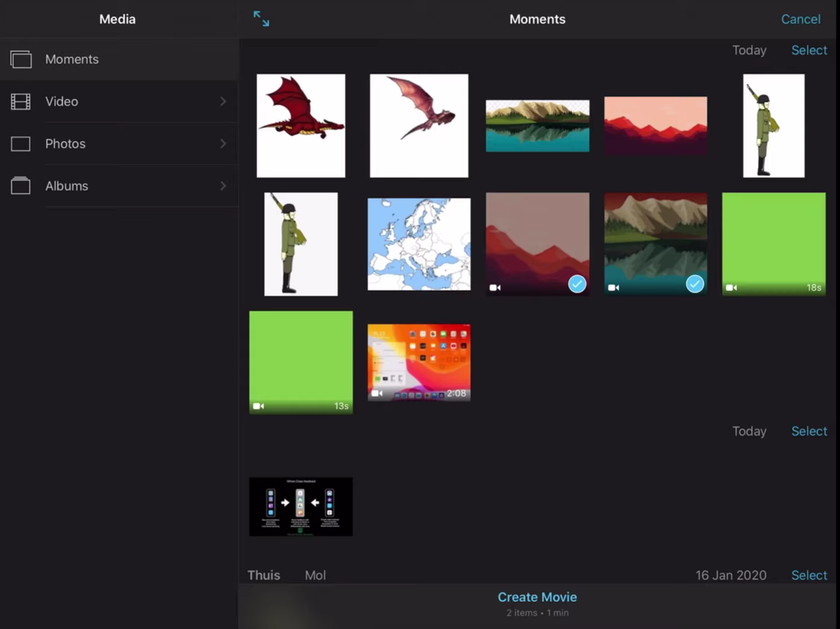
Open iMovie → create a project → add your background video or photo to the timeline.
Next, tap “+” → add your green screen clip and choose Green/Blue Screen from the overlay options.
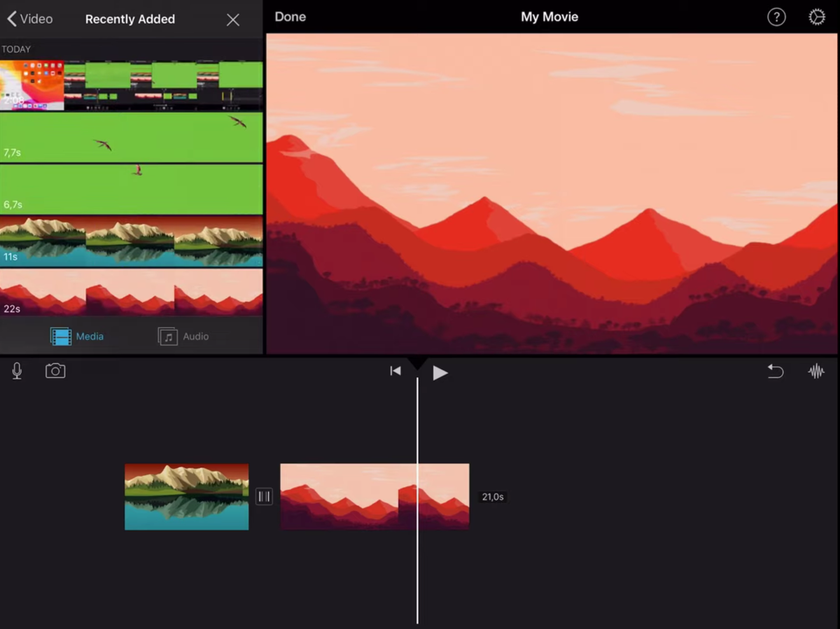
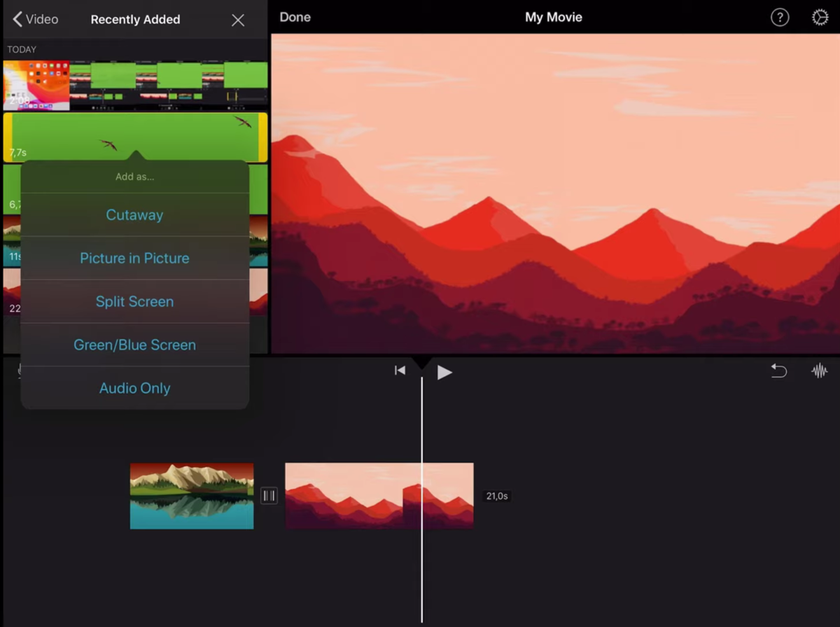
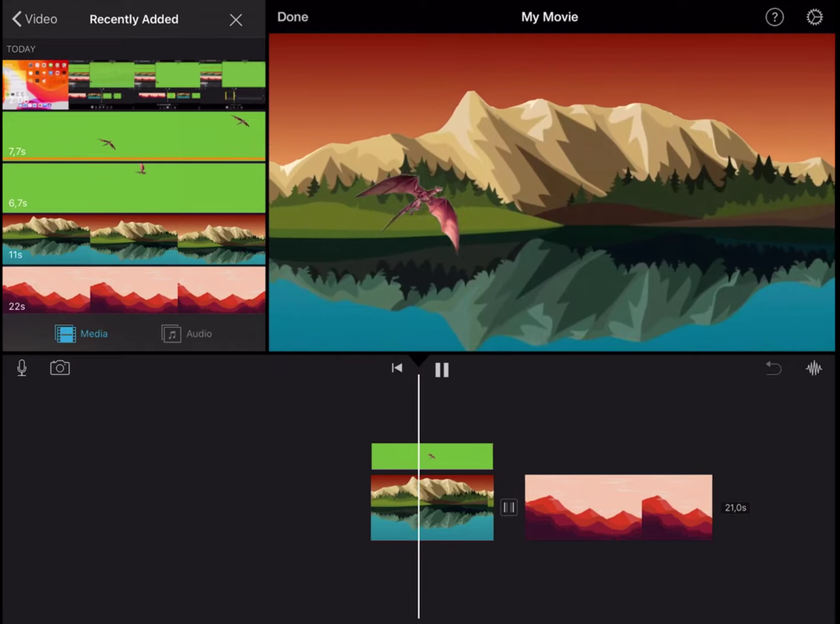
iMovie will key it automatically. Use the on-screen slider to adjust strength, then drag the four “clean-up” handles to mask stray areas (they work like a garbage matte). Trim and reposition the keyed layer so the timing lands where you need it. To match light and color, use the basic adjustments on the background layer first, then nudge the subject layer, so skin tones look natural.
If you’re exporting for Stories and want a consistent look later in your pipeline, keep a note to revisit brand colors in your publishing step—that’s where guides like how to use green screen on iMovie on iPhone often pair with simple color tips you’ll use across apps.
Common Mistakes & Quick Fixes
 After you’ve solved the big issues (even light, distance, and clean exposure), think like a set designer. Match the perspective between the subject and background (camera height, focal length), and shape the light direction on the subject to mimic the scene you’re compositing into.
Problem | What it looks like | Why it happens | Fast fix |
Uneven screen (hot spots/bands) | Patches of green remain after keying | Mixed lighting, wrinkles, shadows | Smooth the backdrop, light it separately, raise ISO slightly, and stop down for uniform exposure |
Spill on skin/hair | Green edges, color cast on cheeks | Subject too close; glossy surfaces | Increase subject–screen distance; add side fill; use spill suppression |
Shadows on the screen | Dark blobs that won’t key cleanly | Key and subject share the same light | Aim lights across the screen, not from the subject angle; lift the screen lights, flag the subject |
Noise in the key | Grainy edges, crawling aliasing | High ISO, underexposure | Brighten the screen lights, expose to the right, and denoise the background before keying |
Motion blur “holes” | Semi-transparent edges on fast movement | Shutter too slow | Raise shutter (1/120-1/250), add more light, or stage slower motions |
Color shift mid-clip | Key breaks at the cut | Auto WB/AE changing | Lock WB/exposure; avoid mixed color temps |
Wrinkles/creases | Jagged areas around folds | Physical texture creates different greens | Stretch/steam the screen; shoot with shallower depth of field to soften texture |
A tiny shadow under feet or behind a product sells depth better than extra saturation. Finally, color-match the subject to the plate, not the other way around—skin tones first, then everything else.
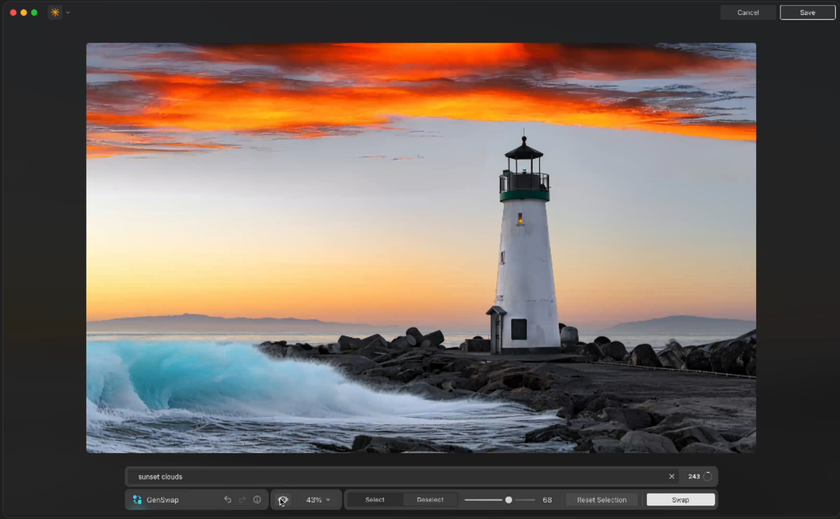
Unleash Your Creativity with Luminar Neo's Auto Photo Editor
Try it Now!Keyed, Clean, and Convincing
Green screen on iPhone isn’t magic; it’s a handful of tidy steps and a plan for post. Light the screen flat, light your subject like the destination scene, and key with restraint. For the finishing pass, Luminar Neo gives you quick masks, believable relighting, and clean background swaps that hold up at full size—exactly what you need when the deadline is now. Keep the process small, repeatable, and your composites will look shot-in-camera more often than not.