The Edit Revolution: Exploring A Feature-Packed Polarr Alternative
November 12, 2025

Discover the best Polarr alternative for creators. Explore advanced editing tools, AI-powered workflows, and intuitive features for consistent, professional photo results.
Creators move fast. They want edits that look consistent across a set, tools that feel clear on first use, and AI help that saves time without hiding control. If you’ve read a Polarr review and feel like you’re close—but still missing layered edits, stronger masking, or an easier way to keep a series consistent—this guide walks through what to look for and why you might try a different tool.
We’ll compare everyday tasks (culling, color, retouch, sky, and light tweaks), then map a simple trial so you can judge results on your own photos. By the end, you’ll know what changes in day-to-day work and how to switch with minimal friction.
What Users Ask From a Modern Editor
 A good editor starts presto, looks clean, and stays stable with big RAW lines. It keeps edits non-destructive, so you can roll back a step without losing the rest. It lets you work on one print or a full set with equal ease, dupe settings, sync looks, and batch import in sizes that match web, social, and print.
Masking and local tools should feel quick: select subject, background, sky, or objects in a click, then refine edges around hair, trees, or fine textures. Color needs to be precise but friendly—white balance, HSL, curves, and a way to tune skin tones without plastic shine. Portrait fixes should be subtle and brush-based, with clear control over eyes, lips, and skin texture.
On the creative side, people want sky swaps that respect reflections and lighting, relight tools that balance foreground and background, and film-like finishing (grain, halation, glow) without complex layer stacks. Finally, migration matters: keep folders as they are, bring salong presets, and hand files to mobile when needed. When an app meets these points, switching feels less like starting over and more like leveling up.
Your AI-Powered Photo Editor for MacOS and Windows
Discover Now!Where Polarr Shines—And Where You Might Outgrow It
Polarr is quick to learn and great for looks-driven edits. On mobile, its filters and overlays help you match a vibe across a batch without fuss. Many Polarr photo editor reviews praise the speed, the remix culture around custom filters, and the way sliders stay clear for beginners. If you're active on social media and post often, that mix is hard to beat.
You might start to outgrow it when projects ask for layered corrections, fine edge work on hair or fabric, complex skin cleanup, or bigger RAW sets from a camera shoot. Power users also ask for deeper color tools, masked relighting, and tighter file handoff between desktop and phone.
None of this cancels Polarr’s strengths; it simply marks the point where you need an editor that maintains the same speed while offering more local control, better catalog choices, and reliable export presets for both print and social media.
Meet a Feature-Packed Alternative (Luminar at a glance)
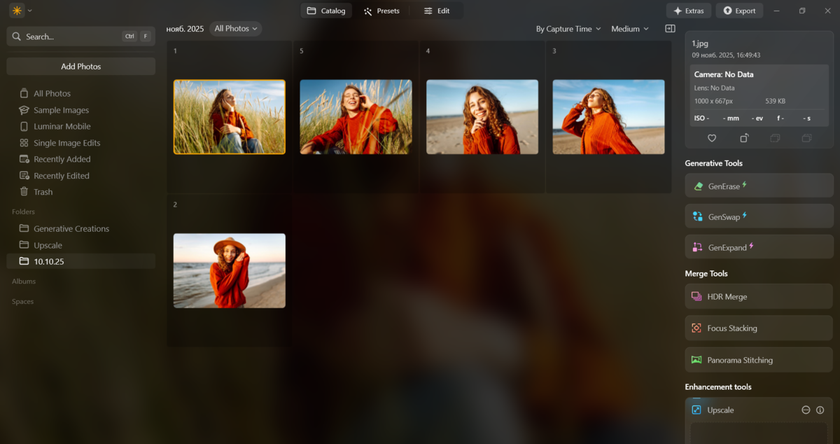
-4398.png?q=85&w=840) If you need more headroom without drowning in menus, try Luminar. It opens RAWs fast, keeps edits non-destructive, and organizes projects with simple folders or lightweight catalogs. The draw is control: subject/sky/background selections in one click, brush and gradient refinements, and portrait tools that respect skin texture while giving crisp eyes and natural lips.
If you need more headroom without drowning in menus, try Luminar. It opens RAWs fast, keeps edits non-destructive, and organizes projects with simple folders or lightweight catalogs. The draw is control: subject/sky/background selections in one click, brush and gradient refinements, and portrait tools that respect skin texture while giving crisp eyes and natural lips.
Style work is quick, too. You can build a look once, sync it to a set, and still tweak each frame with local masks. Color tools cover white balance, HSL, curves, and film-like finishing, while export presets hit the sizes you need for web, social, and print. If you come from a filter-first workflow, you still get presets—but they sit on top of solid masking and light tools, so you can fix tricky frames instead of throwing them away. Next, we'll take a look at Luminar Neo features, how to use them, and the various tricks that make it a unique editor.
Precision Workflows: Masking, Selections, and Local Control
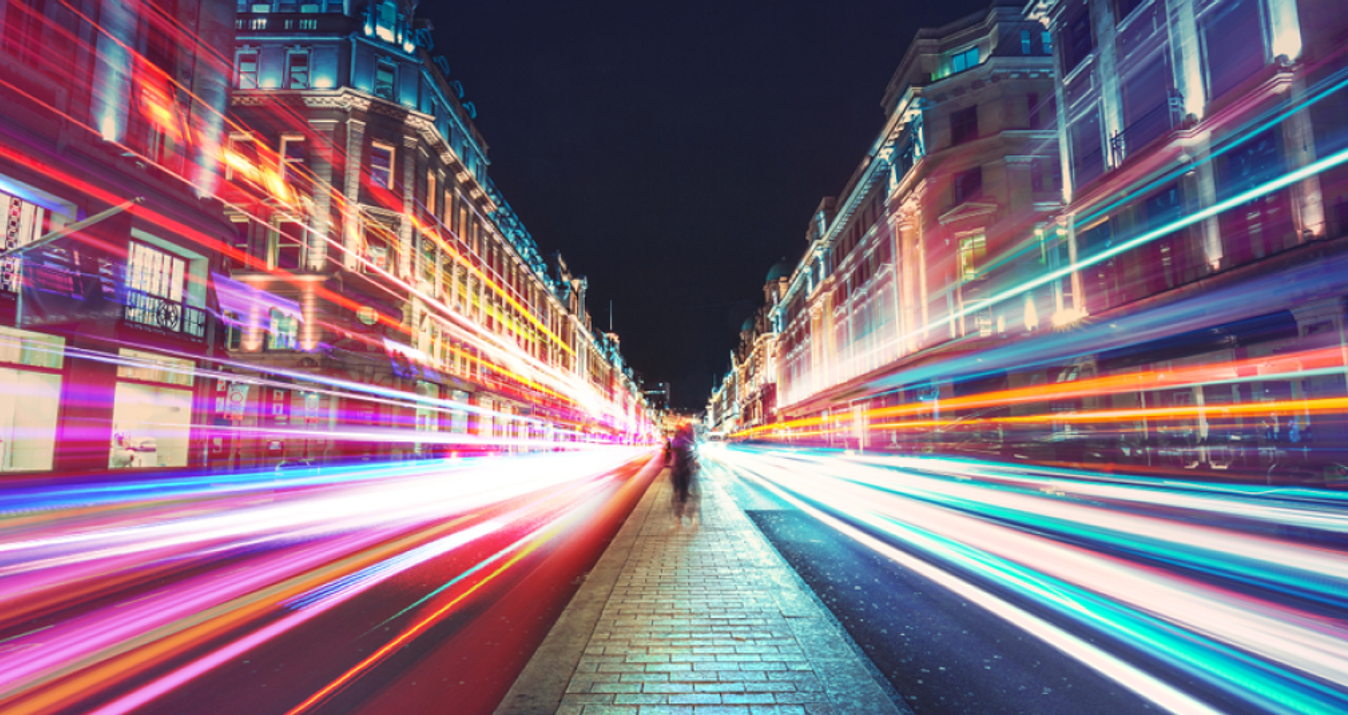
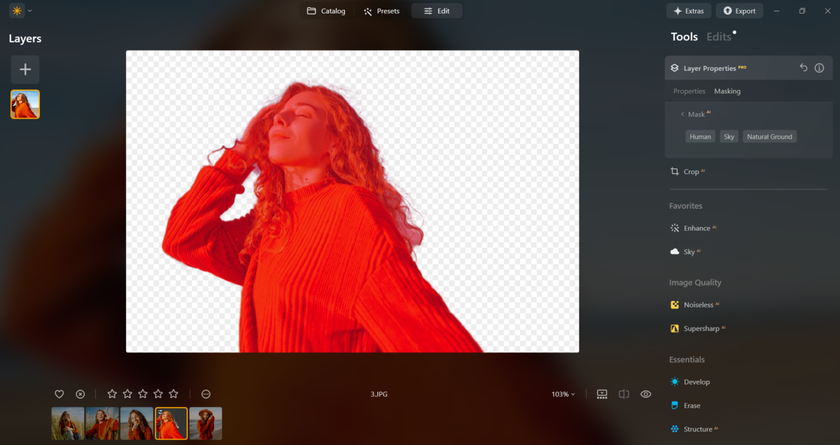
 Tough edges—flyaway hair, fur, tree branches—need smart selections. That’s where one-click subjects and quick refinements speed things up. In AI image masking, you can auto-detect people, sky, background, or objects, then polish with a brush or edge-aware slider. The result is a clean cut without halos, so you can darken a busy street, brighten a face, or cool a window reflection without touching the rest.
Local tools should stack well: linear and radial gradients for sky and spotlight work, a brush for small fixes, and luminosity/color range targeting for precise tones. With a layered, non-destructive approach, you can keep a global base (white balance, exposure), then add local masks for skin, clothing, and background.
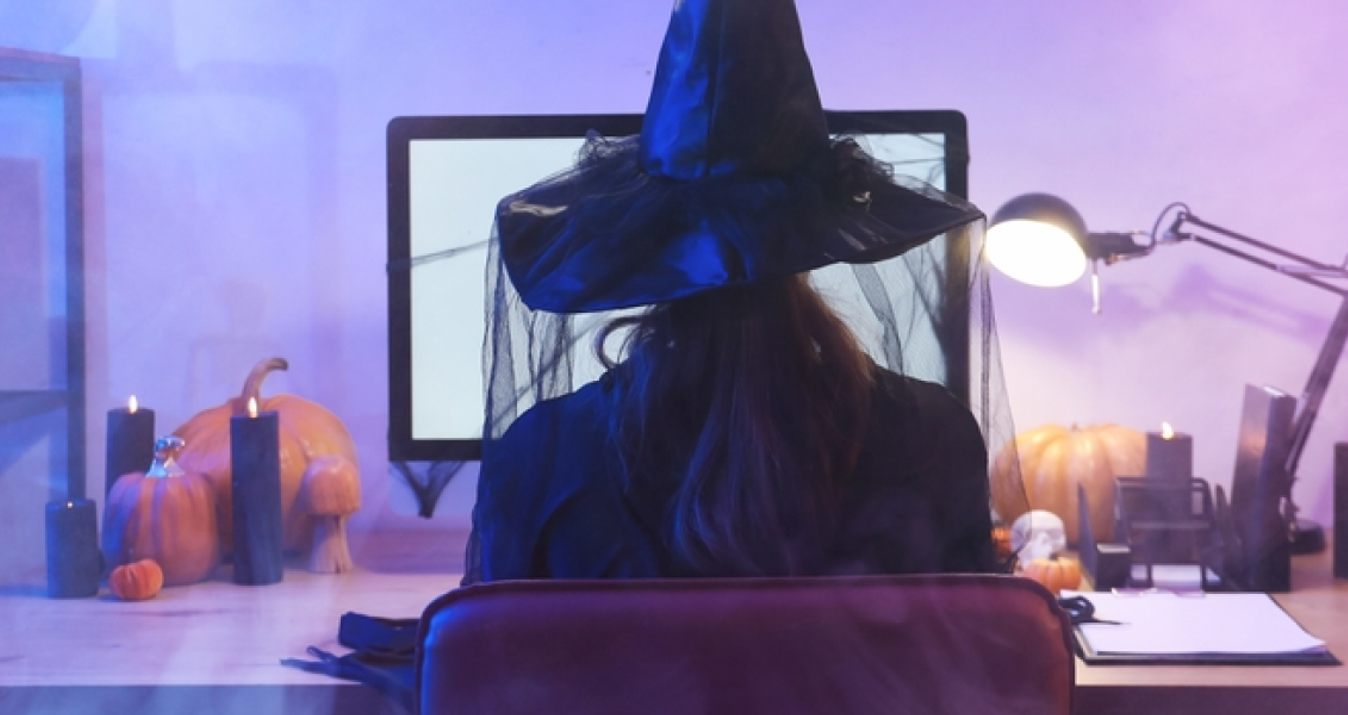
Portrait sessions benefit most: soften skin texture lightly, lift the eyes, and protect lips and brows with separate masks. For product or travel shots, edge-sensitive masks make it easy to change backgrounds, tame mixed light, or keep brand colors exact—without round-tripping to another app.
Creative Sky and Light Tools For Fast Style Changes
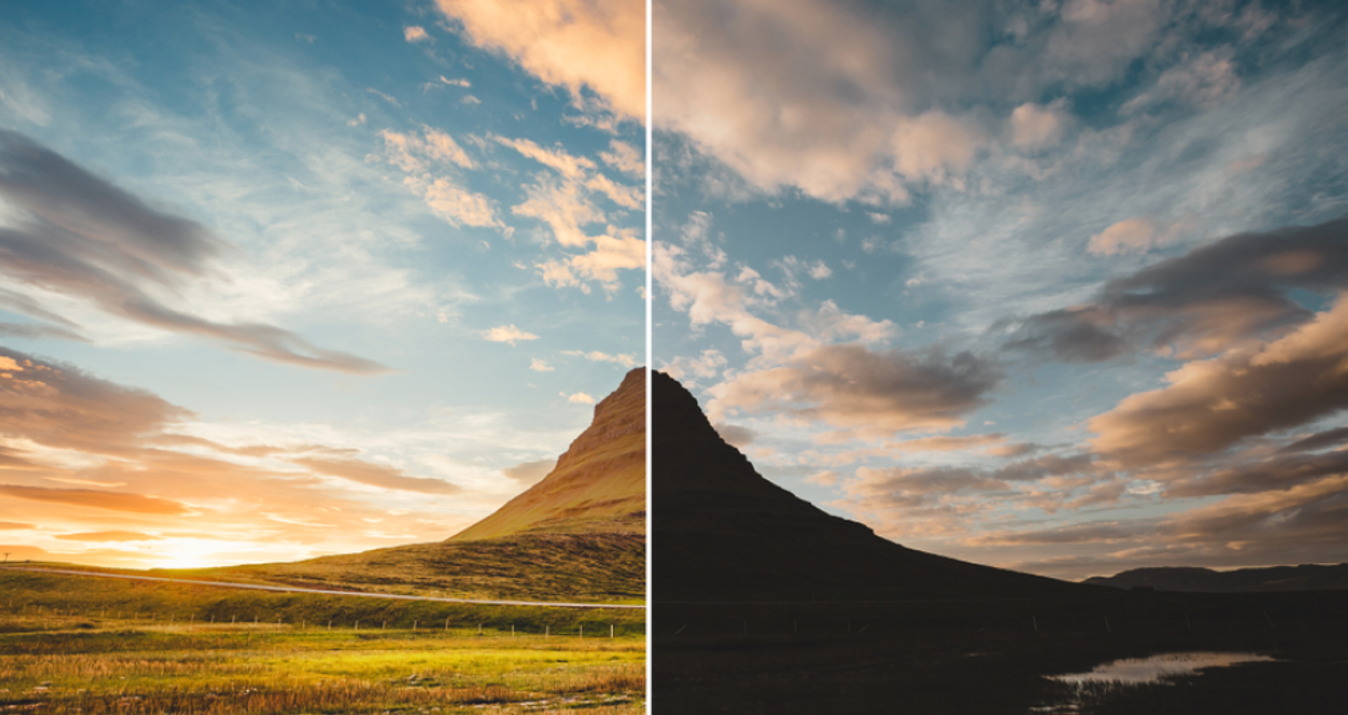
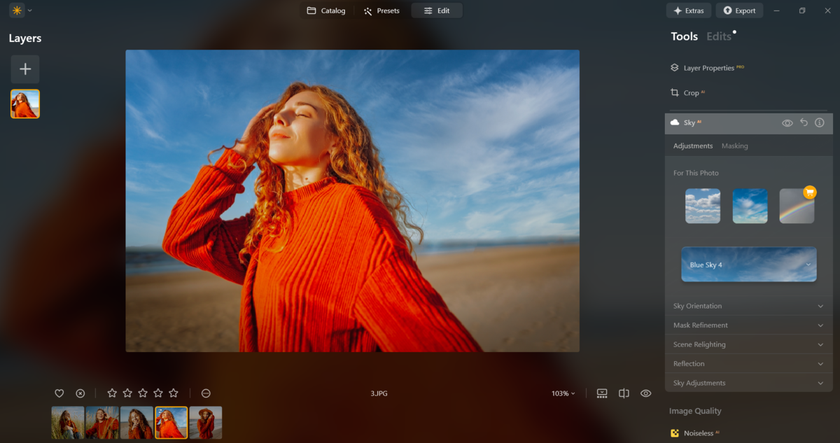
 The weather didn’t cooperate? A sky swap can save the set, as long as the light feels believable. A tool like AI sky changer pairs a replacement sky with horizon blending, color matching, and optional reflections, so water, glass, and metal pick up the new tones. Add a light-balance pass, and the scene feels cohesive instead of pasted.
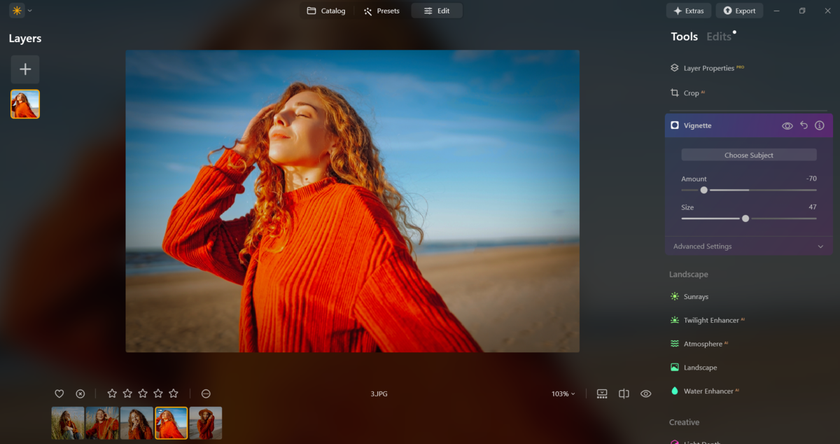
In addition to the sky, Luminar offers quick overexposure tools to help balance the foreground and background when a face is too dark against a bright street. Subtle color harmony and glow bring a film-like finish without heavy layer stacks. For moody portraits, warm the subject slightly, cool the environment, and feather the transitions, so edges stay natural.
For travel sets, build one look that fits the series—consistent contrast, gentle grain, and matched white balance—then sync to the batch and fine-tune a few frames by hand. These small steps turn a mixed shoot into a tight story with even color, believable light, and repeatable results.
Library, Import, and Migration Tips
Moving to a new editor is smoother when you keep folders as they are. Start by mirroring your existing directory tree, then point the new app to those folders instead of importing everything into a heavy catalog. Build a few reusable presets for common shoots (portraits, travel, products) and save naming templates for export, so your files sort neatly on disk.
If you used a simple organizer before, you might want a lightweight companion just for browsing; macOS users researching options can skim the Picasa alternative for Mac to pick an organizer that feels familiar. During the first week, run a small pilot: import one set, create a project folder, apply a base look, sync to the batch, and export for web and print. Once the path works, repeat it on bigger jobs without changing your folder habits.
Lightweight Viewers and Batch Utilities
Even with a strong editor, a fast viewer helps you cull and rename before the heavy work. Use a simple app to flag keepers, add star ratings, and batch-rename by date or client code, then hand the short list to your editor. This keeps catalogs lean and speeds backups. If you’re coming from compact Windows tools and want something similar on other platforms, a roundup like Irfan View alternative can point you to quick viewers with batch features.  Keep the workflow minimal: cull, rename, move to a “TO EDIT” folder, then open the set in your main editor for color, masking, and export.
Quick Start: Try This One-Hour Test Project
Here’s a simple trial you can run on a small set from one shoot. You’ll see how masking, sky and light tools, and export presets change day-to-day work. Don't overdo it: five photos, one base look, a few local adjustments in Luminar.
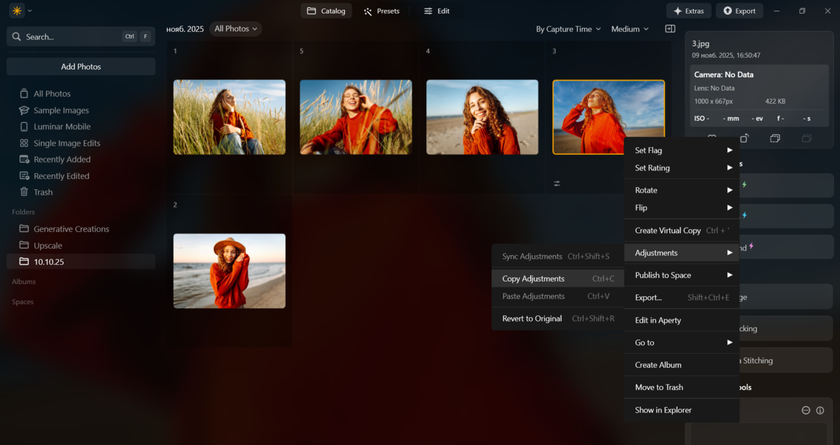
Import a folder containing five RAW files and create virtual copies of them.
Set a base: white balance, exposure, contrast, and gentle color (HSL/curves).
-1861.png?q=85&w=840)
Auto-select the subject; refine the edges on hair or fabric; and lift the exposure on the face slightly.
Balance the scene: darken the background with a radial/linear gradient; tame bright windows.
If the sky is dull, run a sky swap and blend the horizon; add light balance to keep tones believable.
Sync the base to the whole set, then hand-tune each frame with one or two local masks.
Export three ways: web (sRGB, long edge 2048 px), social (platform size), and print (300 PPI).
-2104.png?q=85&w=840)

-1861.png?q=85&w=840)


-2104.png?q=85&w=840)
Review the results side by side and note where you saved the most time; that’s your new baseline.
Side-by-Side: What Changes In Your Daily Workflow
 Day one feels familiar: open a RAW, set exposure and white balance, add contrast and color. The change appears when you need local fixes. Instead of stacking multiple brush layers, you can select the subject/sky/background with a single click, refine the edges, and move on. For a portrait, you lift the eyes, even the skin, and keep the hair crisp without round-tripping. For a city scene, you balance sky and street, cool window glare, and protect signs with a quick mask.
Presets move from “one look fits all” to “base + local tweaks.” You build a base for the set, sync to the batch, then adjust a few frames by hand. Export stays simple: one preset for web, one for social, one for print, each with naming rules so files sort themselves.
Mobile handoff is cleaner too: you can flag keepers on a tablet, then finish masks and color on a desktop without starting over. The net result is fewer steps to get the same (or better) consistency across a shoot.
Who Benefits Most From Switching
Portrait shooters who want fast skin work and believable eyes see the biggest jump. Travel creators who struggle with blown skies or flat light can benefit from quick relight and sky tools. Product and food photographers achieve precise edge control on labels, fabrics, and glass, along with color-matching brand swatches. Teams that deliver many versions—web, social, print—appreciate synced looks and predictable exports.
If your projects are simple, you might stay where you are. But if you often bounce to extra apps for masking, sky fixes, or batch consistency, an alternative with stronger local tools and smarter export presets trims time without adding stress. The learning curve is short: one pilot job, a saved base look, and a few masked adjustments are enough to see whether the switch fits your routine.
FAQ
Will my folder structure change?
No. Point the app to your existing folders and work in place. Edits live in its database or sidecars, while exports go to clearly named subfolders (e.g., WEB, SOCIAL, PRINT). This keeps backups straightforward and avoids shuffling originals.
How hard is mobile/desktop handoff?
Keep it simple: cull and rate on mobile, sync, then finish masks, color, and export on desktop. Use the same preset names on both so the sets stay consistent. If bandwidth is tight, move only picks, not the whole shoot. Export social and print sizes from the desktop.
Can I bring looks/presets from my old editor?
Often, yes. Rebuild core looks with HSL/curves, or import LUTs where supported, then save them as new presets. Expect small differences in tone curves between apps. Batch-apply your base look, then fine-tune a few frames to match past work.
Does this alternative support RAW from recent cameras?
Yes. Most current bodies are supported; check the vendor’s camera list before moving a big project. A good test is to import two or three RAWs from your model, confirm colors and lens profiles, and try basic edits. Update to the latest build if needed.