7 Steps to Recover Light, Colors, and Textures in Your Wildlife Images
May 29, 2024
Turn underexposed or blurry wildlife shots into stunning photos with Luminar Neo. Photographer Ujwal Pasupuleti shares expert tips for recovering light, colors, and textures, ensuring your images capture the wild's true essence
When capturing photos of wildlife, waiting for the perfect conditions is rarely an option. Oftentimes, the moment when an animal presents itself is a brief window that can close in a millisecond. The clearest shot may be underexposed, or a well-lit shot may turn out slightly out of focus.
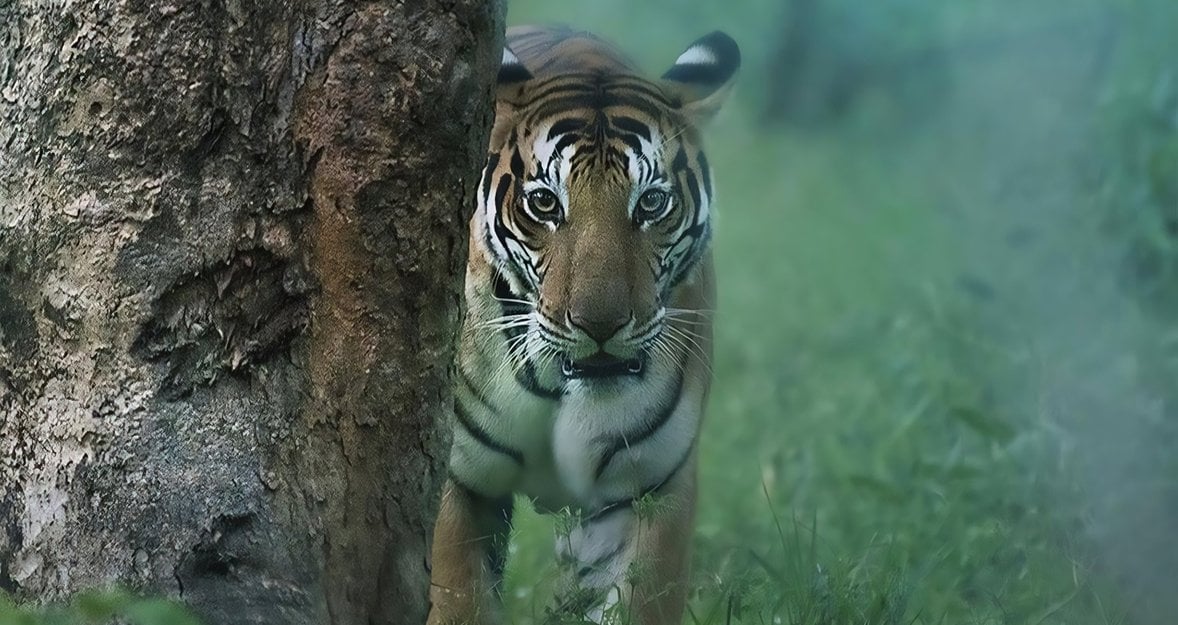
Luckily, it’s possible to address these issues in post-processing with a powerful photo editor like Luminar Neo. Nature and wildlife photographer Ujwal Pasupuleti presents an example in a recent Instagram post of how he was able to recover details in a rare shot of a tiger using Luminar Neo. He was also able to enhance some parts of it to capture the atmosphere of the scene that was lost amid the dwindling light.
"We were in Kabini National Forest in India, and it was our last safari of the day," Ujwal said. "We hadn’t seen any big cats on the previous three safaris and were about to give up. But then, just as we left the forest, we saw this beautiful tiger! It was almost dark, but the lush green background made the scene special."
Ujwal points out that the camera settings are still crucial to capturing as much detail as possible in the raw file, giving you the most flexibility during the editing process. For this shot, he set his shutter at 1/250 sec, aperture at f/5.6, and ISO at 2500. This resulted in an underexposed photo with quite a bit of noise due to the high ISO setting. Using Luminar Neo, he was able to save this photo and transform it into a brilliant shot by following these 7 steps:
1. Develop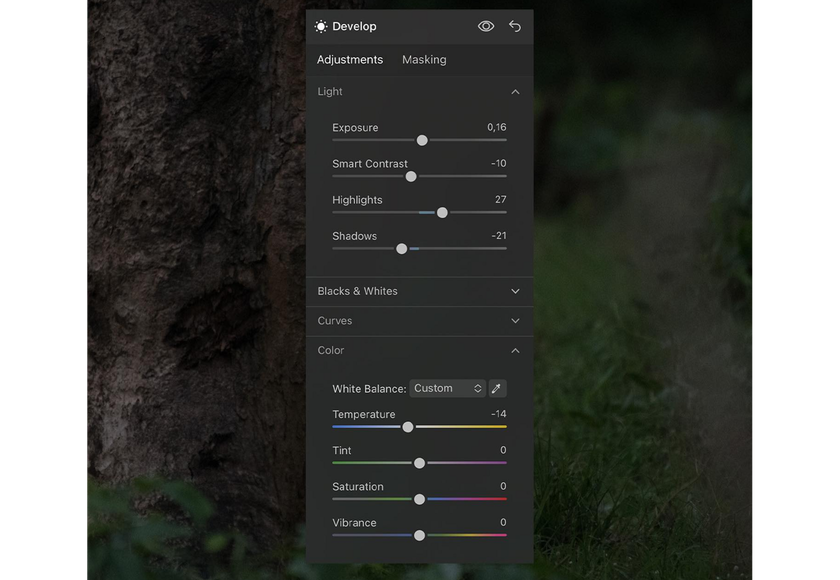

"To bring back the light, I began by increasing the exposure (0,16) and highlights (27) and decreasing the smart contrast (-10) and shadows (-21)."
Using the Develop tool, Ujwal was able to adjust exposure and lighting with precision. It is easier to brighten a darkened photo to see the original details than it is to try to recover details from an overexposed photo.
2. AccentAI
To bring out the details of the tiger, Ujwal used Luminar Neo’s AccentAI tool, located within the EnhanceAI tool. This control intelligently analyzes the photo and automatically adjusts multiple settings with one slider.
3. Mystical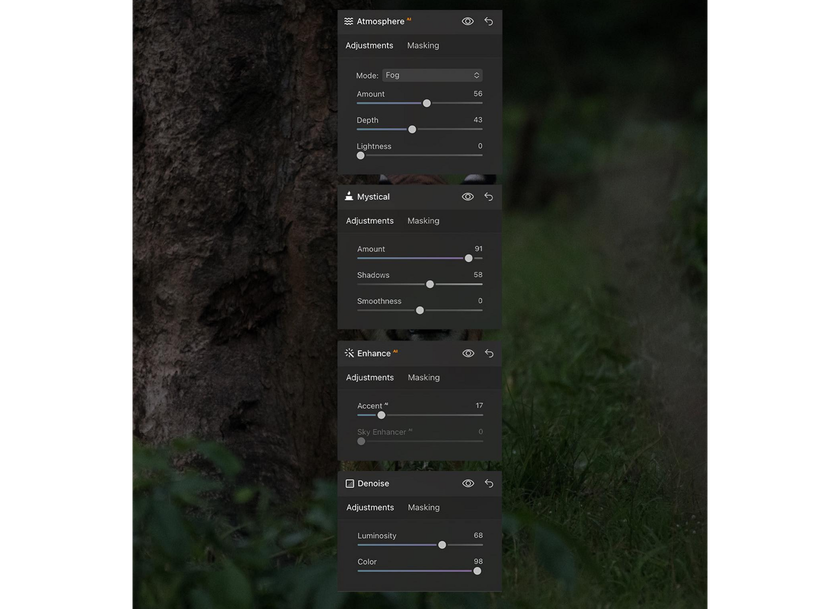

Using the Mystical tool, Ujwal added a dreamy softness to the light in the image that reflected the misty conditions he was shooting under that day.
Discover AI's Power in Wildlife Photography
Dive In Now4. AtmosphereAI
To fully capture the misty conditions, Ujwal used the AtmosphereAI tool to add some foggy haze that perfectly complemented the soft, dreamy light and magnified the natural qualities of the tiger’s jungle habitat.
5. Colors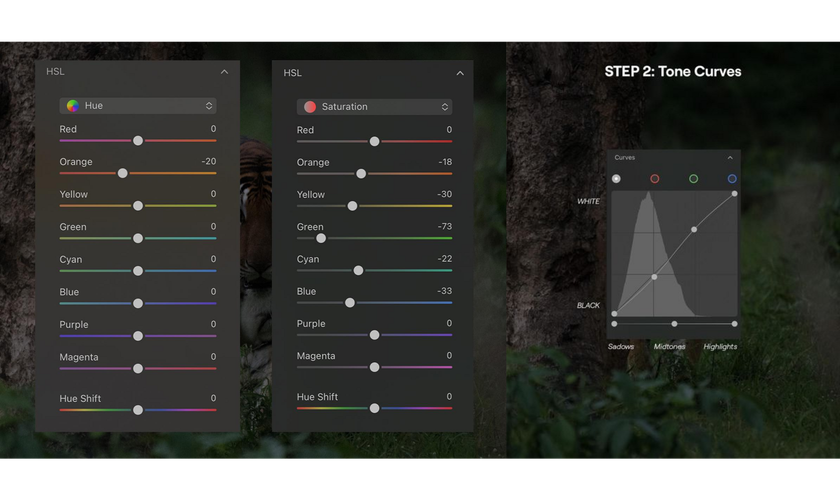

To recover color in the foreground and background, Ujwal made some precise adjustments to Hue and Saturation within the Color tool. This balanced out the cool green and blue tones that dominate the image.
6. Texture
"I accentuated the appearance of texture by adjusting the lighting and increasing the image’s sharpness," Ujwal explained.
These aspects are adjustable through the Light and Sharpness controls in the Develop tool.
7. NoiselessAI
"Finally, since the available light during this shot was minimal and I had to increase my ISO settings significantly to compensate, I used 'NoiselessAI' to reduce unwanted noise."
NoiselessAI is a powerful tool that can remove the grainy look of photos due to a high ISO setting used to shoot in low light. Using advanced AI technology, it intelligently analyzes your photo and automatically removes noise while maintaining the sharpness of all details.
Advanced yet easy-to-use photo editor
Get Luminar Neo NowAbout Ujval Pasupuleti
Ujval Pasupuleti hails from Telangana, India. He began his journey as an IT professional and has intertwined it with an unwavering love for wildlife and landscapes. Ujval views his camera lens as a gateway to capturing the raw beauty of nature.