Urban Photography: Find Beauty In The Concrete Jungle
May 16, 2025
New to street photography? This urban photography tutorial will help you spot beauty in the city, shoot with purpose, and make the most of light, timing, and atmosphere.
If you’ve ever wandered around a city with your camera, you know how quickly your memory card fills up. There’s no shortage of subjects—interesting faces, geometric buildings, street signs catching the light just right. But capturing something worth keeping? That takes more than just being there.
Urban photography is full of potential, but also full of distractions. If you’re just getting into it—or want to be more intentional with your shots—this guide is for you. We’re not only going to understand the urban photography definition, but also look at what actually works out in the field. These tips come from real experience—what’s helped me, what hasn’t—shared in plain language, without the fluff.
Let’s get into it.
What Is Urban Photography?
 Urban photography, in simple terms, is any kind of photography that happens in a city setting. But it can take a lot of different forms—street photography, architectural shots, environmental portraits, minimalism, documentary-style moments… all of that falls under the urban photography umbrella.
Exclusive Tools of Endless Possibilities in One AI Editor
Explore Now!It’s less about what you shoot and more about how you see the city.
You might focus on people, patterns, buildings, light, or mood. It’s not one-size-fits-all, which is why it’s such a great space for photographers who want to explore their style or improve their visual storytelling.
Urban Photography Sub-genres to Explore
Street Photography: Probably the most well-known. This is all about capturing candid moments in public spaces—people walking, talking, waiting for the bus, whatever. It’s less posed, more observational, and timing is everything.
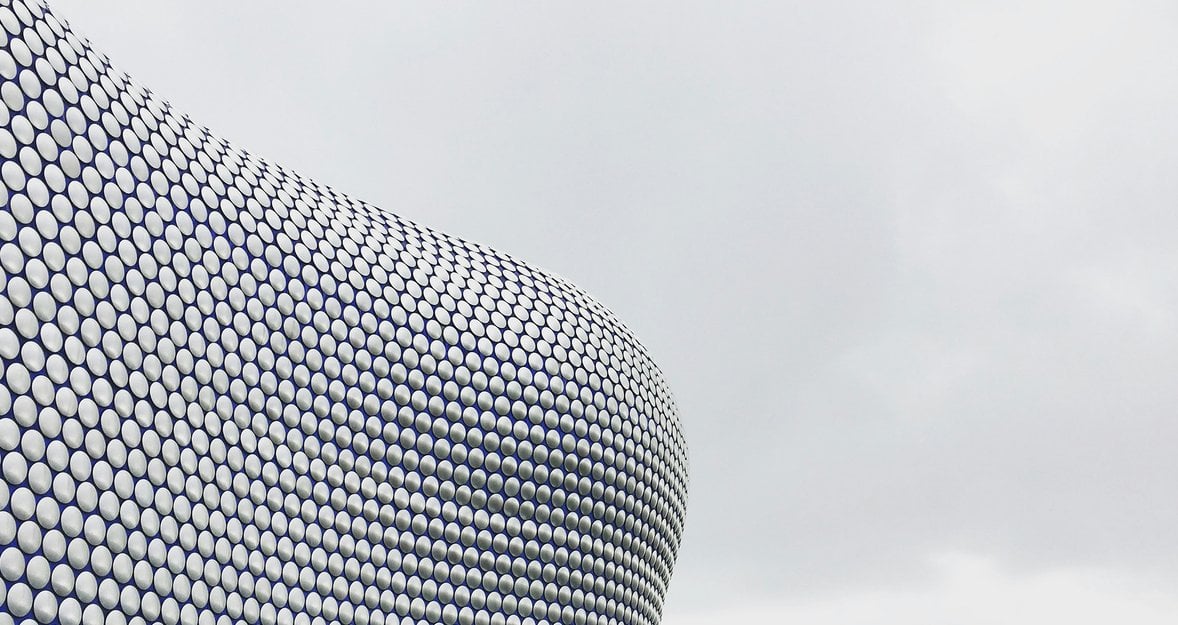
Architecture Photography: Here, the focus shifts to buildings. You can shoot entire structures or isolate interesting angles, lines, or textures. Old, modern, minimalist—whatever catches your eye. Urban architecture photography is a good way to sharpen your composition skills.
Urban Portraiture: This is where you combine people with the city itself. Think staircases, alleyways, textured walls, or subway stations as backdrops. It’s a bit more directed than street photography, and great for learning how to work with your environment.
Urban Decay: Not everything in a city shines—and that’s kind of the point here. This sub-genre focuses on the worn, weathered, and forgotten parts of the urban landscape. Crumbling walls, old signs, rust, broken windows—there’s a lot of story in the decay.
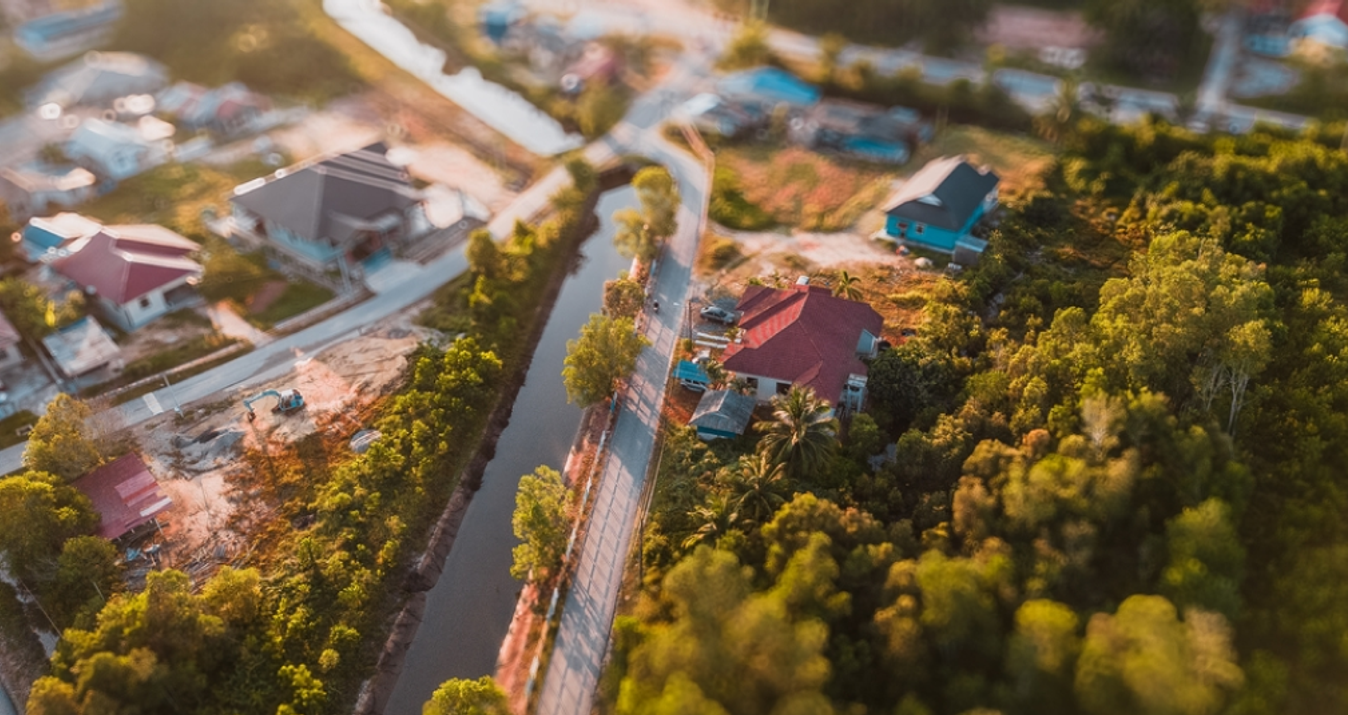
Cityscape: Wide shots of the city itself, often taken from a high vantage point. Think rooftops, parking garages, or bridges. Best shot during golden hour or at night when the lights come on. Great if you’re into dramatic skies or skyline silhouettes.
Night Photography: Cities come alive after dark. With so much artificial light, you can shoot at night without needing a ton of gear. Look for neon signs, car trails, reflections—just bring a tripod and be ready to work with slower shutter speeds.
Street Fashion: This overlaps with portraiture but zeroes in on personal style. Candid or semi-posed shots of people with great looks or interesting details—often taken during fashion weeks, local markets, or just while exploring stylish neighborhoods.
Abstract Urban: If you’re drawn to minimalism, this might be your thing. It’s all about geometry, patterns, reflections, and light. Zoom in on surfaces or shadows and see what kind of compositions you can create without telling a literal story. Tools like picture composition AI can help you fine-tune your framing or spot strong visual patterns during editing. It’s a great way to train your eye and explore new ideas.
How to Take City Photos: 5 Creative Techniques
 You’ve got your genres—now it’s time to add some creative muscle. These are techniques I’ve used myself over the years to bring more depth, energy, and visual interest to city shots. Give them a try, and don’t be afraid to push them in your own direction.
1. Long Exposure
Sure, long exposure works great for classic cityscape shots—but that’s just the beginning. Try slowing your shutter for street scenes, too. Pedestrians become soft blurs, cars turn into light trails, and suddenly you’ve got a photo that feels like time itself is moving. I’ve also used it for portraits in motion and even abstract reflections. All it takes is a tripod, a little patience, and some curiosity.
Quick tip: if you’re trying this technique and end up with more blur than intended, don’t stress. Many modern editors, including Luminar Neo, now offer tools to unblur a picture or recover sharpness in key areas—super helpful if you're working with a slightly shaky frame you still want to save.
2. Shoot Through Obstacles
One trick I come back to often: shoot through something. A passing bus, a gap in a fence, a crowd of people—anything that adds depth or visual texture between your lens and the subject. It can create a natural frame, hint at motion, or just add that layered look that makes a city shot feel more alive.
3. Harsh Light and Shadow
Don’t run from harsh light—work with it. When the sun slices between buildings or hits the edge of a structure, it creates dramatic contrast. Find those slivers of light and wait for the right subject to walk into them. It's a simple trick that can turn an average scene into a photo with serious punch.
4. Black and White
Black and white isn’t just a photo editor filter—it’s a mindset. Removing color helps emphasize shape, contrast, texture, and emotion. It’s especially effective for street photography and urban portraits. Try flipping a few of your color shots into monochrome during editing—you might be surprised at how much stronger they feel.
5. Leading Lines
One of the easiest ways to strengthen your composition is to look for leading lines—and cities are packed with them. Sidewalks, stair railings, fences, alleyways, train platforms, even the edges of buildings—all of these can naturally pull the viewer’s eye toward your subject or deeper into the frame.
It’s not just about finding a cool line; it’s about using it to build perspective composition—where lines create depth, structure, and a clear focal point. Try positioning yourself so the lines lead from the foreground toward your subject. It instantly adds visual flow and makes your photo feel more intentional.
Tips for Urban Photography: Timing and Weather
 Great urban photography isn’t just about where you shoot—it’s also about when. Light, mood, color, and even composition change dramatically depending on the time of day or the weather. You don’t need perfect conditions to get a great shot—you just need to know how to work with what you’ve got.
Elevate Your Photography with Our Advanced Software
Discover PricingHere’s a breakdown of how timing and weather can shape your urban photos, and what to keep in mind when you're heading out.
Time of Day
Golden Hour | This one’s a favorite for a reason. The hour after sunrise or before sunset gives you soft, directional light and warm tones that instantly elevate your shot—whether it’s a skyline, a street scene, or a portrait. It’s also super forgiving in post-processing, especially if you like shooting in natural light. |
Midday | The light here can be harsh—overhead sun tends to flatten your scene, kill shadows, and desaturate colors. But if you use it right, you can still get solid results. Look for shaded areas between buildings to create contrast, or embrace the direct sun to play with bold shadows and patterns. It’s tricky, but not impossible. |
Blue Hour | That short window just before sunrise or right after sunset brings in cool tones and soft light—perfect for moody, cinematic city shots. It works especially well for reflective surfaces and night transitions. Just be quick—the light fades fast, so planning ahead really helps. |
Night | Once the sun’s gone, you’re working almost entirely with artificial light. Think neon signs, headlights, lamplight, and reflections. You’ll want to shoot in manual mode, bring a tripod (or steady hand), and experiment with longer exposures. Night photography has a vibe all its own—the city feels completely different after dark. |
Weather Conditions
Bright Sun | This ties back to midday challenges. The light’s harsh, colors can look washed out, and shadows disappear. But buildings can work to your advantage—they block light and create patches of shade you can shoot in. Look for pockets of contrast to make your scene pop. |
Cloudy Days | Flat light doesn’t have to mean boring. Cloud cover acts like a giant softbox—softening shadows and making colors richer. It’s also great for portraits: less glare, smoother skin tones, and even lighting. Don’t skip cloudy days—they’re surprisingly versatile. |
Rain | Wet streets, reflections, puddles—rain completely transforms a city scene. I always bring a microfiber cloth and a small umbrella to protect my gear, then head out for some reflective night shots. Rain adds motion, mood, and texture—especially if you’re shooting handheld under glowing streetlights. |
Snow | Snow simplifies everything. It covers clutter, adds contrast, and gives you clean lines to work with. Urban shots in snow tend to look more minimal and graphic—great for experimenting with negative space and bold framing. |
Fog / Mist / Haze | If you’re after atmosphere, fog is your friend. It adds mystery, flattens depth in a good way, and lets you isolate your subject. I use it a lot when I want the scene to feel softer or more abstract—especially in street or architecture shots. |
The Bottom Line
Urban photography is all about spotting the beauty that hides in plain sight. Once you start paying attention—to light, lines, people, motion—it gets easier to see potential shots everywhere. That’s part of what makes this genre so addictive: every walk around the block has the potential to surprise you.
The more you experiment with different sub-genres, times of day, and weather conditions, the more variety and mood you'll bring into your work. Mornings feel different than evenings. Rain gives a city a whole different texture than sunlight does. Pay attention to those shifts—they’re part of your toolkit.
So grab your camera, head out, and start exploring. The best way to improve is to shoot often, stay curious, and look at your city like it’s brand new. There’s always something waiting to be captured.