September 18
11 min. to read
How to edit your beauty portraits Luminar Neo

Capturing a person's raw essence of beauty through a photograph is a fine art. And just like any art, it requires retouching to get closer to perfection. It is where the magic of post-processing enters the scene. With the right tools and techniques, you can accentuate features, correct imperfections, and create captivating visual narratives.
This article explores the essential techniques on how to edit portrait photos with precision and finesse, focusing on the powerful editing tool known as Luminar Neo.
Why To Choose Luminar Neo
 Below, we will explain how to use Luminar Neo for beauty portrait retouching. Luminar Neo is an AI-based image editing tool that many photographers come to depend on as part of their post-production workflow, so we are about to observe its work from the point of view of enhancing beauty portraits.
Luminar Neo is an incredible standalone tool for editing your photos. The device includes a wide range of built-in presets. These presets allow photographers to have layers and work on their images. It is required to figure out how to incorporate Luminar Neo into your workflow. Hence, every photographer has a different workflow when working on their pictures. Users have found Luminar Neo to be efficient at some of the beauty work. Some of you may use the tool already or need help with it and are trying to figure out how it works in your workflow.
Luminar Neo is not the only photo editing software for enhancing beauty portraits. So why do so many photographers rely on it when they want to beautify their headshots?
First of all, most premium-class editing tools are unaffordable for average people. Secondly, let's talk about the newbie photographers. The learning curve of software like Photoshop can confuse them — they can spend hours and hours trying to figure out what the next step should be, and it is not worth it when they want to post a selfie on social media.
Even the professionals who need to give their clients a bunch of perfectly edited photos as soon as possible would prefer the editing process to be faster and easier with an easy-going and user-friendly editing tool, such as Luminar Neo. In the following section, we will learn how to edit a beautiful picture perfectly using this tool.
Luminar Neo Іs The Software For You
 So, enter Luminar Neo. Once you get into the Luminar interface, it is straightforward. You have reached preset-driven parts, where you can just come and say, "Okay, I just want some one-click edits."
We can select "high key," where you can see the before and after by just bringing it in. If we want to do some more beauty retouching, we can hit "vignettes," and there are a lot of presets that are built in. But if you are not a presets fan and prefer to control the editing process from beginning to end. You should avoid the presets and go into the general edit tab.
In the portrait area you have in Luminar Neo, there are plenty of possibilities for creative experiments with your beauty portraits. For example, you can add bokeh, you can work on the face, you can work on the skin, you can work on the body, you can make it high key — all of the basics.
The Definitive Solution for Picture-Perfect Portraits
Discover Today!
In some advanced editing tools like Photoshop, some of these features still need to be included. Others can be buried within the layers, which means these features are out of reach for those users who cannot master their complicated learning curves, as we stated above. And you start getting into layers. It is nice, and you will see how efficient Luminar Neo is compared to other editing tools of a similar kind.
How to Edit a Portrait in Luminar Neo: A Brief Guide
The first thing you will do when editing your beauty portraits with Luminar Neo is cleanse the face.
Step 1. Lips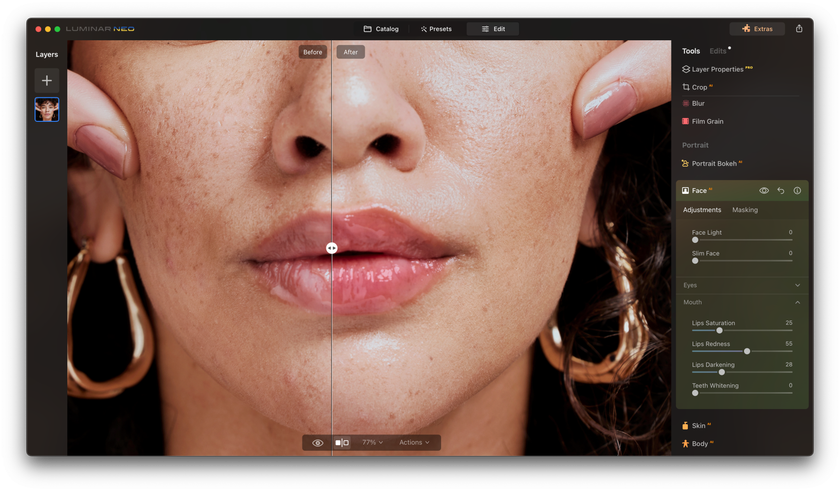

Let’s begin with the lips. Adjust saturation on the lips, adjust redness on the lips, darken the lips, and whiten the teeth — these are the basic things you are doing in case you are working on headshots or portraits.
Step 2. Eyes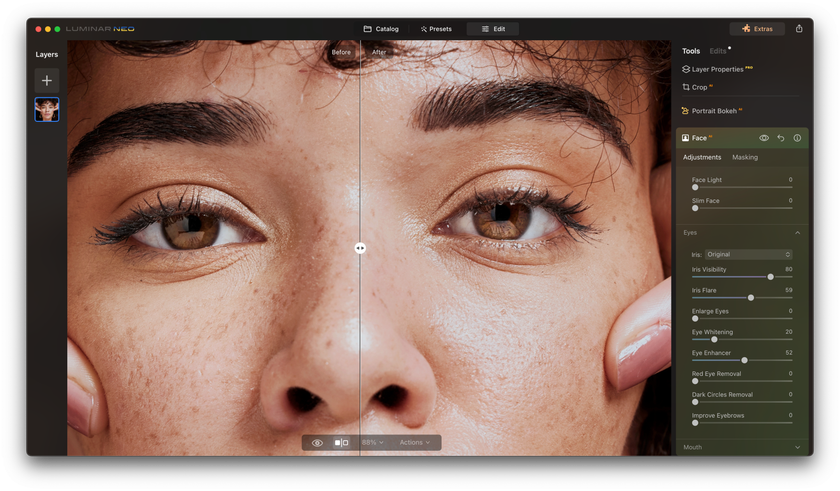

Let’s go further. The next step is the mirror of the soul — the eyes. There is no universal advice on editing the eyes perfectly, so you can mess around and experiment until the model’s eyes start telling the story you expect your audience to read from your photo. Luminar Neo has many built-in features to experiment with when editing the eyes. We can make the eyes bigger, we can make them wider, we can enhance the saturation to remove dark circles, and there are many more things to try.
Step 3. Face 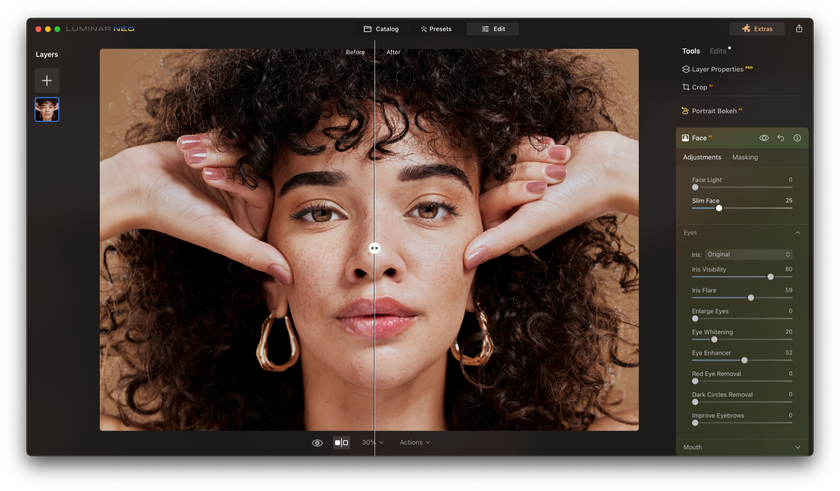

Now, we should focus on the face as a whole. Subtly slim the face if necessary. The face is the key element of every portrait, so make it a little brighter using the "face light" feature to attract viewers' attention.
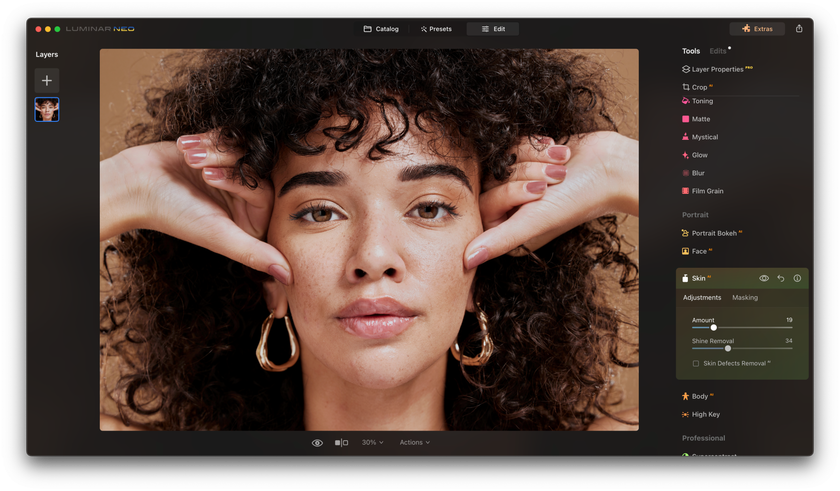
Step 4. Skin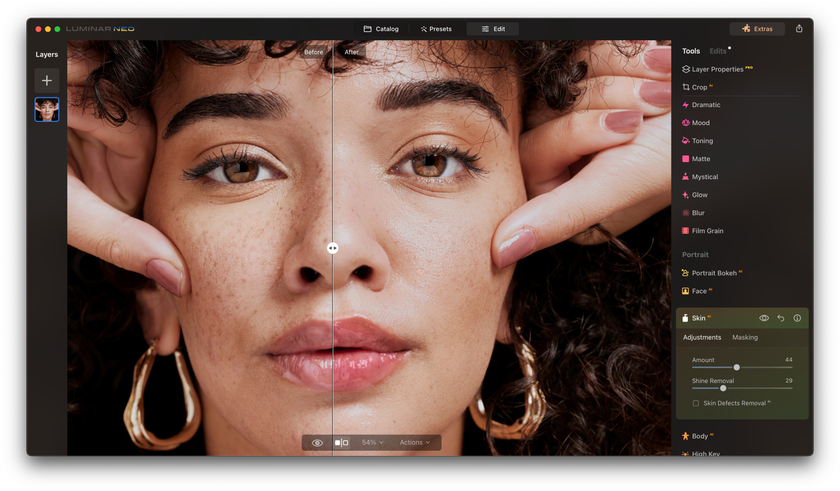

Now jump down to the skin to eliminate some disturbing minor defects, if any. Do some masking with a brush, linear gradient, or radial gradient, or allow it to mask AI. It will find all the face and skin and then apply the masking. Ensure you only use a little skin softening through gradients and/or vignettes. The skin might be flawless, but the model might look unnatural, like a plastic doll, not a living human whose story you want to tell through the portrait. So, keep the balance.
The attention should be paid to details. But if the final result is not on billboards or banners, you can use less than 100k zoom while editing your pictures to find minor drawbacks.
Step 5. Vignettes
Let's lighten the face while maintaining a natural balance of light and shadows. For this, we will use a vignette. We can do lots of vignettes in different areas by adding some shading. You can control the vignettes' intensity, size, and shape. To see changes and influence them, use the function to turn vignettes on and off. Having fiddled with them, you can easily add the effect of studio professional light to the face.
Step 6. Finalling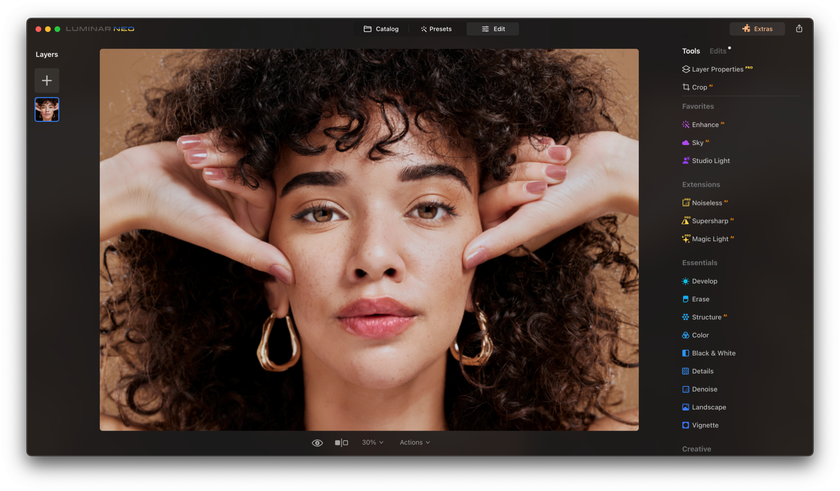

The final touch-ups include adding toning via the built-in presets or manually applying contrast and saturation.
It is how Luminar Neo helps you to turn an average headshot into a marvelous beauty portrait within a few minutes.
Download Luminar Neo and Get a 7-day Free Trial
I'm in!
Bottom Line
In conclusion, portrait editing is a dynamic process that allows you to bring out the best in your subjects while preserving their natural beauty. We have delved into the world of how to retouch photos and how to touch up photos with Luminar Neo, a tool that empowers photographers with its versatile capabilities.
Through careful editing, you can enhance skin tones, refine details, and create images that resonate with viewers on a deeply emotional level. However, it is important to remember that the ultimate goal of portrait editing is not just about technical expertise but also about connecting with your subjects and conveying their unique stories through your lens.
So, armed with these valuable techniques and the guidance from the tutorial linked above, embark on your journey to create captivating beauty portraits that leave a lasting impression. With Luminar Neo as your trusted ally, you will unlock endless possibilities for turning your photographic visions into reality, making your portraits stand out in the world of photography.
 >
>
