September 15
12 min. to read
How To Erase Unwanted Objects From Your Photos
 You might wonder, "Can I erase something from a photo?" Good news! This guide will show you simple steps to remove the unwanted things from your pictures. With the right tips, your photos can look just the way you want them to! After all, every snapshot has the potential to be picture-perfect with a little touch-up.
Let's get started!
Clear Photos, Clear Message
 In today's world, we see pictures everywhere – on our phones, computers, social media, and even billboards. With everyone snapping and sharing, the digital space is like a giant photo album that never ends. So, how do your photos get the attention they deserve? By keeping them clean and free from distractions.
Imagine you're in a busy room, trying to tell a friend an important story. You'd want to find a quiet corner, away from all the noise, right? In the same way, a clear picture without any unwanted items or backgrounds can tell its story more effectively. Distractions in a photo can be like background noise – they take away from the main point.
In our digital age, clean photos aren’t just nice to have; they're a must. They grab attention, make your message crystal clear, and ensure your images remain memorable in the sea of visuals. So, let's aim for clarity and let our photos do the talking!
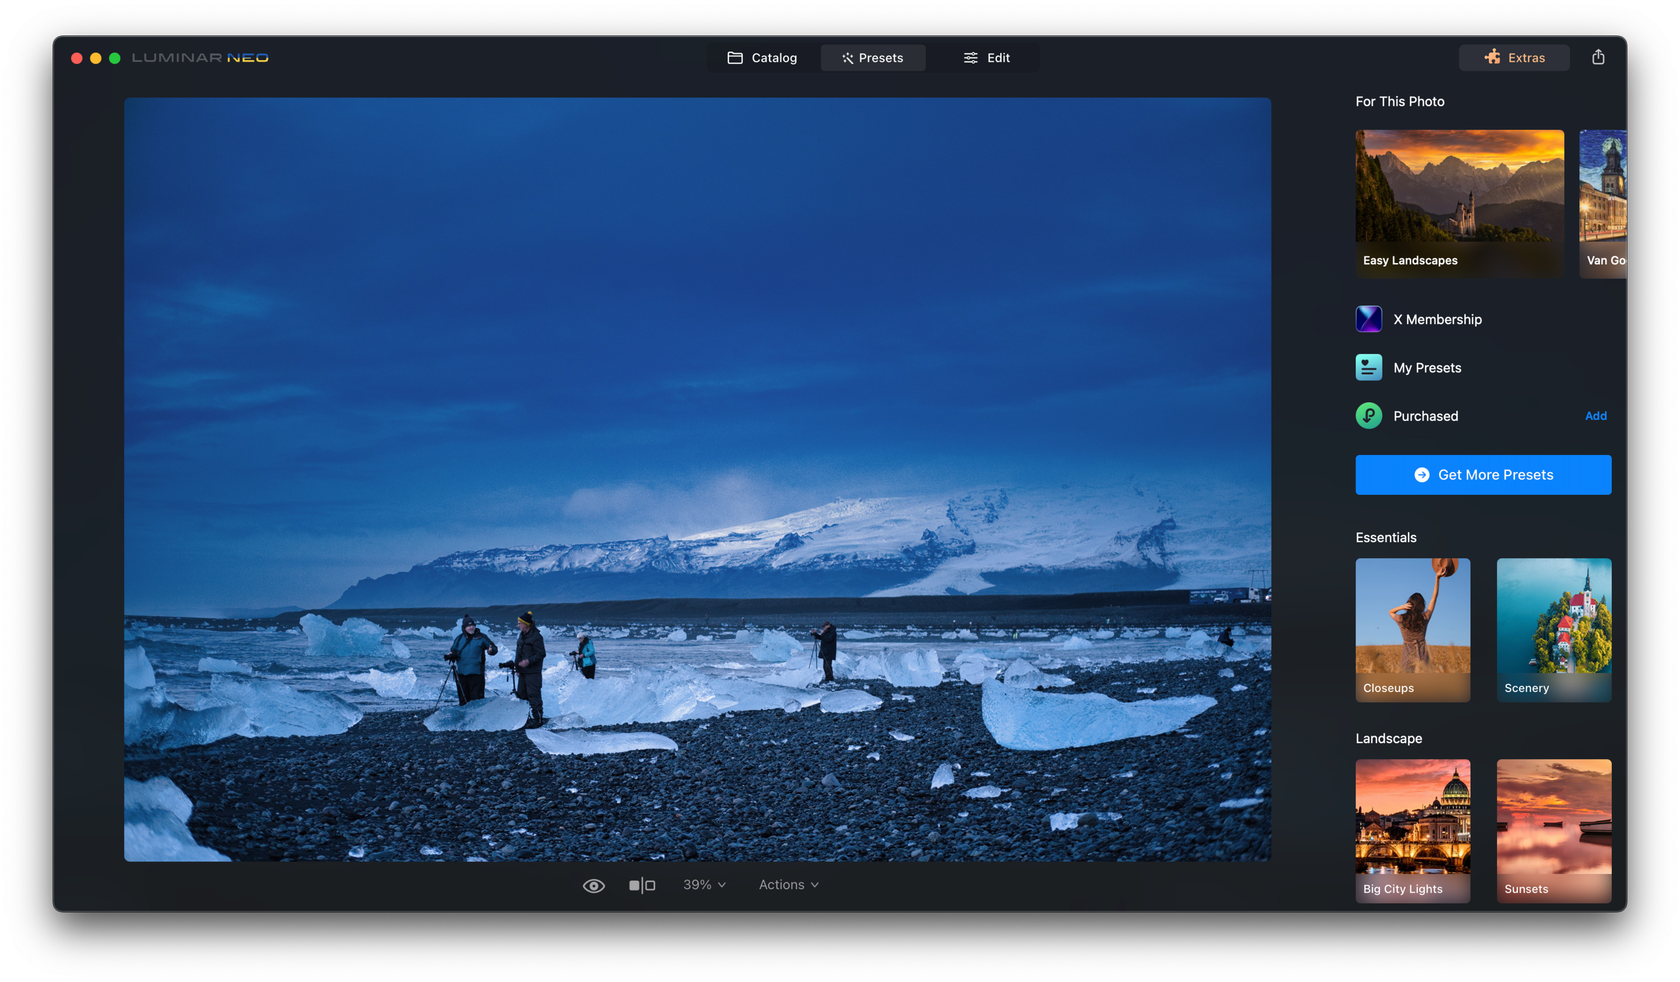
Your Solution for Removing Unwanted Objects
Explore In Luminar Neo!
Why Edit Out Objects
 Have you ever clicked a photo and later wished that a soda can or stray bird wasn't in the shot? You're not alone, and you've probably wondered, "How to remove something from a picture?" Removing details from photo online is a common practice, and there are strong reasons for it.
First, there's the issue of distractions. Picture this: You've captured a breathtaking sunset, only to later notice a random balloon stealing some of its thunder. Such unintentional intruders can divert attention away from your photo's main subject. Then there's the matter of those unwanted guests—perhaps a passerby who wandered into your scenic shot or a car parked in a spot that disrupts your picture's harmony. These elements can jar the story you're trying to share.
Beyond just the removal of unwanted items, there's the overarching goal of aesthetic enhancement. With a little tidying up, what was once a good photo can become an eye-catching masterpiece.
So, remember: a clean and well-composed image can create a lasting impression, telling your story just as you envisioned!
Using Editing Software
 In the vast sea of photo editing tools, Luminar Neo stands out like a lighthouse. Why? Because it's not just any ordinary software—it's a dynamic blend of user-friendliness with top-tier editing capabilities.
Designed with both beginners and professionals in mind, Luminar Neo offers intuitive solutions for those common (and sometimes pesky) editing challenges. In this tutorial, its relevance can't be stressed enough. We've chosen Luminar Neo as our go-to platform because it simplifies complex tasks, like erasing unwanted objects, without compromising on quality.
So, as we delve into the art of cleaning up your photos, you'll see just how Luminar Neo makes the process efficient and the results impressive.
Instant Object Removal in Luminar Neo
Choosing the right tools can make all the difference. When you find yourself pondering questions like "How to erase parts of a picture?" or "What's the best way to remove that distraction?", it's crucial to have reliable software by your side. Luminar Neo, with its advanced suite of features, stands out as an exceptional choice!
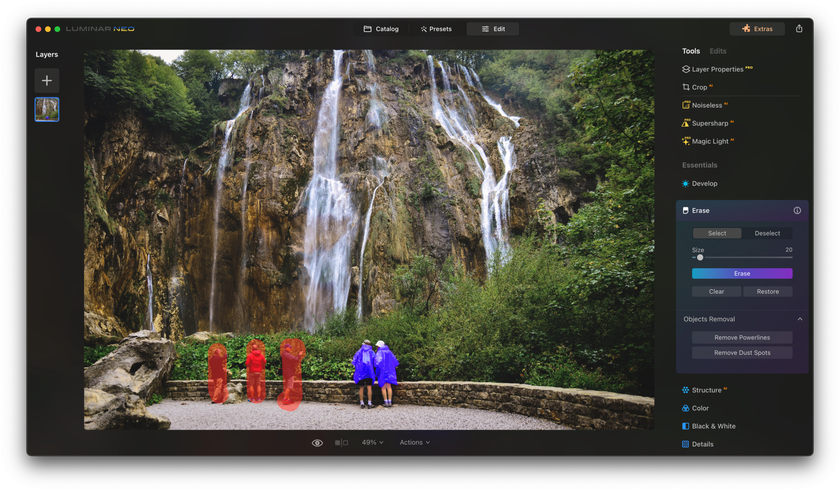
The Erase tool is exactly what you need there! It works non-destructively and matches the original pixels’ texture, lighting, and shading without using a layer. Think of it like having a smart assistant. Instead of just wiping away objects, the remove object AI technology in Luminar Neo really gets the whole picture. It removes things while making sure the background still looks natural and in sync. It's like magic, but smarter!
After understanding this tool, practice becomes essential. Every photo is unique, and the art of editing is as much about intuition as it is about technical skill. As you spend time with the software, you'll find your rhythm and style!
Now, let’s talk about how to use the Erase tool!
Step-By-Step Guide
- Activate the Erase Tool: Once you select this tool, your cursor becomes a brush ready to paint over the unwanted areas.
- Selecting Areas to Erase: Simply brush over the parts you want gone. A red overlay will appear, marking them for removal.
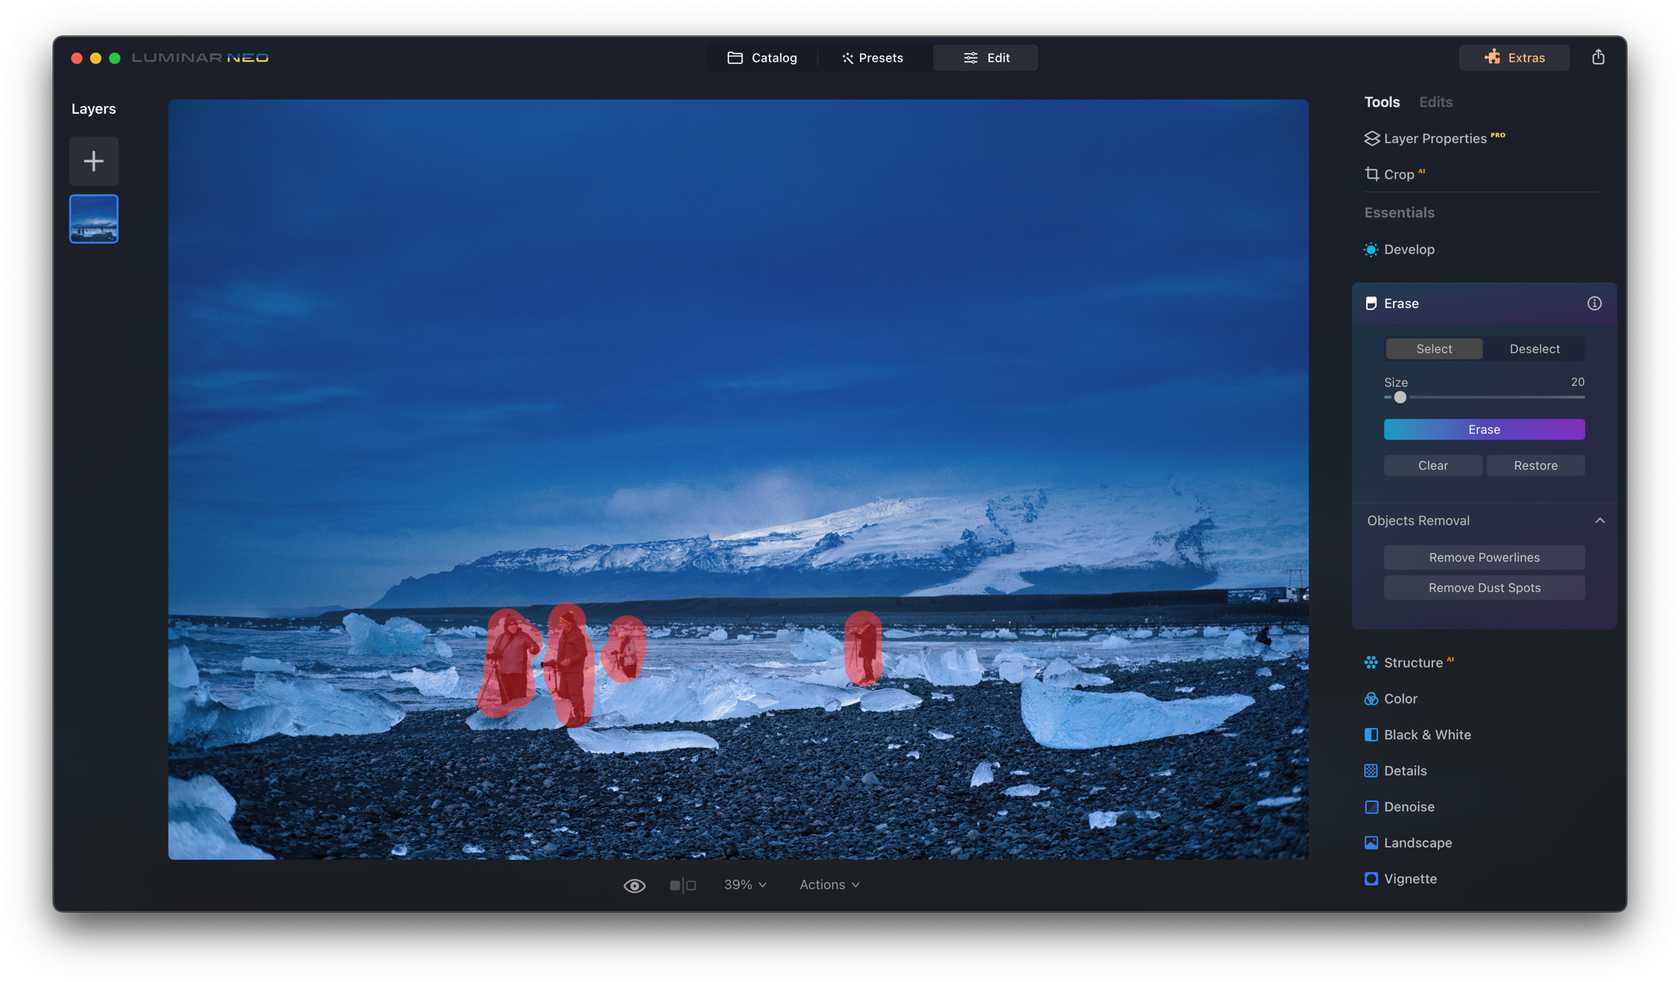
- Deselecting Areas: If you change your mind, click on 'Deselect'. This will remove the red overlay from areas you don’t want to erase.
- Adjusting Brush Size: Use the 'Size slider' or the bracket keys [ ] to control the brush size. It's best to keep it slightly bigger than what you're erasing.
- Execute the Erase: Once satisfied with your selection, hit the 'Erase' button. The areas under the red overlay will vanish.
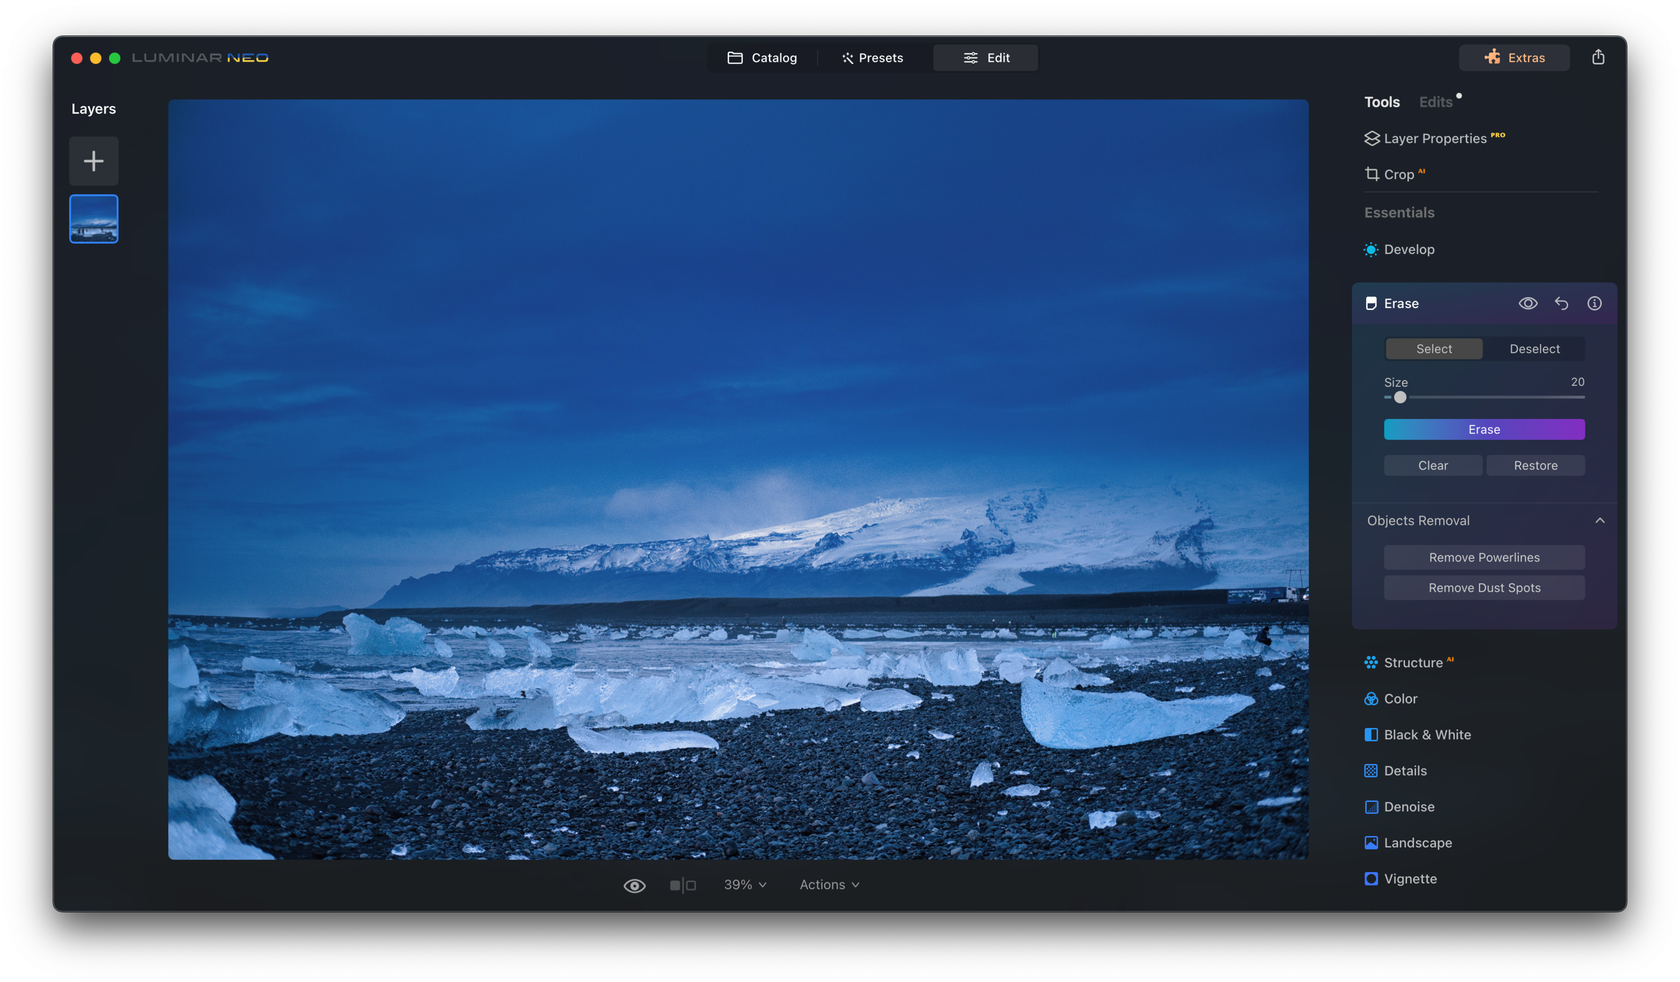
- Clear or Start Over: If you want a do-over, 'Clear Selection' will reset your marked areas.
- Undo Erasing: Changed your mind? Click 'Restore' to bring back what you just erased.


In addition, if needed, you can use AI-based tools that allow you to remove powerlines and dust spots from the photo in one click. So, the next time you notice something out of place in your picture, you know which tool to grab!
A 7-day Free Trial of Luminar Neo with No Obligation
Get it now!Catching Up with the Instructions
- Match the Area: When using tools like Clone & Stamp, pick a part of the photo that looks like the spot you're fixing. This makes your edit blend in.
- Think About Light and Feel: Look at the shadows and patterns in your photo. When you take something out, try to keep the same light and pattern around it. This way, your edit won't stick out.
- Take Your Time: Don't rush. Make small changes bit by bit. This helps keep your photo looking real, just like you took it that way.
With these simple yet effective tips, your photos will shine, and viewers will appreciate the flawless finish without ever realizing the edits you made.
Additional Tips
 When you've taken out unwanted objects from a photo using Luminar Neo, there's often a little more work to do to make the image truly shine.
1. Balancing Your Photo Right
It's essential to think about your photo's overall balance and composition. The 'Rule of Thirds', where you imagine your image split into nine equal sections, can guide you. Place the vital parts of your photo at the intersections of these sections for a pleasing look. And if you've got some empty spots after removing objects, don't leave them hanging. Draw from nearby patterns or backgrounds to fill them in seamlessly.
2. Color Makes a Difference
After you've made edits, the colors might need a bit of a tune-up. Adjust the brightness, contrast, and saturation to get the right mood. And if the color feels a bit off after your edits, don't be shy to use a filter. It can help unify the image and bring back its original essence. Find out more about color and its temperature here!
3. Details Matter
A final touch often lies in the details. If your edits made parts of your photo lose their sharpness, a quick touch-up can bring them back to life. On the other hand, a subtle blur can be your ally in smoothing out areas and making the whole image blend well. For more, check the article ‘How To Sharpen Blurry Image With Sharpening Software.’
With some care and attention, your photo won't just be free from distractions—it'll be a refined piece of art.
Wrapping It Up
So, you’ve journeyed with us through the steps of turning your near-perfect shots into masterpieces. By now, you should be confident in answering the question, "How to remove an object from a picture?" with a resounding, "With ease, using Luminar Neo!" Whether it's erasing a photobombing squirrel or enhancing a sun-kissed beach, you now possess the knowledge to do so with style and finesse.
Remember, photos are more than just captures of moments; they are narratives, memories, and artistry. With the tips we've shared, you're well-equipped to craft stories worth a thousand words—and ensure every pixel tells the tale just as you intend.
Thank you for joining us on this editing adventure! Go out, click, edit, and let your visuals leave an everlasting mark.
Until next time, happy editing!
 >
>
