December 22
28 min. to read
How to Photograph Lightning
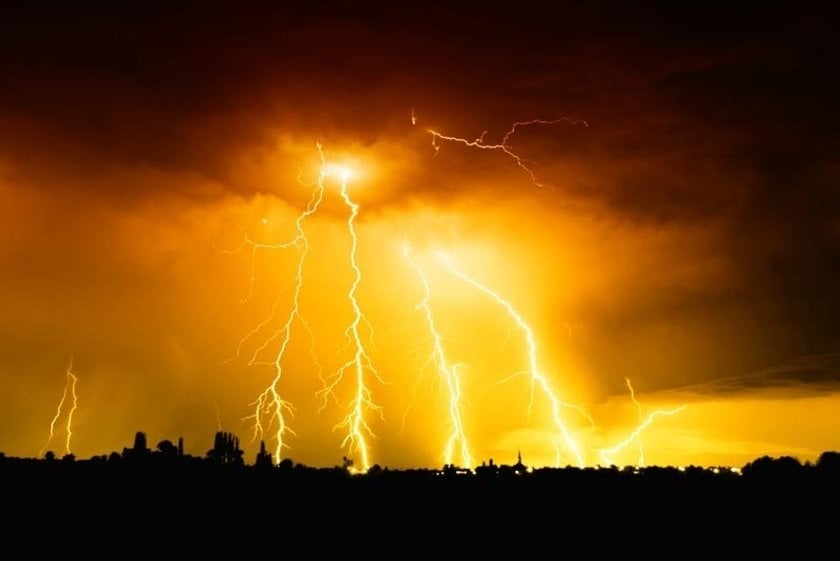
Lightning is one of the most powerful forces in nature. For all of its potentially destructive power, it's also one of Mother Nature's most captivating and beautiful sights. With an estimated 100 lightning strikes per second worldwide, this gorgeous phenomenon is common enough for almost any photographer, anywhere, to have opportunities to capture it. Because of the high frequency and strength of the electric charge, it is better for the photographer to stay away from the epicenter. But even under such conditions, it is possible to make beautiful lightning pictures with the help of a remote shutter and a prepared workstation.
 The results can be incredibly rewarding, but great lightning shots aren't usually accidental; sometimes, it is necessary to take a test shot or even several before choosing the best result. This article will give you some pointers to increase your chances of successful – and safe – lightning photography.
Safety First. Safety First. Safety First.
The above heading is not a typo. There is nothing more important in taking lightning photos than ensuring your personal safety. Let's put that in perspective: a lightning bolt can hold as much as 1 billion volts of potential energy and the air around it can be many times hotter than the surface of the sun. Cloud-to-ground strikes can strike the earth anywhere, even arcing miles away from their point of origin. As many as 2,000 deaths occur every year from lightning strikes. Don't become one of those statistics.
 No matter how tempting it may be, being outside in an electrical storm is risky and standing next to a metal, or carbon-fiber tripod only increases the risk. There's no sure way to avoid being struck, but common sense will help make cool lightning pictures and not get hurt in the process. If it's raining where you are, you're under the storm, and your chances of being struck are greater. If possible, stay indoors. A vehicle is a better choice than standing in the open. Better yet, stay far away from the storm and increase your chances of capturing some great wide-angle shots.
We also recommend using special equipment for photographing lightning:
- digital camera capable of shooting long exposure time with manual focus;
- tripod;
- remote shutter button release;
- automatic lightning trigger;
- rain protection.
These will protect you from a direct hit from the discharge and allow you to take distant lightning photos.
Technique for Capturing Lightning Strikes
There are different techniques for creating photographs. Each of them is designed for different scenarios and shooting conditions. However, none of them guarantees excellent results and clarity of pictures of lightning strikes. It's best to act situationally and prepare for different shooting scenarios. So, here are ways to create lightning photos.
Basic camera ISO and aperture settings
Depending on the shooting conditions, lightning photography settings may vary. Basic example:
Blinding | Average | Dull | |
Close Lightning | ISO 100 @ f/16-22 | ISO 100 @ f/5.6-11 | ISO 100 @ f/5.6 |
Mid-distance | ISO 100 @ f/11 | ISO 100 @ f/5.6 | ISO 200 @ f/4-5.6 |
Distant Lightning | ISO 200 @ f/4 | ISO 200 @ f/2.8 | ISO 200 @ f/2.8 |
This is only a rough camera setup; you will need to experiment with setting the best parameters to get quality thunder and lightning pictures instead of lightning bug photos.
Day/Night shots
As a rule, it is nighttime photography that is considered easier and not demanding of the skills of the photographer. This is not entirely true. The fact is that photographing lightning at night is technically difficult and can result in blurry or overexposed images.
Experiment! Set different ISO settings and apertures. If not the first flash, try to catch at least a few residual flashes.
How to Capture Perfect Moment
We have all seen beautiful photos taken in various locations and shooting conditions. But little thought has been given to how to take pictures of lightning. Is it necessary to calculate the moment to find the right angle? Yes. Only 10% of pics are taken spontaneously, and the rest result from long and diligent attempts to catch the flash.
To get the most attractive image when photographing lightning, you need to follow 3 rules:
- Set the digital camera on a tripod. This prevents image distortion and blurring and allows you to set a fast shutter speed. Using a tripod ensures that photos are clear and detailed.
- Watch the storm's movement and record the most frequent points of discharge. This will allow you to take beautiful pictures of storms with lightning under almost any conditions. The main thinis to choose the angle and avoid the epicenter.
- Experiment with shutter speed, ISO, and aperture, and use the lightning trigger. When shooting lightning storm pictures, it is essential to avoid overexposure and too-dark shots. Contrast should not be excessive or insufficient.
The best lightning bolt pictures are taken using the lightning trigger. It is important to check its operation and camera settings before starting the photo shoot. Only then can you see the lightning in your photos. Use the advantages of your cameras, lenses, and accessories to create fantastic pictures of lightning bolts.
Equipment For Photographing Lightning
Alright, now that we've covered safety, let's move on to the fun part. There are two basic ways to photograph lightning. One involves the use of a lightning trigger and is a fairly sure way to get the shot. The other is my personal favorite and is more of a matter of luck, but doesn't require any highly specialized equipment. Let's start with the more sure method:
Using a Lightning Trigger
A lightning trigger is a very sensitive light detector connected to a very fast electronic shutter release. Most triggers are designed to mount on your camera's flash shoe and connect directly to the electronic shutter release socket.
A lightning strike actually consists of several flashes in segments that occur within milliseconds of each other. A trigger detects the first flash and opens the camera shutter immediately. The duration of the exposure depends on the camera settings, and many triggers on the market can actually work with your camera's auto-exposure settings. The procedure for using one in lightning photography depends on the brand and model you purchase, so I won't go into details.
There are many high-quality triggers on the market today and most help you to get beautiful pictures of lightning, even though they can be purchased at a surprisingly reasonable cost. I recommend searching on Amazon.com and comparing features and pricing to find the one that suits your needs.
The Old-Fashioned Way
 How to take photos of lightning and get the best results? If you're old-school like me, and enjoy surprises, taking lightning shots doesn't require anything more than a tripod and an SLR or DSLR. The trick is to stabilize your camera, point it in the general direction of the lighting activity, and hold the shutter open to let those ultra-bright flashes record themselves on your film or sensor.
The downside to this method is that it involves a lot of guesswork. Since lightning is unpredictable, there's no way to know how long you'll need to keep the shutter open to capture one or more strikes, so there's no real way to calculate your exposure. Too many strikes may overexpose lightning pictures. If you're framing buildings, a skyline, or something else in the shot, it could be silhouetted by the bright flashes. You may also end up with a lot of frames with no strikes at all.
Despite all of the above, it's possible to grab some really spectacular lightning photographs with just some basic steps:
- Find a safe location to photograph the storm.
- Mount your camera on a tripod, bean bag, etc.
- Use the highest resolution setting and shoot RAW if possible.
- Set your ISO as low as possible.
- Turn on Long Exposure Noise Reduction (if possible)
- Set your exposure to Manual.
- Turn off autofocus and vibration reduction/image stabilization.
- Set your aperture at f/8 – f/11.
- Connect a cable release or remote release.
- Use a wide enough focal length to increase the odds of capturing strikes.
- Frame your shot.
- Set your focus at infinity or focus on the object(s) you're including in the shot for getting lightning photos.
- Take several multi-second exposures, waiting for lightning strikes.
Obviously, the longer your shutter is open, the more light will be recorded, so you'll want to limit the exposure time. I prefer to use Bulb shutter mode, but you can set your shutter speed to 2 – 3 seconds and then judge the results as you capture lightning.
Tripod, camera cover, spare batteries, memory cards
Everyone who wonders how to photograph lightning must understand that this process is time-consuming and resource-intensive. The minimum set of equipment for the job includes:
- sturdy tripod, preferably with an axis stabilizer;
- spare batteries for the camera and trigger;
- extra memory cards (RAW format is resource-intensive);
- cover to protect your camera, equipment, and you from the rain;
- weather-appropriate clothing, especially for storms;
- navigator, communication gear, and first aid kit (for outdoor shooting);
- extra lenses and filters for experimenting;
- remote control to minimize shake when you release the shutter.
All of the above not only creates a comfortable shooting environment but also improves the quality of lightning strike pictures. For example, a tripod can even out shake, and lenses with filters customize the image by changing the depth of the photo and the color tones.
Locating Suitable Spots for Lightning Photography
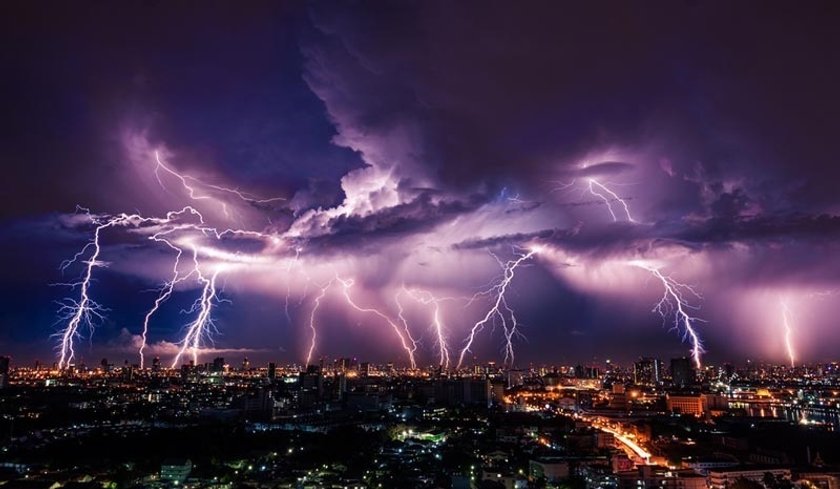
Capturing the raw power of nature in a frame is both a thrill and a challenge, especially when you're trying to figure out how to photograph lightning at night or during the day. A location's attributes can either magnify or diminish the drama in your photos. Elevated areas like hills or the tops of tall buildings provide an encompassing view of the storm, making it easier to shoot lightning as it dances across the horizon.
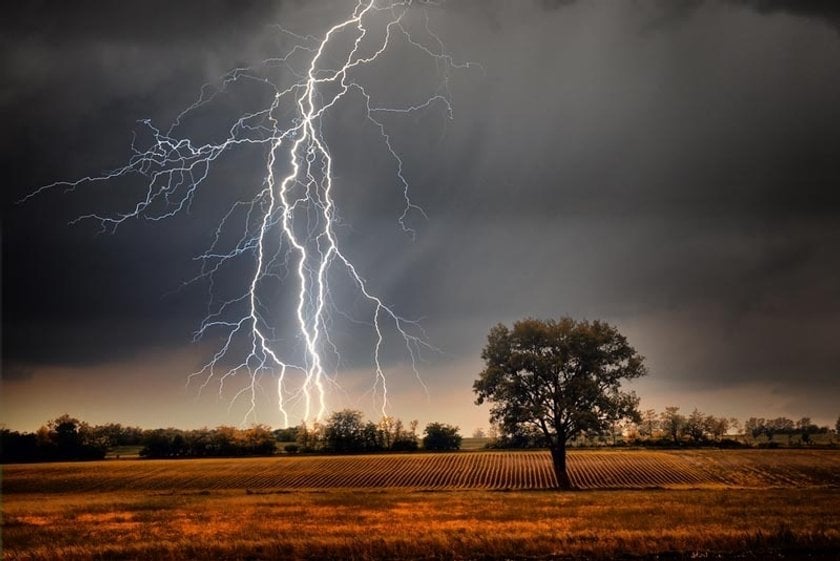
Yet, if you're pondering how to take a picture of lightning with a touch of serene contrast, consider the expansive plains and open fields. These landscapes set a tranquil stage, emphasizing the storm's fury against a calm backdrop. It's this juxtaposition that can turn a simple photo of lightning into a masterpiece.
However, as you chase the perfect shot and explore different techniques on how to capture lightning on camera, always prioritize safety. Steer clear from water bodies during storms, and ensure you have a quick exit plan. After all, the pursuit of the perfect lightning photo should be exhilarating, not perilous.
Tips for Composing Lightning Shots
 When it comes to learning how to capture lightning on camera, understanding composition can make the difference between a good shot and an extraordinary one. Below are some key tips to elevate your lightning photography:
Tip 1: Utilize the Rule of Thirds
One of the fundamental rules in photography, the Rule of Thirds, is also applicable when capturing lightning. Imagine your frame divided into nine equal segments by two vertical and two horizontal lines. Place the main elements of your scene, such as the horizon or a bolt of lightning, along these lines or at their intersections. This can create balance in your shot and draw the viewer's attention to the most impactful parts of the image.
Tip 2: Integrate Foreground Elements
To add depth and context to your lightning photographs, consider including distinct foreground elements. Silhouettes of trees, buildings, or other landmarks can provide a sense of scale to the lightning and create a more compelling composition.
Tip 3: Prioritize Sky and Horizon Placement
Depending on the intensity and location of the lightning, you might want to adjust the placement of the horizon in your frame. If the sky is alive with multiple bolts, consider giving it two-thirds of the frame. Conversely, if the ground has intriguing elements illuminated by the lightning, allow it more prominence.
Tip 4: Embrace Framing and Leading Lines
Structures, both natural and man-made, can serve as effective framing devices in your shots. Features like roads, pathways, fences, or rivers can function as leading lines, seamlessly drawing the viewer's gaze toward the lightning. Using these elements wisely can create a compelling path for the eye, making your lightning shots more dynamic.
Explore and Try New Approaches
In the world of photography, particularly when photographing unpredictable subjects like lightning, sticking to tried-and-true methods might not always yield the most stunning results. To truly excel, it's vital to step out of your comfort zone and explore new techniques. Here are some fresh approaches to consider:
1. Play with Shutter Speeds: While long exposures are a common choice for capturing lightning, experimenting with various shutter speeds can give different effects. A quicker shutter might capture a sharp, detailed bolt, while a slower one can illustrate the progression and path of the lightning.
2. Incorporate Reflections: Water bodies, be it lakes, ponds, or even puddles, can offer a unique perspective by capturing the reflection of lightning bolts. This not only doubles the visual impact but also adds a symmetrical element to your shots.
3. Experiment with Angles: Don't just shoot straight ahead. Try capturing lightning from different angles, be it low angles looking up to the sky or from a high vantage point looking down on a city or landscape.
4. Use Different Lenses: While wide-angle lenses are popular for capturing vast landscapes with lightning, using a telephoto lens can help you zoom in on a specific part of the storm, offering a more detailed view of individual bolts.
5. Black and White Photography: Removing color can sometimes emphasize form and contrast. A monochrome palette might bring out the drama of a lightning storm in ways colors might not.
6. Layer Multiple Exposures: If you have multiple shots of lightning from the same viewpoint, consider layering them in post-processing. This composite image can show the fury of a storm with multiple bolts striking at once.
7. Seek Unique Environments: Instead of open fields, try capturing lightning against urban skylines, through windows, or against unique landmarks. These environments can add a narrative element to your shots.
8. Post-processing Techniques: While you can make basic adjustments with any online photo editor, for advanced enhancements, it's beneficial to use professional photo editing software. Luminar Neo stands out as an invaluable photo editing software, perfect for tasks like enhancing contrasts, adjusting sharpness, or even tweaking hues, which can significantly amplify the drama in your lightning photographs.
Remember, the key is not to be bound by convention. The more you experiment, the better you'll understand how to shoot lightning in a way that resonates with your unique artistic vision. Always stay safe, and let your creativity guide your exploration!
Exercise Patience and Capture Multiple Frames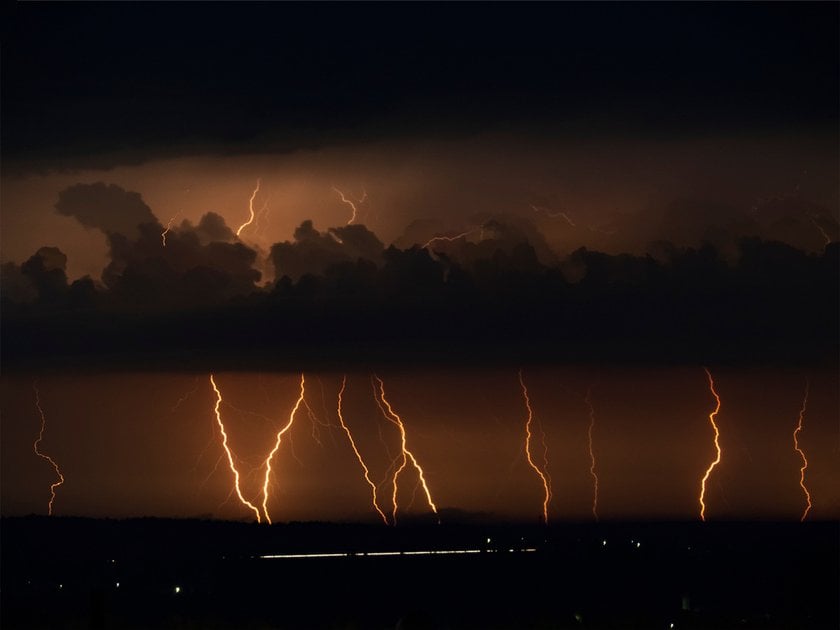

Capturing the elusive beauty of lightning often hinges on two crucial components: patience and persistence. Unlike many photographic subjects, lightning's unpredictable and fleeting nature means it won’t strike on command. Sometimes you might be treated to several brilliant bolts in mere minutes, while other instances might see you waiting for hours amidst a quiet storm.
Preparing early, employing continuous or burst shooting mode, and considering methods like time-lapse can increase your chances of securing that perfect shot. It's essential to stay rooted in a safe location, equipped with the essentials for potentially long sessions.
Remember, each attempt, successful or not, is a lesson in refining your craft. Mentally prepare for varying outcomes, and with every frame you capture, you're one step closer to that awe-inspiring lightning photograph.
Photographing Lightning at Night
Mastering night photography is one way to make a fantastic lightning strike photo. Especially when working with urban backgrounds or nature. Why so? The camera lens captures enough light to bring out details even in low light conditions. Electrical discharges with flashes, in turn, further saturate the picture with plot and depth.
Night lightning storms pictures are best taken in Bulb mode. It keeps the shutter open while the photographer's finger is on the shutter button. With a low ISO value (in the 100-200 range), your camera will capture the flash and lightning structure in the photo. The aperture should preferably be set to f/5.6. This will give you a clear picture without blurring the background (assuming the focus is on the lightning).
As for shutter speeds, since the chance of overexposure is quite low at night, you can experiment with them. Try working with a shutter speed range of 20 seconds to 2 minutes. This will allow you to capture as much light as possible and get beautiful pictures of lightning. But when you're shooting against a city background, slow shutter speeds will only hurt you by over-saturating the frame with outside light sources.
You may also be interested in: How to Photograph Fireflies
How to Capture Lightning with an iPhone
Many users of Apple devices wonder how to take a photo of lightning. In fact, the answer to it has already been painted in the material.
Modern iPhone cameras support professional (manual) shooting mode, where you set the ISO, aperture, and shutter speed. The quality of the optics in these devices allows you to work with complex scenes and conditions.
You will need the same equipment to take pictures:
tripod;
protection from rain and wind;
remote descent;
power banks for recharging.
The resulting images can be corrected by both internal means and third-party software.
Processing the Photos
How to Photograph Lightning Image4
Regardless of the method and settings you use for lightning photography, post-processing can elevate your original photos to even more breathtaking levels. Adjusting exposure, sharpening, noise reduction, and cropping are essential steps to maximize the results of your fieldwork. Tweaking the White Balance can also add impact. Furthermore, this post-processing stage helps in managing unintended captures, like lightning bug pictures.
Luminar Neo, an AI photo editor with RAW file processing and a comprehensive toolset is a necessity for processing lightning photos. It provides everything required to produce high-impact images from your lightning captures. Take a look at this great set of tutorials for Luminar Neo for some ideas on how to get great pictures of lightning.
Wrap-Up
Capturing the raw power and beauty of lightning is both challenging and rewarding. It requires a blend of patience, technical knowledge, and sometimes a bit of luck. But with the right equipment, settings, and safety precautions, you can immortalize those fleeting moments of nature's fury.
Now, you know how to take a picture of lightning, turning a mere flash in the sky into a captivating work of art. As you continue your journey in this field, remember that every storm provides a unique opportunity to hone your skills and capture stunning images. Embrace the challenge, stay safe, and let nature's light show inspire your creative spirit.
FAQ
What's the ideal shutter speed for capturing lightning?
The ideal shutter speed for capturing lightning varies depending on the intensity of the storm and the ambient light. Generally, a slower shutter speed is preferred to capture the full trajectory of a lightning bolt, especially when you're figuring out how to take photos of lightning at night. Most photographers use a setting between a few seconds to 30 seconds, allowing the sensor ample time to capture the sporadic and fast-moving bolts.
Is photographing lightning a challenging task?
"Yes, photographing lightning is challenging due to its unpredictable nature. Mastering the art of capturing lightning requires patience, the right equipment, and a deep understanding of camera settings. Above all, safety is paramount. However, when done correctly, the results are immensely rewarding, transforming a mere picture of lightning into a captivating image.
How can one capture lightning with a smartphone camera?
Capturing lightning with a smartphone camera can be more challenging than with a DSLR, given the limited manual settings. However, it's not impossible. Most modern smartphones have a "Pro" or "Manual" mode which allows for extended shutter speeds. If you're wondering how to take photos of lightning with your smartphone, use this mode and set the shutter speed to a few seconds, stabilize your phone on a tripod or steady surface, and use a timed or remote shutter release to avoid shaking. There are also various apps available that are designed to help you capture lightning and other fast-moving events.
 >
>
