April 18
20 min. to read
How To Use Content Aware Fill in Photoshop
In its first version, this tool was very simple (but still potent), allowing you to simply replace part of an image with surrounding pixels with a single click. But now it has more options, so you can control many aspects to work faster and get better results with no distortion.
In this tutorial, I am going to show you how to use content aware in Photoshop. There are three examples of how we can hide or displace some objects in the frame using different features. Accordingly, we are going to edit three pictures, one for each of the methods. I hope this will answer all of your questions.
What is Photoshop Content Aware Fill and How Does it Transform Your Editing?
So, first, let's figure out what a content-aware tool in Photoshop is and what it is needed. The feature allows you to easily remove objects from a photo, replacing them with pixels from other areas, such as the background. While Photoshop selects pixels to replace on its own, you can still manage this process by showing the program where to take pixels from and where not to. At the same time, you see all the changes in real time, which allows you to choose the right combination to hide what you don't want to see.
This can be useful in many cases. For example, you have taken a great deep shot, but at the moment of the shutter release, someone's hand was accidentally caught in the frame, and you want to fix it. Also removing and moving objects is often used when creating collages when you need to clear the background and then fill it with whatever you want.
It is very convenient that all content-aware tools in Photoshop are in one workspace, which makes the photo editing process even more convenient.
To activate Content-Aware Fill, simply follow these steps:
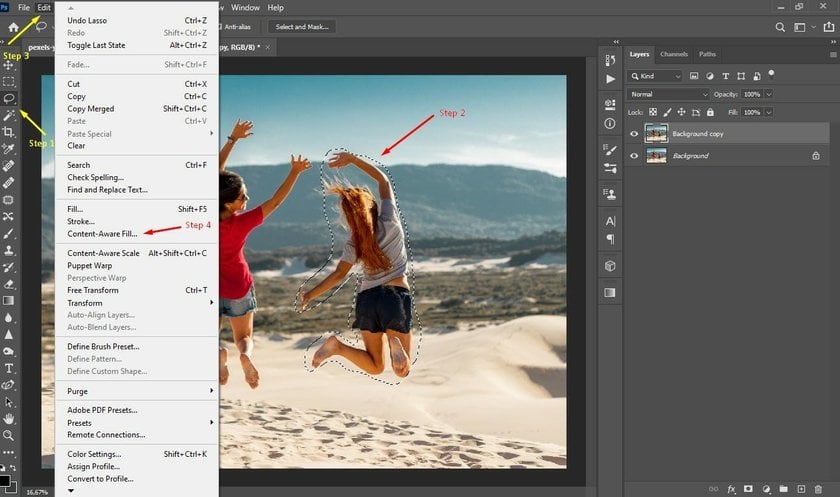
1. Select the portion of the image you want to erase using the Lasso or Marquee selection tools.
2. Click Edit > Fill Selection.
3. In the Fill Layer dialog box, choose Content-Aware from the Use drop-down list. Wait until part of the image is erased.
4. Check the result. If you're not satisfied with the resulted image, click Edit > Undo. Then, apply another Content-aware fill.
Unfortunately, Photoshop smart fill is not smart enough to make everything perfect. Photos with complex backgrounds or overly colorful palettes can be quite a challenge for Photoshop's autofill algorithms. However, Photoshop is getting smarter with every new update, so it's only a matter of time before multicolored and highly detailed photos are no longer a problem.
By the way, if you have already learned how to rid photos of unnecessary objects, but are still experiencing some difficulties, look at the end of the article. Perhaps you just made some standard mistakes that both beginners and experienced pros periodically make. At the bottom, there is a FAQ where we have covered the most common problems, most of which arise due to simple inattention.
Edit Specific Parts of Your Photo with Precision
Try the Brush ToolHow to make it invisible?
Where is content aware fill in Photoshop?
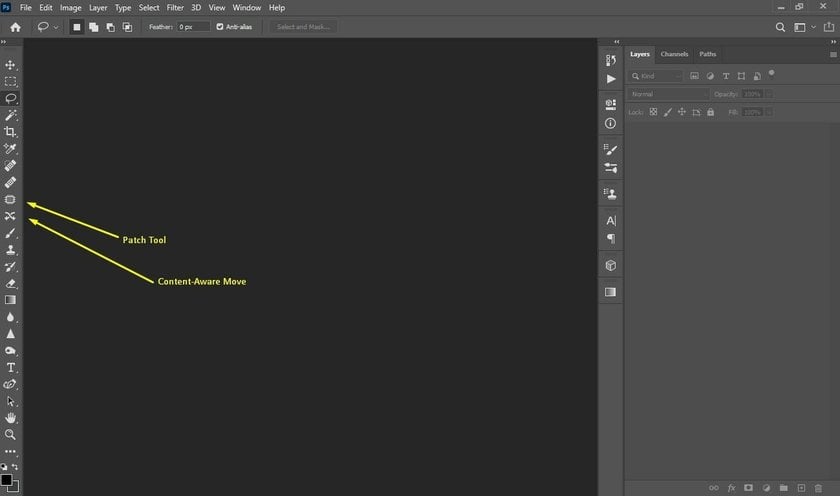
There are several tools in Photoshop that we can use to both remove an object and displace it:
- Patch tool;
- Content-Aware Move;
- Content-Aware Mode.
The first two can be easily found in the toolbar (see screenshot below). Both are also available by pressing J.
To cause this mode, we need to work with the object, namely, to make a selection around it (otherwise this feature will not be active). To do this, use the lasso tool. After that, click Edit and select the relevant paragraph from the dropdown list (an example is in the screenshot).
So, we will have to work with these tools. Let's learn how to use them.
NB! Don't risk the original image. I guess we all know the situation when you forget that you are editing a single instance of a file, so you later regret not making a backup copy. I recommend copying the image to a new layer so you always be able to go back to the very first file version.
Using the Patch tool to hide objects
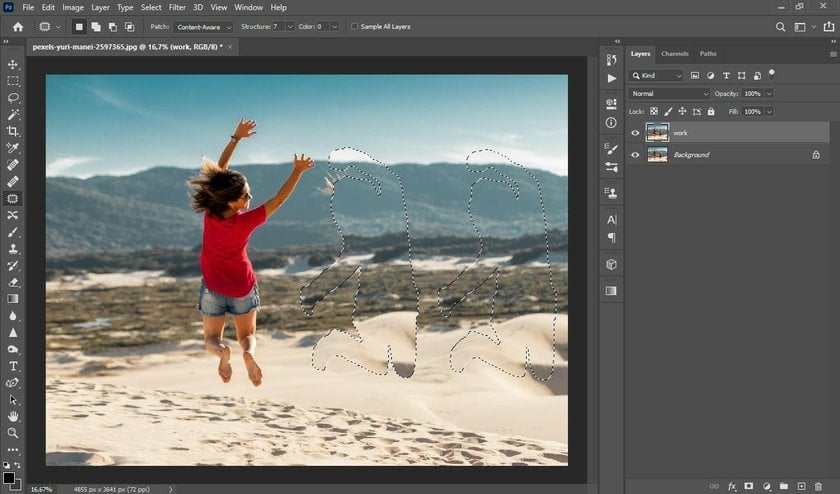
Take a look at the image below. I want to remove the girl on the right from the photo. Let's try to do this.

Open your image. By pressing J, select the Patch tool. We need to select an object, but there is no need to do it with pinpoint accuracy. Just circle the girl on the right as it turns out.
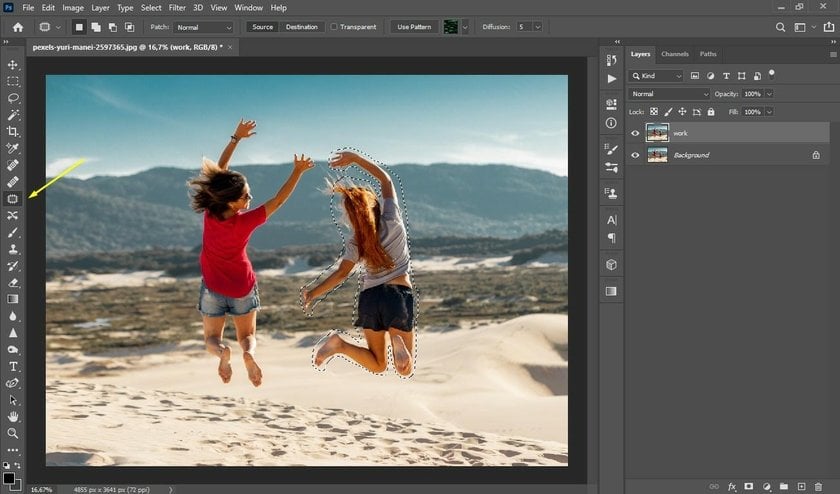
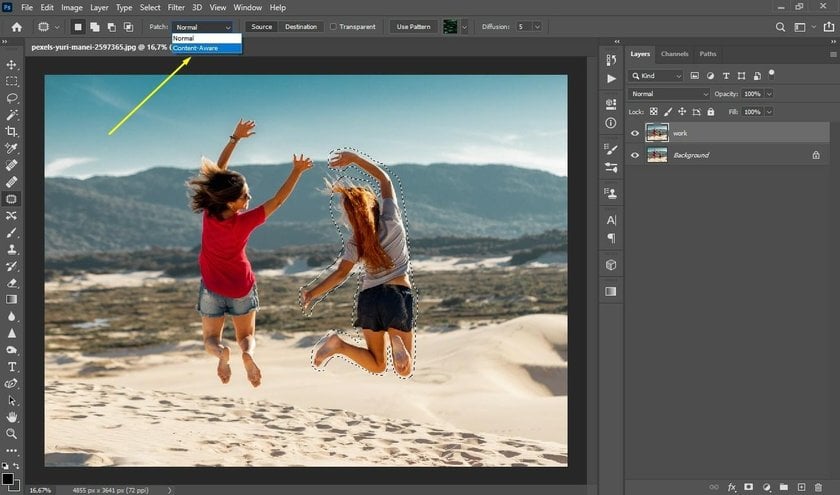
You may have noticed that our Patch is Normal. Be sure to change this setting to Content-Aware.
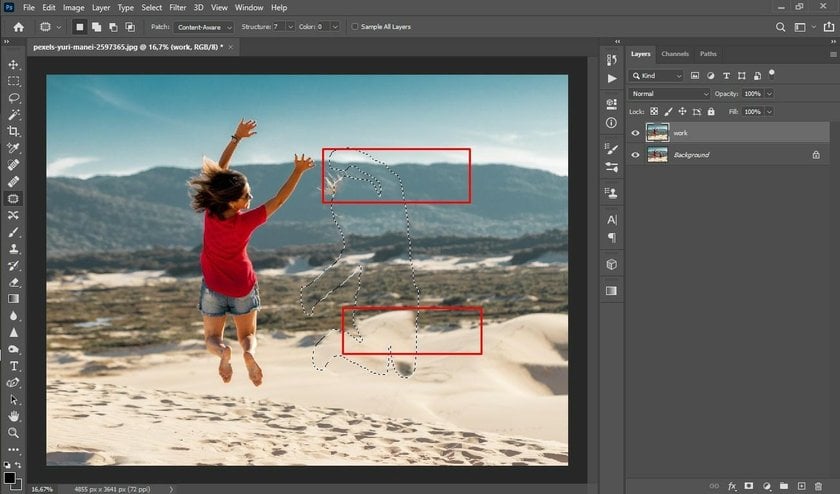
Hold down the left mouse button and lug the girl to the area you want to replace it with.
I tried to immediately match the lines to avoid unnatural joints, but this is not always possible to do right away. Note that the outline of the mountains still looks natural, but the dune in the background has let us down.
To avoid such incidents, pay attention to the structure setting in the options panel at the top. Set it to 1 to let the program know that it can adjust the forms on its own.
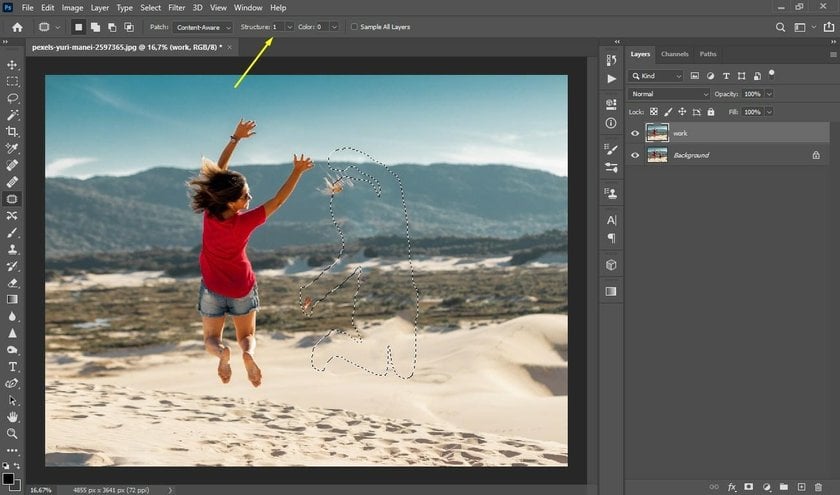 There is also a Color setting here. Select 0 if you don't want the colors to shift. A value of 10 will allow Photoshop to replace colors.
We got something more or less acceptable. However, there are some parts of the image that still need to be improved.

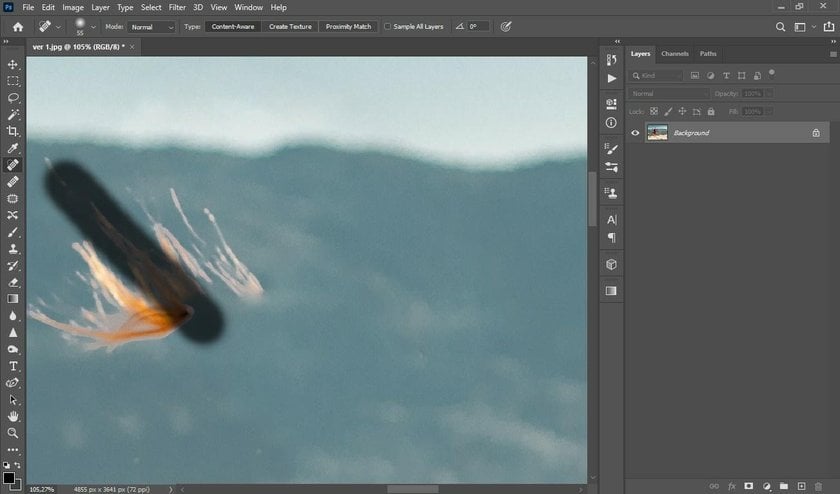
Unfortunately, only the content-aware fill is not enough to hide something using the Patch tool. But we can use it for photos like this one that has blurry backgrounds. Using the Healing brush and Spot healing brush (the hotkey for both is J) you can gently "heal" small details, such as hair, that we did not capture with a selection. This is very easy to do precisely because of the blurred background, which both brushes can easily cope with.
Hold ALT and zoom in on the image by rotating the mouse wheel. I prefer to use the Spot healing brush tool as it does everything by itself. If you want to use the Healing brush tool, first select the area to replace by pressing the ALT + left mouse button on the specific area. You can also change the area size in the settings panel. By holding the left mouse button, carefully cover the details that do not suit you.
And here is our result! As for me, it turned out well. Now let's deal with the second mode.

Step-by-Step Process to Utilize Content Aware Fill in Photoshop
This tool gives you a simple and convenient way to move an object. This is important because it is not used for deletion, but it doesn't make it inconvenient.
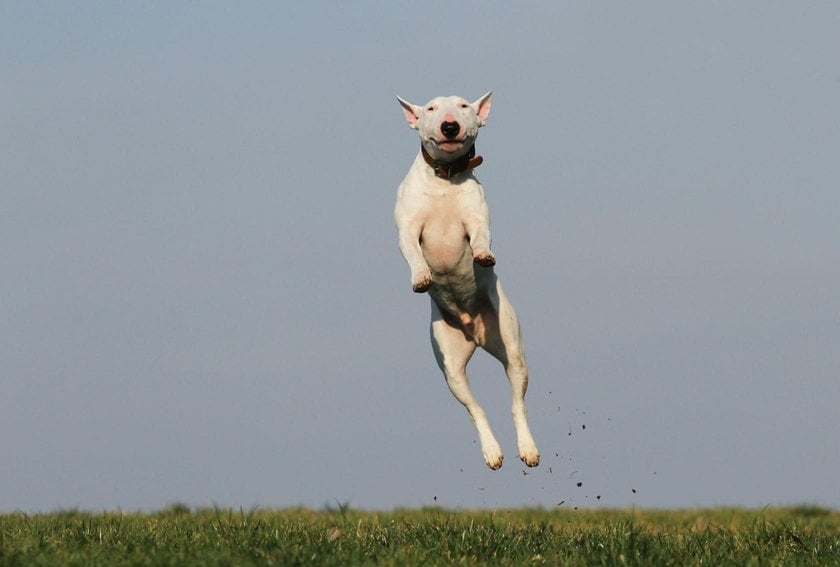
Here we have a simple example, because the dog is against the background of a monochromatic sky, without clouds, which means that we do not have to modify anything. Great photo to learn how to use the tool and how to content-aware fill.
So let's open our photo in Photoshop and select the Content-Aware Move tool. The principle of operation here is the same as in the case of the Patch.
First, we have to decide which area of the picture will be moved. After that, you have to select it and just move that part.
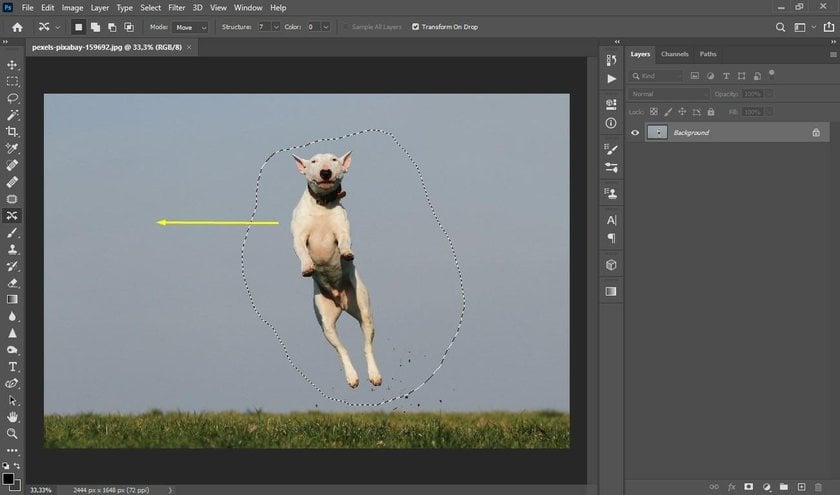
When this is done, you will notice that a box has appeared around your subject. Grab it by the corner by pressing the left mouse button to rotate the content. This way you can better fit the object into the new scene.

There are also color and structure settings that will allow you to fix defects when moving objects in more complex compositions (they work the same way as in the Patch tool). Of course, if there's a lot of detail in the frame, you'll also need to spot-correct the image.
Well, it was too easy. Now let's move on to a more difficult task. To do this, we need Content-Aware Fill Workspace.
Content-Aware Mode
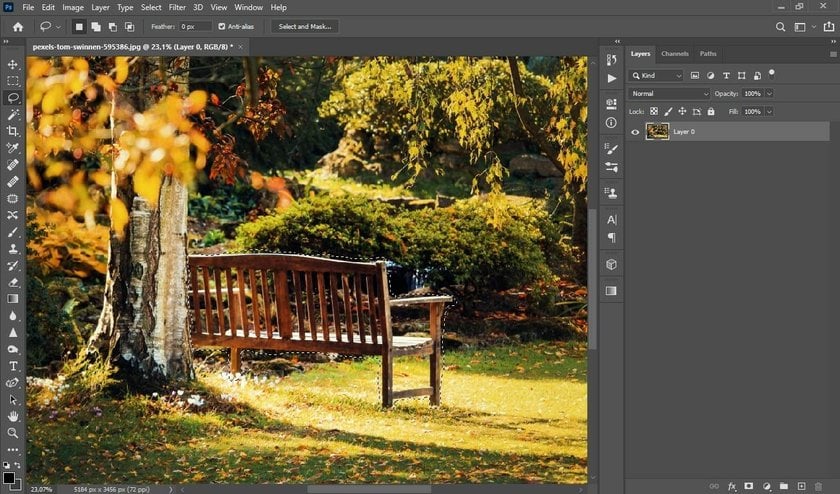
2019 has just recently passed. That's when this feature was created. Unlike the Patch and Content-Aware Move tools, this gives you much more fill settings and more control over the area of your image. Now I will show you how to remove an object from the photo using this mode. Let's try to remove the bench from this photo.

Step 1. Select the object
So, as I said earlier, we need to use the lasso tool, and the content-aware fill option becomes active. For now, don't worry about the precision of the selection. We will deal with this a little later.
Step 2. Open the Content-Aware Fill Workspace in Photoshop
The way is “Edit → Content-Aware Fill…” as I showed before.
Step 3. Explore the tools
You may have noticed that now there are only four icons left on the toolbar. Before moving on, I suggest you find out which set of tools has a content-aware mode.
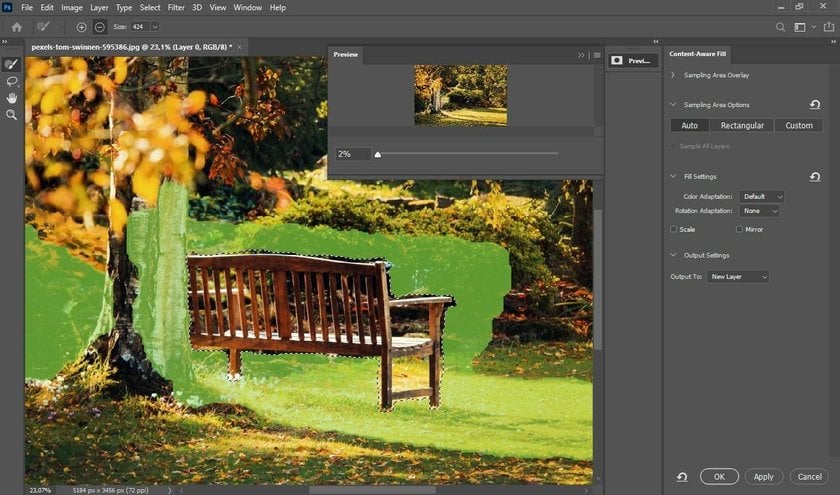
Here we have the Sampling Brush Tool (B), Lasso Tool (L), Hand Tool (H), and Zoom Tool (Z). The very first one is used to highlight (in green, as you can see in the screenshot) those parts of the image that we will use for replacement. This feature allows you to select some pieces or vice versa to exclude them.
Using Lasso we can select something else if we need it. This will change the sampling area, so we may need the Sampling Brush Tool again. Hand and Zoom are the same as always, everything is simple here.
You can also see the preview window. It is necessary in order to understand what exactly Photoshop wants to replace your object with and adjust the selection area in accordance with this.
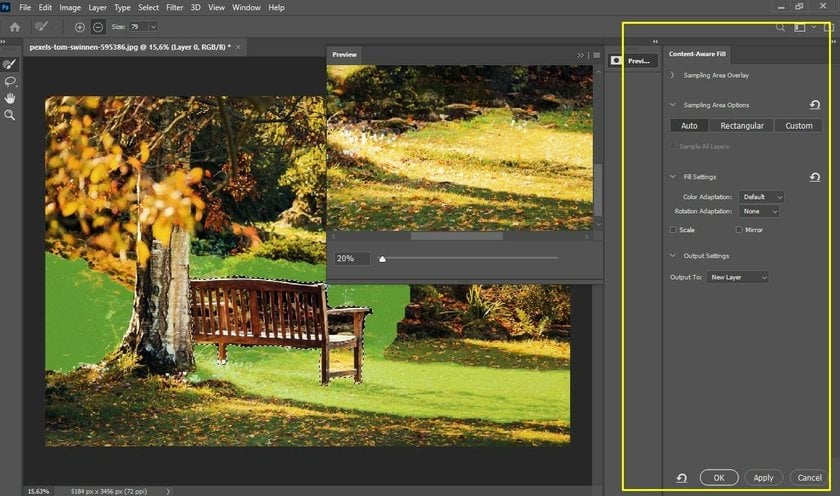
On the right is the advanced settings panel.
Step 4. Paint over only the parts you want to replace the bench with
Select the Sampling Brush Tool. Be sure to set the mode to Subtract on the top toolbar and set the brush size that you are comfortable with.
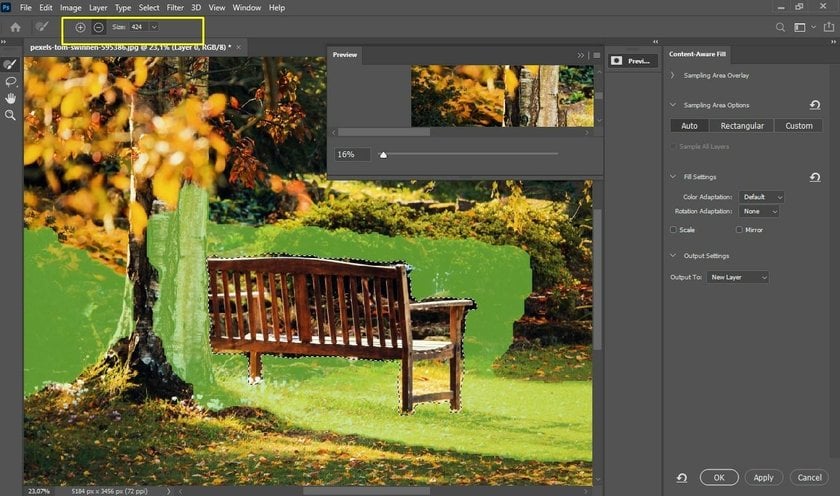
Now paint over the parts you don't want to use as a replacement pattern. I will exclude only the tree. The remaining sections may well be suitable for replacement. The more carefully you do this, the better the result will be. By the way, check out the preview. This already looks promising!
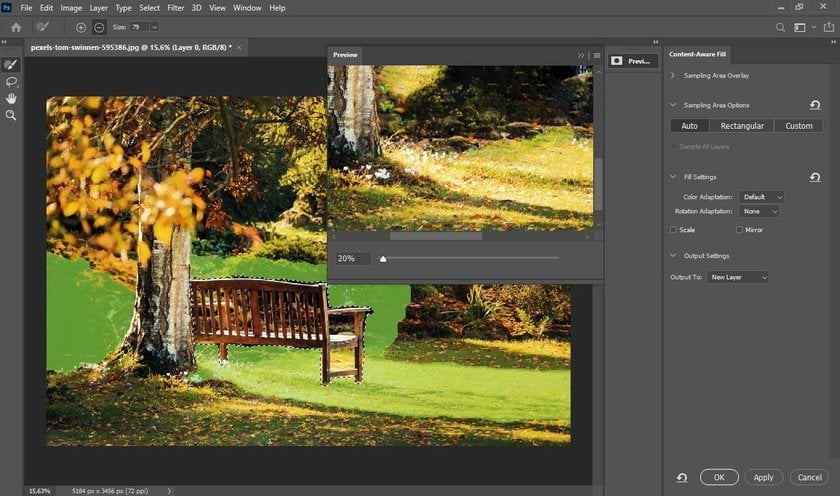
Step 5. Content-Aware Fill settings panel
In the settings panel (on the right), expand the Fill Settings controls and set the Color Adaptation option to Default, the Rotation Adaptation option to None, and leave the Scale and Mirror checkboxes inactive.
In the Output Settings section, you can choose to output the final result: Current Layer, New Layer (New layer), or Duplicated Layer. Let's create a new layer so we can roll back if something goes wrong. Press OK.
Step 6. Enjoy!
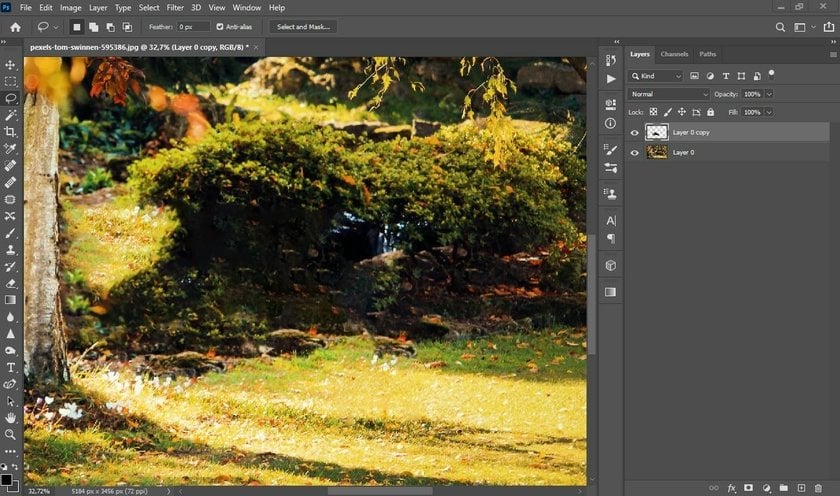
No, it didn't go the wrong way. Looks like Photoshop did a great job. Let's deselect the area (CTRL+D) and take a closer look.
On closer inspection, you can see some minor defects. Fortunately, most of them are concentrated in the shaded area of the bush. I think we can agree with this for the time being. So, now you know how to content-aware fill in Photoshop.
FAQ
How to do content aware fill in Photoshop?
Launch Photoshop and open the image you want to edit.
Use the Lasso tool or another selection tool to outline the area you want to fill.
Go to Edit > Content-Aware Fill.
In the Content-Aware Fill workspace, adjust the sampling area and settings as needed. You can use the green overlay to define the area Photoshop will sample from.
Once satisfied with the preview, click OK to apply the fill.
Make any additional adjustments if necessary and save your work.
How can I perfect the use of Content Aware Fill in Photoshop for complex edits?
To effectively use Content-Aware Fill in Photoshop for complex edits, make precise selections with the appropriate tool, utilize the Content-Aware Fill workspace to control the sampling area, experiment with different fill modes for the best results, and refine with layer masks and the Patch Tool for seamless blending. Also, remember, regular practice and keeping Photoshop updated are key to mastering this feature.
What version of Photoshop do I need to use these tools?
2010 is when the opportunity arose. Most likely, you are using a later version of the program, so the Patch and content-aware move features are there. But if you want to use content-aware mode, you will need the 2019 version or later.
Why is the content-aware fill function greyed out and can't be activated?
In order for this feature to become active, you first need to select a specific area in the photo you are editing. You can use any tool for this, such as a lasso, a magic wand, or geometric shapes.
Also, pay attention to the type of layer you are editing the image on. The tool does not work with smart objects and adjustment layers.
Why do I see a blank canvas?
This error sometimes happens in Photoshop. To fix it just create another layer or activate "Sample All Layers" to continue editing without difficulty or obstacles.
On a final note
As I said earlier, Photoshop content-aware tool is not perfect, but it gets better with every new program update. And until the automatic removal of objects becomes invisible to the eye, we will still have to correct minor flaws manually. But you must admit that this is a really great result!
I'm an old-school photographer, so I think it's best to shoot in a way that doesn't require post-processing at all. But situations are different. At the last moment, a car may jump into the frame from nowhere, or someone may push you, or something else. So sometimes you still have to use Photoshop. And when I see results like this, I'm always amazed at how smart modern software is getting. Hope this doesn't leave our cameras gathering dust on the shelves in the future.
I will leave you with these reflections and the result that we have achieved together. See you (write you) in the following articles.
 >
>
