Neon Light Portrait Photography: Creative Photo Ideas
December 17, 2024

Ready to experiment with neon light portraits? Find creative ideas and practical tips for using neon signs, reflections, and bold lighting effects.
Neon portrait photography has swept the creative world, allowing photographers to innovate on traditional portraiture. Neon portraiture features images with an outspoken combination of vivid (pink, purple, and blue) colors and dramatic shadows and reflections, creating futuristic, edgy, and alive images.
Want to learn how to make your photos different and stand out in a world of traditional imagery? And it’s time to explore the popular field of neon portrait photography.
Rethinking Neon Portraits: A Fresh Perspective
 Time passes, and new trends are evolving, but this type of photography withstands all the fluke changes. Let's find out why.
Why Neon Light Portraits Stand Out
Standard studio lighting cannot match neon lighting's pop of color and an edgy, futuristic vibe. While neon lighting features vivid colors, it harnesses the power of shadow and contrast to provide a cinematic, dramatic feel when used as it should — on portraits. Unlike traditional lighting setups, neon light can add personality to a shot without needing an extreme amount of Post-Production.
The Importance of Creativity and Breaking Cliches
Neon light is not limited to pointing your camera at a bright light source. Thinking beyond the colors means you must break away from cliche neon shots. Look at many ways to frame the subject, yet bring the neon light together to augment your photograph. Use contrast to tell a story, to give your subject a character and energy.
Camera Settings for Neon Light Photography
 Balance is the trick to getting the perfect shot. These are the settings needed to master neon light portrait photography.
ISO, Aperture, and Shutter Speed for Low Light
Neon photography is usually done in low-light conditions. You'll need to make thoughtful adjustments to your camera settings to capture the neon glow while still getting proper exposure for your subject.
ISO. Set your ISO low so your image won’t be too noisy. Between 400 and 800 should give you clean images. If your shot is too dark, raise the setting to 1600. Be careful about introducing too much grain.
Aperture. You'll have enough light to see your subject if you choose a wide aperture (f/2.8 to f/5.6). It blurs the neon lights in the background to create a pleasing depth of field and places all the focus on the subject.
Shutter speed. A slower shutter speed is needed to capture the glow of the neon light. If your subject moves, put your shutter speed between 1/60s and 1/125s.
Adjusting White Balance for Vibrant Neon Tones
Keeping your colors true to life requires you to adjust the white balance. When it's neon, neon signs usually have a cool blue or magenta hue to them, so set your white balance to that or even have it manually adjusted to be cooler, as the pieces of your image aren’t going to seem overly saturated or off-color.
Preset white balance. Many cameras have preset white balance settings for fluorescent or tungsten light, which is possible to enjoy.
Custom white balance. You can manually set the white balance by using a gray card.
Tips for Avoiding Overexposed Highlights
Watch the camera histogram, and don’t let the brightest part of the photo go into the “clipped” zone to avoid overexposed highlights. Use the exposure compensation feature to slightly underexpose the image. You can also experiment with the subject's exposure and allow the neon lights to glow naturally.
7 Neon Portrait Ideas
When it comes to portrait neon photography, your possibilities are endless. Here are seven unique ideas to spark your creativity:
Urban Lights
 Focus on the neon signs and their reflections in the puddles or glass tops. Use a long exposure to represent the movement of city lights and color neon. Shoot against a dark background or mid-twilight when the neon lights pop.
Parameter | Value |
ISO | 400-800 |
Shutter Speed | 1/30 - 1/60 |
Aperture | f/2.8 - f/4 |
White Balance | Cool Lighting (5000-6000K) |
Neon Backgrounds
 Take a photo of your subject against bright neon signs or bright walls. Preserve the bright neon highlight while maintaining shadow detail when used over areas low in light. Some LED panels or lights that simulate neon effects can provide even, colorful illumination.
Parameter | Value |
ISO | 200-400 |
Shutter Speed | 1/60 - 1/125 |
Aperture | f/4 - f/5.6 |
White Balance | Shadows or Daylight |
Nature and Neon
 Naturally placed forests or beaches with incorporated neon lights. Imagine your model lit up by neon tubes surrounding the trunks of trees or dangling between the branches.
Parameter | Value |
ISO | 800 |
Shutter Speed | 1/30 - 1/60 |
Aperture | f/2.8 - f/4 |
White Balance | Shadows or Daylight |
Neon Light Painting
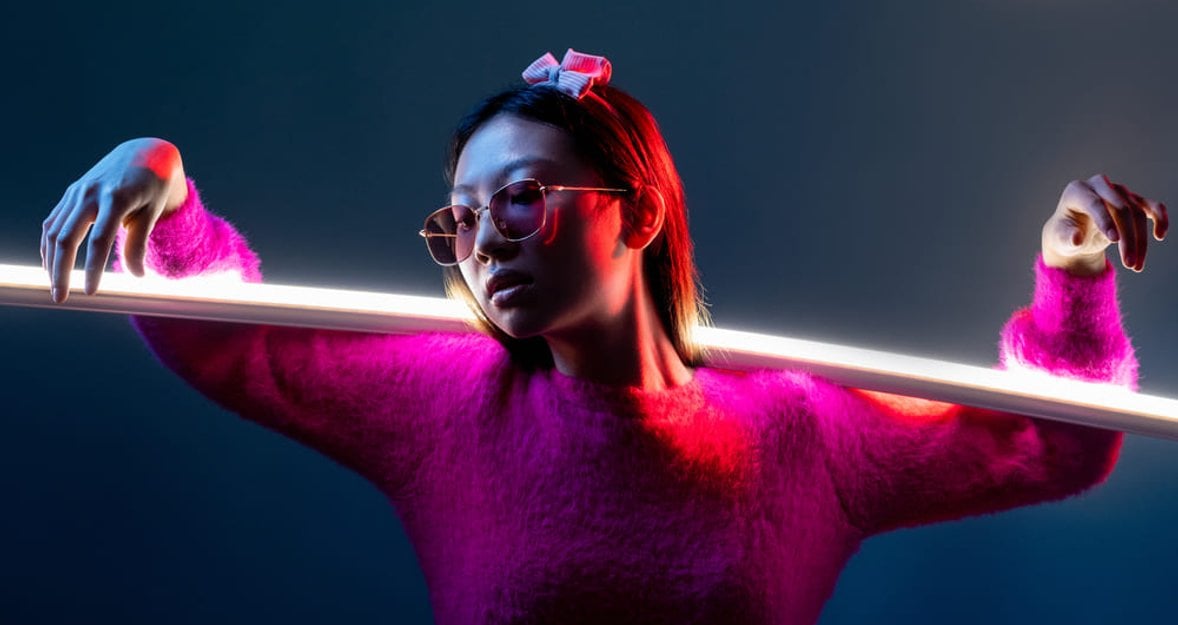
 For a light painting effect, have the model hold a neon tube and move it around while the camera captures the light trails. It works by moving the camera’s shutter long enough with the light source, resulting in a line or band of light following your subject. This technique adds abstract elements to your portraits.
Parameter | Value |
ISO | 100-400 |
Shutter Speed | 1-10 seconds |
Aperture | f/8 - f/11 |
White Balance | Cool Lighting or Daylight |
Neon and Motion
 Image a model rollerblading or dancing at night, using neon lights as their only light source. Select clothes that are not going to clash with the neon. Some reflective or black clothing will stand out against the neon lights.
Parameter | Value |
ISO | 800-1600 |
Shutter Speed | 1/500 or faster |
Aperture | f/2.8 - f/4 |
White Balance | Shadows or Cool Lighting |
Double Exposure with Neon
 Layer one image over another to get a double exposure effect, such as combining a portrait with neon signs or city streets at night.
Parameter | Value |
ISO | 100-400 |
Shutter Speed | 1/60 - 1/125 |
Aperture | f/4 - f/5.6 |
White Balance | Manual White Balance |
Neon Through Glass
 Captured run-through glass and reflected from neon lights. It gives reflected reflections, texture, and interest to the photo. Night shots or a cloudy day will help make neon lights look more vibrant.
Parameter | Value |
ISO | 400-800 |
Shutter Speed | 1/30 - 1/60 |
Aperture | f/2.8 - f/4 |
White Balance | Cool Lighting (5000-6000K) |
Pro Tips for Better Neon Portraits
 Taking your neon portraits to the next level requires basic knowledge of lighting, composition, and subject interaction nuances. Experiment with the neon light position. Make it a bit higher, causing shadows and highlights on your subject and creating drama in the shot. You can combine multiple colored lights instead of just one neon, adding depth and dimension to the shot.
Did you know that ambient light or other artificial sources can lighten the shadows and give more balanced and detailed portraits? Yes, it's true, so try it!
By the way, shooting in RAW gives you more room to make adjustments in post-production without losing quality.
Update Your Neon Portraits with Luminar Neo
After you’ve captured your neon portraits, editing them can take them to the next level. Luminar Neo has several powerful tools for improving your neon shots. One of these features is Relight AI for portraits. What is so special about this photo-editing program?
Use color grading tools for dynamic neon tones. Color grading can take your neon portraits to a whole new level. Work on neon colors with different types of highlights, mid-tone adjustments, or changes to the tone of the shadows.
AI tools for refining skin tones under harsh lighting. ometimes skin tones can look unnatural under neon light. Adjust the lighting and tone to your liking to even them out with Studio Light AI. Use the Skin AI tool to remove imperfections from your face.
Add glow effects for a more immersive look. Luminar Neo can add even more glow to the picture, making it more engaging and boosting the neon experience.
The Definitive Solution for Picture-Perfect Portraits
DISCOVER TODAY!Your Next Steps in Neon Portrait Photography
 Now you know how to shoot incredible neon portraits, it’s time to get to work. First, get the needed equipment (neon lights, tripod, backgrounds), set your low-light camera settings, and fine-tune your process.
Don’t be afraid to try new locations, subjects, and compositions. When you consistently push yourself out of clichés and against the limits, you end up with a style all your own.


