How To Develop A Photo From Film To Finish With Simple Steps
September 03, 2025
Grab a cup of coffee and discover how to develop a photo from film to print.
There’s something honest about working with film. It slows you down, makes you look twice, and gives you that slightly unpredictable, tactile result — negatives you can touch and prints that smell faintly of chemistry. This guide walks you through the full process from exposed roll to a finished print (or a scanned digital file) using simple, practical steps anyone can follow.
What You Need Before You Start
 Gather your tools before you open the tank or darkroom. This will save time and minimize mistakes.
Film changing bag or a completely dark room
Developing tank + reels (for your format)
Thermometer and timer
Developer, stop bath (optional), fixer, and wetting agent
Scissors, can opener (for 35mm), and film clips
A clean sink and towels for drying
Optional: enlarger or film scanner
If you’re wondering boldly at this point whether “can you develop film at home?”, the answer is yes — with the right kit and careful attention to hygiene and timing. Home processing is common, cheap, and satisfying.
Your AI-Powered Photo Editor for MacOS and Windows
Discover Now!Quick Overview of the Workflow (So You Don’t Get Lost)
Before we get into the nitty-gritty of each step, let’s start with a bird’s-eye view to set the stage.
Load the film into the developing reel in total darkness.
Mix the chemistry at the correct temperature.
Agitate with precise timing and pour developer in/out.
Stop, fix, wash, wetting agent, and hang to dry.
Scan or print negatives and make the final corrections.
This is the high-level version of film developing steps — the detailed notes and a small table of common times are below.
Safety Notes
Wear gloves to avoid skin irritation.
Work in a ventilated area.
Label bottles and never mix chemicals.
How to Develop 35mm Film at Home: A Step-by-Step Guide
Step 1: Preparing Your Workspace and Film
 To remove the photo roll from its cassette and wind it onto the reel, you’ll need a completely dark space. If you don’t have a darkroom, a light-tight changing bag works very well.
Lay out everything within reach so you won’t fumble.
Check your timer and thermometer. Chemical activity depends strongly on temperature.
If you’re working with 35mm, you’ll cut the leader or use a bottle opener tool to remove the spool.
If you’re new to this and asking how to develop 35mm film at home, focus on mastering the reel loading — once the strip is on the reel, the rest is mostly timed chemistry.
Step 2: Mixing and Measuring Chemistry
 Most black-and-white photographic processing uses three basic liquids: developer, stop bath (or water), and fixer. Color (C-41) requires four or more and stricter temperature control.
Typical developer blueprint (black & white):
Step | Chemical | Common Temp | Typical Time (example) |
Develop | Developer (rodinal, HC-110, etc.) | 20°C (68°F) | 6–12 min (varies by developer & dilution) |
Stop | Stop bath or water | room temp | 30 sec–1 min |
Fix | Fixer | 20°C (68°F) | 2–5 min |
Wash | Running water | room temp | 5–10 min |
Final | Wetting agent | room temp | 30 sec soak |
NOTE: Times depend on developer type, dilution, and film speed. Keep a small notebook with your recipes.
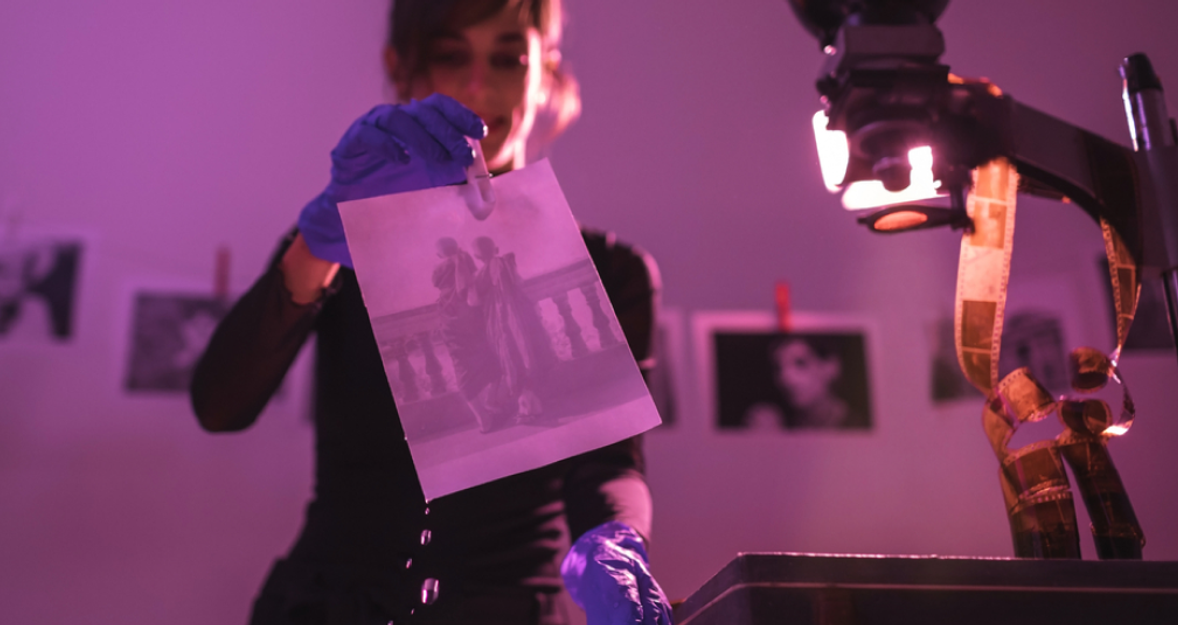
Step 3: Loading Film in the Dark
 This is the trickiest part for beginners because you must be in total darkness (unless you have a daylight spool). Inside a changing bag:
Cut the film leader and pull the strip free.
Find the reel slot and gently thread the film onto the spiral.
Wind until the whole strip is on the reel, then place the reel in the tank and close it.
Now you can turn on the lights. Once the tank is sealed, you can mix the chemistry and begin.
Elevate Your Photography with Our Advanced Software
Discover PricingStep 4: Developing: Timing and Agitation
 Pour the developer in at the set temperature and start your timer. Agitation pattern matters:
First 30 seconds: continuous gentle inversion or rotation.
Then: 10 seconds of agitation every minute (common approach).
Maintain temperature and precise timing.
These are the core film-processing steps in action: agitation, timing, and temperature. When finished, pour the developer back into its storage bottle or dispose of it according to local rules.
Step 5: Stop, Fix, Wash, and Dry

After developing film photos :
Pour in stop bath or run water for 30–60 seconds.
Add fixer and run the recommended time (usually a few minutes).
Wash thoroughly: stop streams of water for 5–10 minutes, or use a hypo-clearing agent to cut time.
Use a wetting agent in the final rinse to prevent water marks.
Hang negatives by the edges with clips; place a weight on the bottom to keep them straight.
Once dry, handle negatives only by the edges.
A cheat-sheet (for quick reference):
Developer temp: 20°C (68°F) ±0.5°C for many B&W processes.
Agitation: first minute continuous, then 10s each minute.
Fixer: 2–5 minutes typical.
Drying: 1–3 hours in a dust-free area.
Making Prints in a Darkroom or Scanning
 If you choose the analogue route, printing requires an enlarger, trays of chemistry, and an orange safelight. This is true developing film in a darkroom and demands practice — dodging and burning with your hands and cardboard is part of the fun.
If you prefer to work digitally, scan your negatives with a dedicated film scanner or a good flatbed with film holders. Scanning gives you the flexibility to edit, correct, and print digitally.
Finishing Touches: How to Take Negatives to Final Photos
When negatives are scanned or you’ve developed prints, final editing polishes the image. For scanned negatives, basic adjustments include dust removal, contrast, and color balance. If you want to emulate roll grain or tones, consider curated presets and gentle retouching.
You might use a simple tool such as a photo corrector for quick tonal fixes, or apply the occasional selective adjustment to preserve grain and highlight detail. If your scan looks flat, a controlled curve or local contrast boost can bring it to life. For a natural film-like finish, avoid crushing the blacks or over-sharpening.
Practical Tips for Cleaner Negatives and Better Prints
 Here are some practical tips for cleaner negatives and better prints.
Avoid static by not rubbing the film surface; let it dry in a humid-ish room if possible.
Clean your scanner or enlarger glass regularly — a single speck can appear on every frame.
Label your processing journal with film type, developer, dilution, temp, and time. That makes repeats easier.
If a shadow area in the scan is too dark, a subtle selective exposure or darken image correction can rescue it. Use such tools sparingly so the image still breathes.
Simple Retouching and Film Looks (Digital)
-7917.jpg?q=85&w=840) For scanned negatives, you can do minimal retouching in an editor:
For scanned negatives, you can do minimal retouching in an editor:
Remove dust and scratches with the healing brush.
Adjust exposure and highlights to preserve detail.
Add subtle grain if you want to reintroduce natural texture.
When you need to retouch image elements (like a dust spot or a sensor artifact), do it locally — don’t globalize the change.
For those wanting a consistent analogue aesthetic, look into curated bundles like the best film presets for Lightroom, which mimic classic stocks and tonal curves.
A Few Common Mistakes and How to Avoid Them
 If you’re converting negatives to beautiful prints and wondering how to develop film into pictures, the key is patient, incremental corrections — small moves, not big leaps.
1. Problem: Uneven development (streaks).
Fix: Check agitation and tank cleanliness.
2. Problem: Washed-out midtones.
Fix: Shorten development time slightly or try a different developer dilution.
3. Problem: Water spots after drying.
Fix: Use a wetting agent and hang in a clean area.
4. Problem: Over-corrected scan (looks digital).
Fix: Reduce saturation, add subtle grain, and preserve highlight roll-off.
If you want to learn how to go the DIY route, there are guides on how to edit photos to look like film that explain color curves, grain, and highlight rolloff. The key is patient, incremental corrections — small moves, not big leaps.
Final Thoughts: Why Do This at Home?
Making your own prints or scans from film is both craft and creative control. Each step — from loading the reel to the final curve in software — carries choices that shape the image. When you finish a successful roll, the satisfaction is big and deeply human.
If you’ve followed this guide, you now know the practical answer to how to develop film on your own: prepare, time carefully, keep things clean, and scan or print with modest corrections. Whether you prefer the ritual of developing analogue photos in trays or the flexibility of digital scans, you’re in charge of tone, texture, and story.
Go gently, keep notes, and enjoy the small alchemy of this classic medium.