How To Take A Timed Photo On iPhone: Your Phone Timer Tricks
December 23, 2025

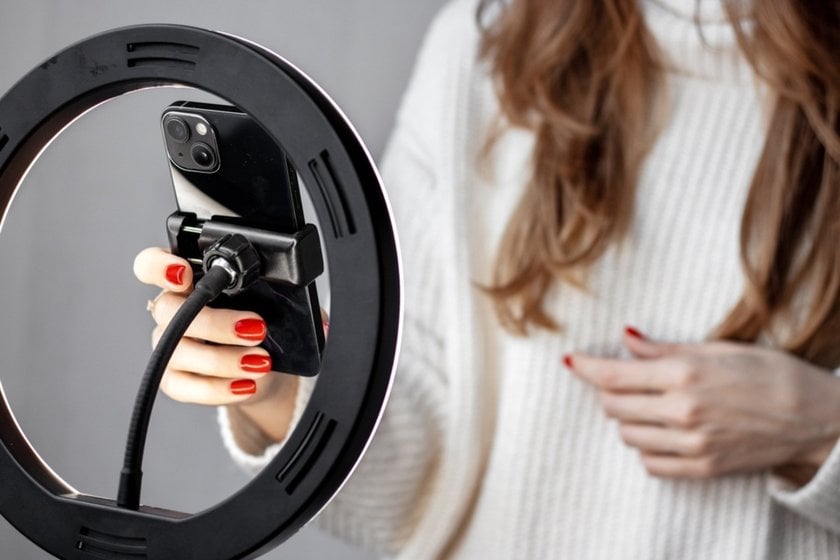
Hands-free photos are one of the most underrated features of the iPhone. Once you learn how to put timer on iPhone camera, you'll no longer have to juggle your phone at arm's length to avoid blurry selfies or group photos. The tool is built into the original camera, so you don't need to download additional apps or buy separate devices, which is quite surprising considering Apple's other solutions.
To make everything work, you only need to set the parameters once: choose how many seconds the timer will wait, which shooting mode you need, and whether to turn on the flash. Place your phone on a stable stand and take your place, not forgetting to smile.
Why Use the Timer on iPhone Camera
One of the main issues that a timed photo iPhone helps with is tiny camera shake from your own hands. Every time you tap the shutter, the phone moves just a bit. In bright daylight, this is almost invisible, but indoors or at night, even the smallest motion can soften the image and make faces look fuzzy. By adding a short delay, the timer lets the phone settle perfectly still after you press the button, and only then does it capture the shot.
If you are always the one holding the phone, you eventually disappear from the photos you take. Using the timer changes that: you can step out from behind the lens and stand right next to your friends or family instead of lingering off to the side. You no longer have to stop strangers in the street or sort through a bunch of awkward attempts—just pick a delay, tap the shutter once, and walk into the scene with everyone else. Later, you can run the best images through auto editing software to quickly polish exposure, color, and contrast so those shared moments look as good as they felt.
You can either place your phone on a shelf, on the car dashboard, or on a tripod, then walk into the picture and pose naturally. Enough arms no longer stretched, no more awkward shoulders in the corner, and more of your surroundings. Lastly, the countdown provides time to organize. The momentary delay allows everyone to prepare and exit the TikTok to view the camera.
Setting Timer on iPhone Camera: Step-by-Step Guide
Turning on the timer on your iPhone camera is a complex process with lots of variables, when really it's just a matter of a few taps and finding the right spot for your photo. Of course, this feature isn't highlighted by a huge red “Timer” button, but if you spend some time exploring the camera's additional features, you won't miss it. Below, we will take a step-by-step look at how to time a photo on iPhone and take a high-quality photo using it.
How to Take a Photo With a Timer?
Apple has tried its best to ensure that one can adjust photo settings as easily as a child can. The steps to be used to turn on the timer are as follows:
Open the Camera app and stay in Photo mode. In case a second function is turned on, turn it off.
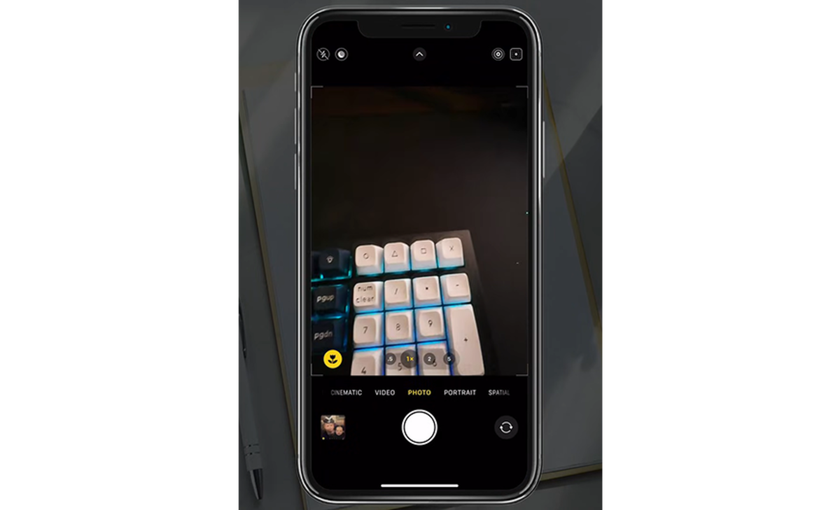
Tap the up arrow at the bottom of the screen. Nonetheless, if this fails, simply slide it up until you reach the control panel.

Select the shooting settings. There are many additional features designed to improve the quality of your photos in different circumstances. You can set the flash/night mode, take multiple pictures at once, or change the image format.

Set the desired delay. Any iPhone can be set to a value of up to 10 seconds. This may seem like a long time, but experience shows that many people still freeze in funny poses.
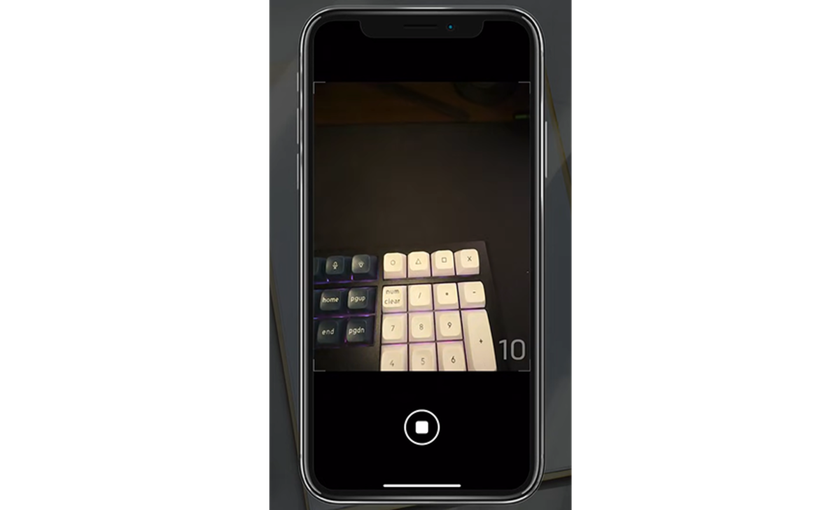
Visualize in your head the frame that you want, where you want people to be, and where you want the lens to capture the objects. Once all is set, press the shutter button.


This feature doesn't have to be used all the time. You just need to be ready to pull it out of the arsenal like a cowboy in a showdown, and then your photos will be beyond praise.
How to Put a Timer on Your iPhone Camera for Burst Mode
When you take a photo, someone in the frame is bound to blink, turn away, or make an accidental hand gesture, which can ruin the original idea. To avoid such situations and prevent taking the photo several times in a row, a burst mode was developed.
When the timer is started, the phone locks the focus and exposure, and then records a quick series of frames as soon as the countdown ends. Isn't that an excellent and elegant solution? Later, you can open the series, scroll through the set, and save only the frames where everyone looks their best.
Live Photos can be turned off before use or changed to the camera's settings, depending on the model and the version of iOS (single-frame).  In several sessions, you will have a pace that will not overuse memory, and you will have fewer choices to select from at the end of the process. If you are interested in how to combine two pictures on iPhone, Luminar Neo will help you create a collage. It is a sophisticated editing application that can bring any idea to life, even when it means combining over two images.
How to Use the Timer for Different Types of Photos
How the timer on iPhone camera works in practice is determined mainly by the frame settings and where you place your smartphone. Suppose the phone is on a stable surface. In that case, there is no chaotic movement in the frame every second, and the lighting is pretty even, the timer reveals its full potential—whether it's a quiet shoot with friends or a moment of taking pictures of the sun with iPhone. With those basics in place, the feature turns into much more than a simple “everyone stand there and smile” button.
How to Take a Delayed Picture with an iPhone for Selfies
 Capturing selfies with your phone in your hands? Mistake! This is an undesirable way to use the camera, as it restricts your angles and usually leaves your face distorted because the lens is too close. Use the delayed shooting technique to take a minute to step back, relax your shoulders, and make the appropriate expression.
The exercise of capturing a timed photo involves either attaching your phone to a tripod or setting a delay. So even if you've never heard of how to take a timed photo on an iPhone, even your grandmother could figure it out. Other settings can also be adapted in this menu should the need arise; the level of exposure, the live view, or the filters enablement.
How to Take a Timed Photo on iPhone for Group Shots
 Group photos benefit from a longer delay and a wider view. Group shots have the advantage of a longer delay and a wider view. For the family and friends, change the primary wide camera, select the 10-second setting, and center everyone, leaving a little breathing space around the periphery so no one is lost at the sides.
One of your anchors should stand approximately where you want the group to be, frame the shot, then start the timer. When everyone is in position, remind them to look at the lens, not the screen, in the last seconds. If a bit of motion or slight shake still sneaks in, a smart picture unblurrer in your editing app can sometimes recover enough detail to save a group shot. If a bit of motion or slight shake still sneaks in, a smart picture unblurrer in your editing app can sometimes recover enough detail to save a group shot.
Tips for Night Photography with iPhone Timer
 In low light, your iPhone suddenly becomes very sensitive: small touches or dots turn into visible streaks and blurring. Using delayed shooting helps to some extent, but without additional equipment, you can't expect high-quality results in pitch darkness. You can either give up or try shooting with different settings.
Select night mode. In the same menu where you set the timer, you can select additional shooting options. Keep in mind that activating this mode will force the flash to turn off.
Set a long exposure. The specific value will depend on the subject, but if you want to capture stars, 10-20 seconds is optimal. For shooting people, it is better to choose 1 to 5 seconds so that you don't look like a ghost in the photo.
Maximum stabilization. Night shooting settings assume that the phone will remain stationary for a long time. Make sure your smartphone is securely mounted, or be prepared for some scary faces.
A simple rule to share with the group: smile, breathe, but pretend you're a statue until the camera finishes shooting—superhero poses are welcome, except in the middle of movement.
Enhancing Timed Photos with Luminar Mobile AI Tools
 A timer will help you take better photos, but it doesn't solve all existing problems. For example, you can only replace the sky or remove an object using an iPhone picture editor. But which solution should you choose? Any professional photographer will answer without hesitation: “Luminar Neo is worth considering.”
This state-of-the-art AI-driven utility lets you add a moon to the night sky, replace clouds, or remove a passerby who accidentally wandered into your shot with a single click. And if you wish to make more sophisticated adjustments to your picture, this editor offers automatic color correction and support for layers.
The disadvantage of using a timer in a low-light environment is the high graininess. Use a small amount of noise reduction and remove a small amount of microcontrast to ensure that faces don’t appear excessively smoothed. The possibility of working with several images simultaneously is the icing on the cake. Thus, even when you have many pictures, you will not have to create a standard style among them in Luminar.
Conclusion: Making the Most of the iPhone Camera Timer
The iPhone timer is a small button that solves three common problems at once: camera shake, awkward framing, and the “who takes the picture if everyone is in it” question. Once you get comfortable with the delay options and where the timer lives inside the Camera app, using it becomes second nature.
Think of a timer session as a mini photo shoot. You set the scene, run a few takes, then pick and edit the best results afterward. With stable support, thoughtful framing, and light editing in your favorite tools, your timer photos can look every bit as polished as shots taken by someone else.
FAQ
What Are the Best Lighting Tips for Timer Photos?
Soft, light, even, is thy good fellow. Whatever you are going to shoot outdoors, pick a moment when the sun is low on the horizon. When you are in an indoor environment, you want to face the window, as it will provide little natural light, which can cause harsh shadows. Neon signs, street lights, or the light of any objects are the supplementary sources of light that can be detected in the surrounding objects when shooting at night. Under these circumstances, you can shoot good photographs with a mysterious effect. The main thing in this case is to find a reliable stand for your phone, set the timer, and strike a pose.
How Do I Stop a Timer Once It’s Started on My iPhone Camera?
Once you have tapped the shutter with a shutter timer on, the shutter changes to a stop or cancel icon in place of the shutter button. Tap it to stop the countdown and avoid taking the photo.
Can I Use the iPhone Timer with Portrait Mode?
Yes, you can. Switch to Portrait mode in the Camera app, then turn on the timer in the same way—using the arrow and clock icons.
Can I Use the Timer for Video on iPhone?
This may pose a problem. The timer built into Apple products can only be used in Photo and Portrait modes. To apply the delayed shooting effect to videos as well, users will need to equip themselves with additional devices or applications.
How Do I Take a Timed Photo on My iPhone?
It all comes down to three steps: turn on the camera, set the timer, and activate the process. If you haven't changed the default settings, the “photo” mode will be active initially, and the minimum delay before the photo is taken will be 3 seconds. These settings are suitable for most situations, but if you need to change them, you can open the settings by swiping up from the bottom with the “camera” app open.