Luminar Neo Preset function: A Brief Guide
December 21, 2023
Today, we will discover how to use the Luminar Neo Preset function, where AI suggests the best preset for your photo.
Skylum's Luminar Neo has many tools with various effects, and if you can master these tools, you can edit your photos as you want.
However, it is difficult for beginners to use the various tools to edit photos immediately, so let's start by editing photos quickly using the preset function.
Hello, this is E-M-W.
The primary Usage of Presets
First, I will introduce the primary usage of presets.
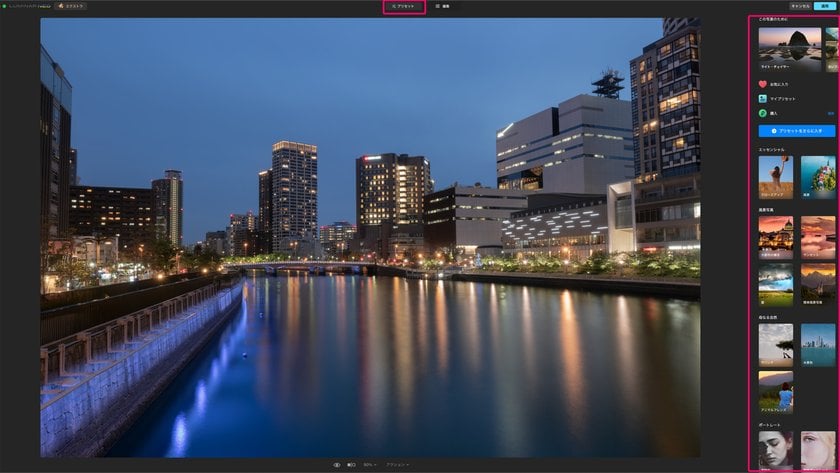
Click on the Preset on the screen to go to the preset screen. A preset panel will appear on the right side of the screen, from which you can select and use a preset.
The preset panel displays the following items from the top: For This Photo, Favorites, My Presets, and Purchased, and below that are Essentials, Landscape, Mother Nature, Portrait, Macro, Cinematic, Lifestyle and Aerial; eight preset categories displays.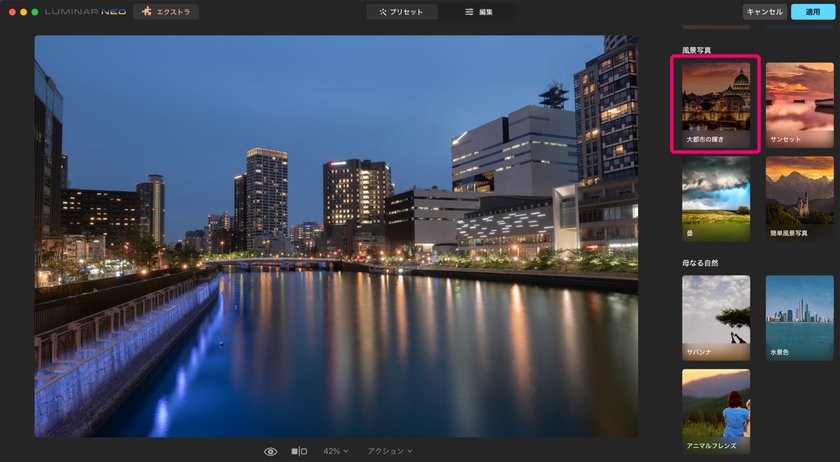
For example, in this case, select the preset collection of “Big City Lights'' from the landscape photography category.
Of course, no rule says you must choose a preset in the same category as the subject you are editing, but choosing a category that matches the topic is generally better.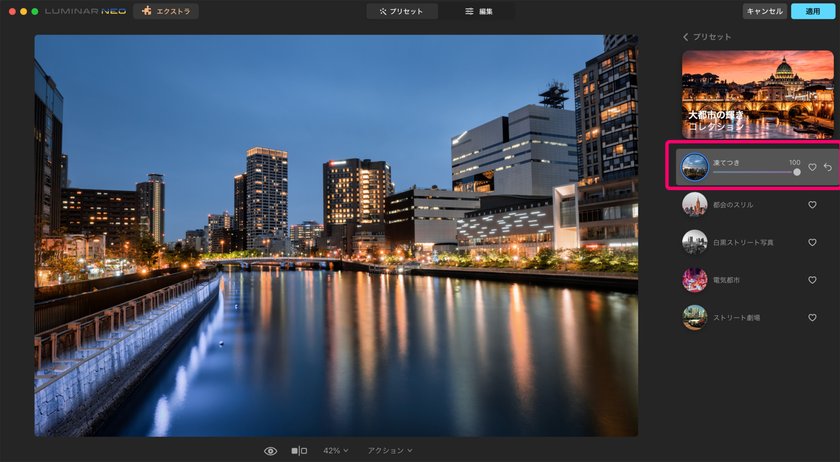 Select a preset from the preset collection and click it to complete editing.
For this Photo Feature
“For This Photo" is one of Luminar Neo's most representative features and is a fantastic feature where AI recognizes the photo and suggests the most suitable preset.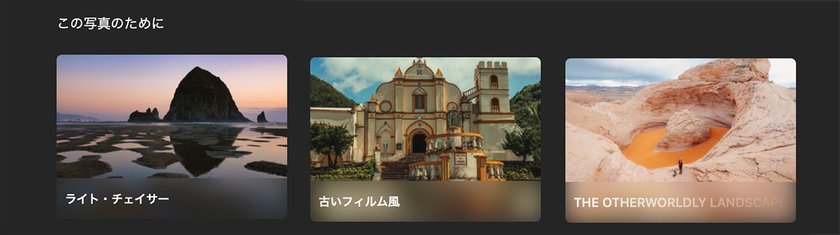
For this night scene photo, it recommended three preset collections: "Light Chaser," "Old Film Photography," and "The Otherworldly Landscape".
This time, I will apply the Light Chaser preset "Last Light" from among them.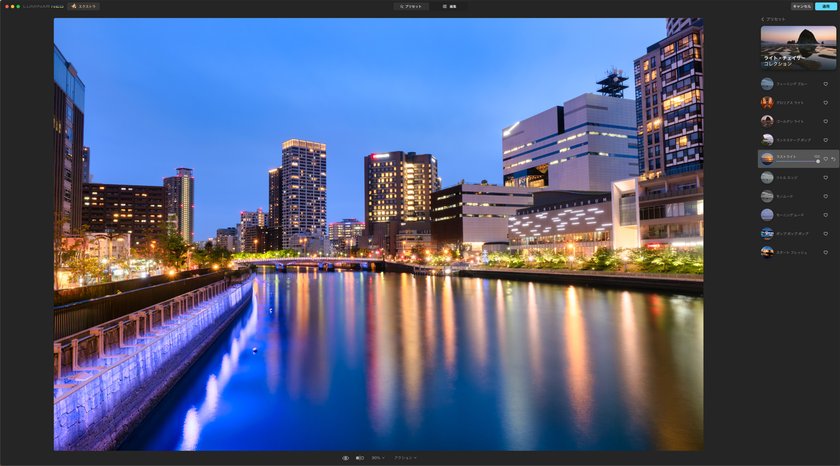
Using the presets recommended by AI, a dark nightscape photo was transformed into a gorgeous nightscape photo.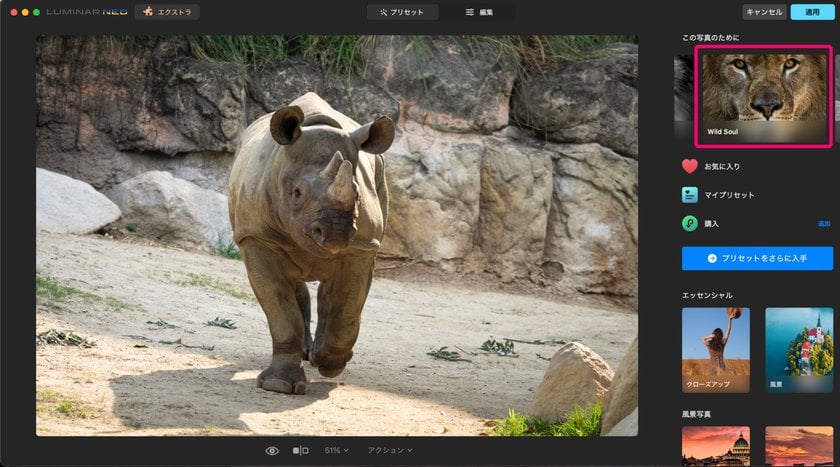
Next, use presets to edit a photo of a rhinoceros taken at the zoo.
“For This Photo'' has recommended three preset collections: Wild Soul, Forever Wild, and Black & White Wildlife. But this time, I will apply the Wild Soul preset "WILD LOOK" from among them.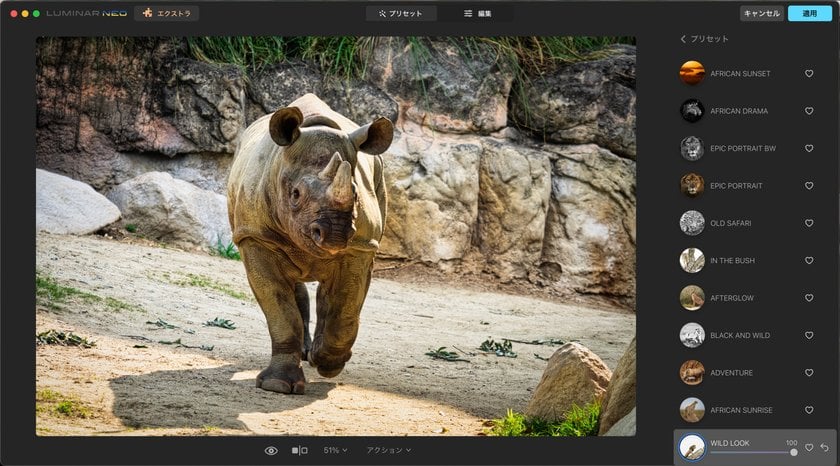
The photos taken at the zoo have been transformed into an image that looks like they were taken in the wild, but the effect is too strong.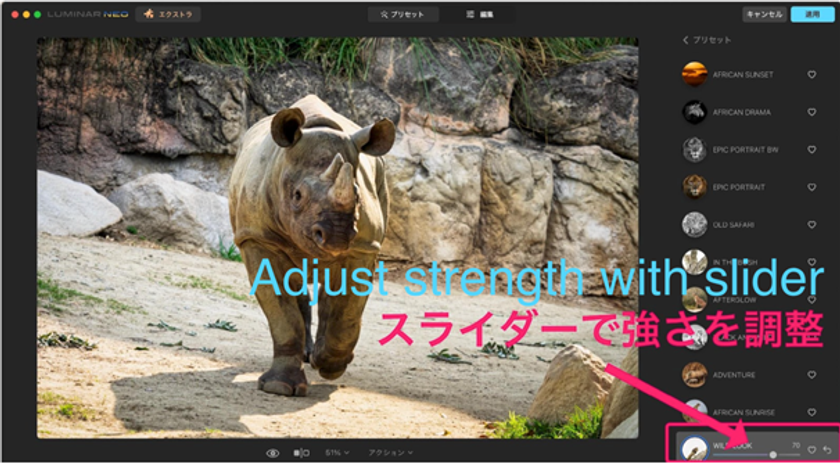
If the preset effect is strong like this time, you can easily adjust it by weakening the slider amount.
Luminar Neo has 22 preset collections as a default, and the number increases as you purchase on the Luminar Marketplace, so you may need clarification on which one to choose.
In such a case, you can edit the photo efficiently using the presets recommended in "For This Photo".
Advanced yet easy-to-use photo editor
Get Luminar Neo NowHow to Create a Preset
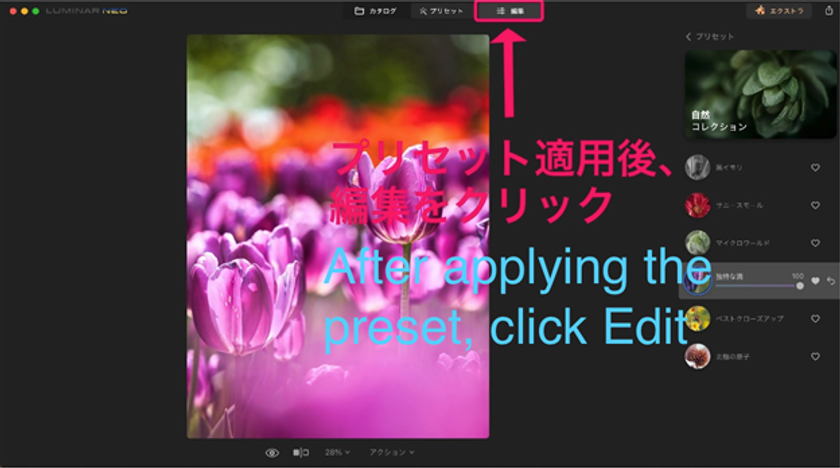 The My Preset function allows you to create your own original presets.
 Although you can create your own preset from scratch, you should first edit an existing one and then create your own. After applying the preset, click Edit at the top of the screen.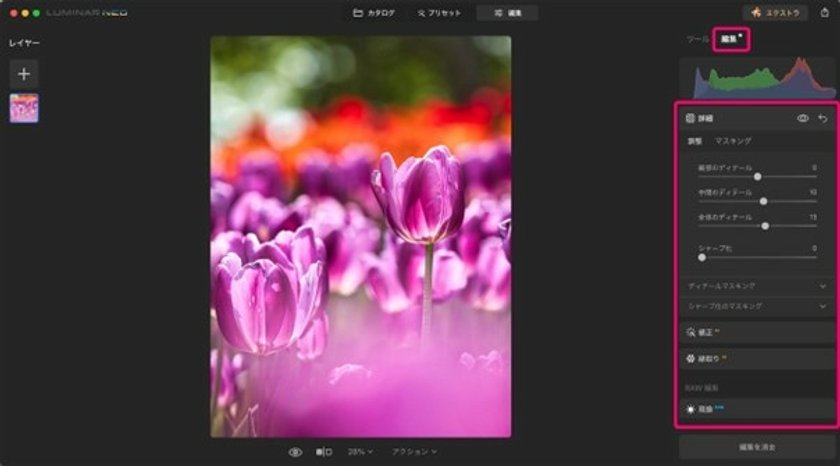
Click Edit at the top right of the screen to adjust the tools applied to the preset.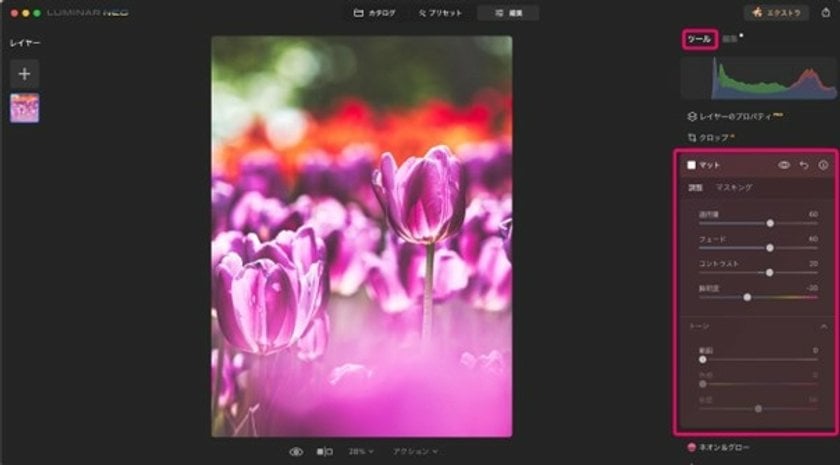
By clicking the tool at the top right of the screen, you can add new effects to the preset. With the preset applied, I used the matte tool to add a fade and matte feel to the photo.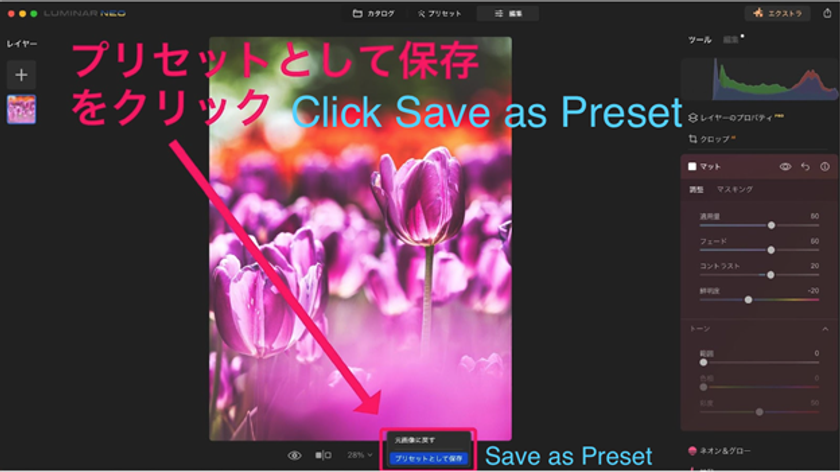
Click Save as Preset at the bottom of the screen.
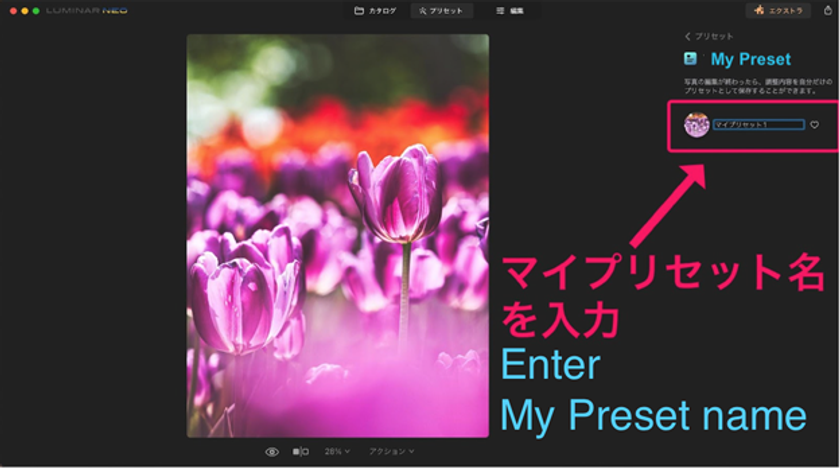 Just enter your preset name, and you're done. The presets you create can be used from "My Presets" in the Presets panel, and you can also edit and rename the presets.
How to Purchase Presets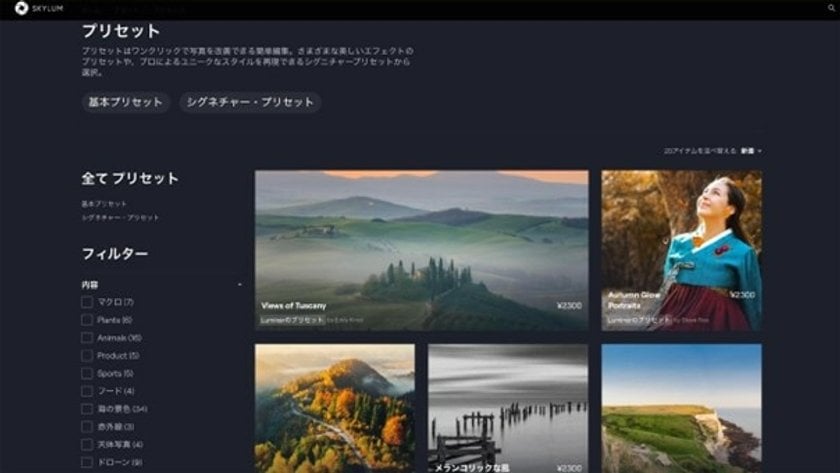

You can purchase presets created by professional photographers and editors on the Luminar Neo official website marketplace.
The presets sold are of higher quality than those that come with the software, and there are presets that can be used for various purposes.
If you want to purchase presets cheaper than in the marketplace, subscribe to the flat-rate Luminar X membership.
When you subscribe to this plan, you get two free presets, LUTs, and sky images every month, and you also get discount coupons that can be used when purchasing presets in the marketplace.
Lastly…
Luminar Neo's presets can be edited thanks to the "For this photo" function quickly; the My Presets function allows you to create your own presets, and it has various attractive features, such as purchasing high-quality presets on the official website.
Now, enjoy photo editing with Luminar using the preset feature.