Making and Using LUTs for Flex and Luminar
June 07, 2019
For years, Hollywood has used Lookup Tables to achieve creative results quickly. These magical files can do all sorts of things like simulate film stocks, change color and tone, and much more.
LEARN WHAT’S NEXT!
And never miss the most exciting updates from Skylum.
Congrats, you’re in!
Don’t forget to check your inbox from time to time.
Sorry!
Looks like you're subscribed already
Error! This is sad. Looks like you’ve earlier unsubscribed from Skylum emails.
Here’s an in-depth article I wrote that explains more about the technology.But for now, let’s jump to the fun stuff.

Making a Custom LUT
A LUT can easily capture multiple color and tone adjustments into a single file. Think of it as a “bundled” adjustment. Taking it to a single filter that can contain several creative options. LUTs are easy to work with and fast to use because they are simple and portable.
We can make a LUT using Luminar or Flex and a cool free utility called IWLTBAP LUT Generator.
STEP 1: Download the IWLTBAP LUT Generator from https://generator.iwltbap.com. It’s donationware so you can make a small payment or download for free.
STEP 2: Install the correct version for your computer.
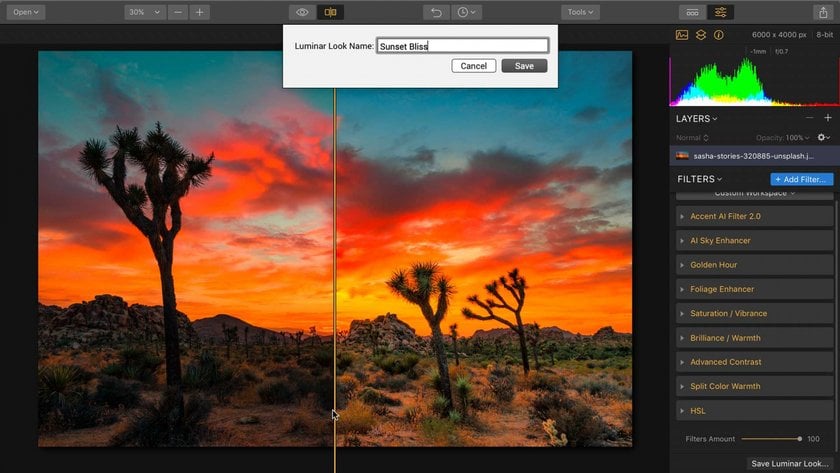 STEP 3: Develop a photo you like in Flex or Luminar and save a Custom Look. For best results stick with filters that adjust color, contrast, and tone. Creative filters like Sunrays or Orton effect don’t transfer, just adjustments that affect things like saturation, contrast, and hue.
STEP 4: Open up the Color chart graphic Neutral-512.png in Luminar or Flex.
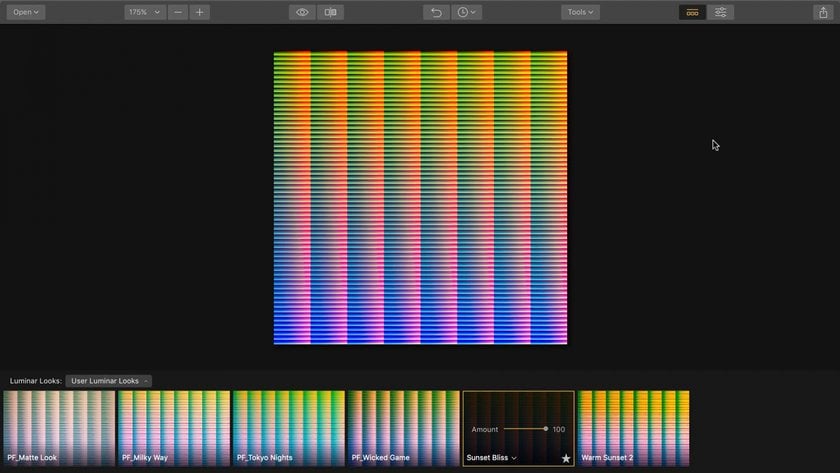 STEP 5: Apply the preset you recently made to the color chart.
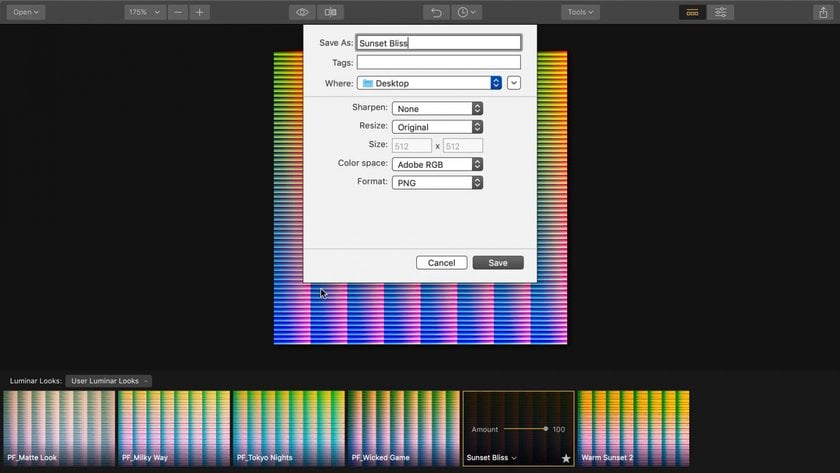
STEP 6: Export a new PNG file using the Adobe RGB color space and name the file clearly to match the look or mood.
 STEP 7: Fro, the IWLTBAP LUT Generator application, open the PNG file you just made. A new LUT is created and stored need to the original file. The .CUBE file is ready to use in Luminar.
Working with LUTs
Once you’ve got a CUBE file, things get easy. LUTs can be used in Flex, Luminar, and even Aurora. They are awesome for creative options.
STEP 1: Open an image
STEP 2: Apply the LUT Mapping filter. (Click the Add Filter button if needed)
STEP 3: Click the pop-up list labeled Choose LUT. You can also load your own LUTs (in the .cube format).
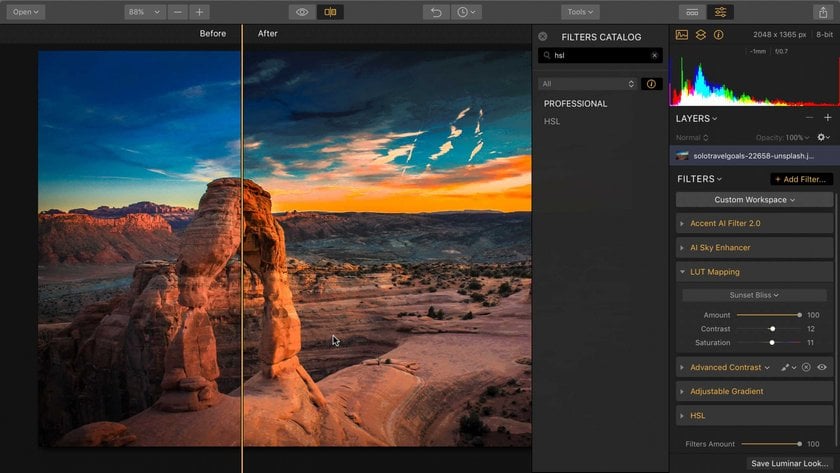
STEP 4: Adjust these sliders to taste.
- Amount. This lets you reduce the intensity of the Lookup Table.
- Contrast. This impacts the overall contrast in the image and can be used to refine the LUT’s appearance.
- Saturation. This impacts the overall saturation in the image and can also be used to refine the LUT’s appearance.
STEP 5: [OPTIONAL] Click the drop-down arrow next to the filter name and feel free to try out options like = Blend,
STEP 6: [OPTIONAL] Add additional filters, textures or LUTs to create a new style for your image. Then save a new Luminar Look (Filters > Save Luminar Look). If you choose a custom LUT it will automatically be stored with your saved Luminar Flex file or embedded into any custom Luminar Look that you create.
Enjoy
Get creative and build up your LUT toolbox. A LUT you make with Luminar can be used with many other video or photo applications. Have fun and start color grading.
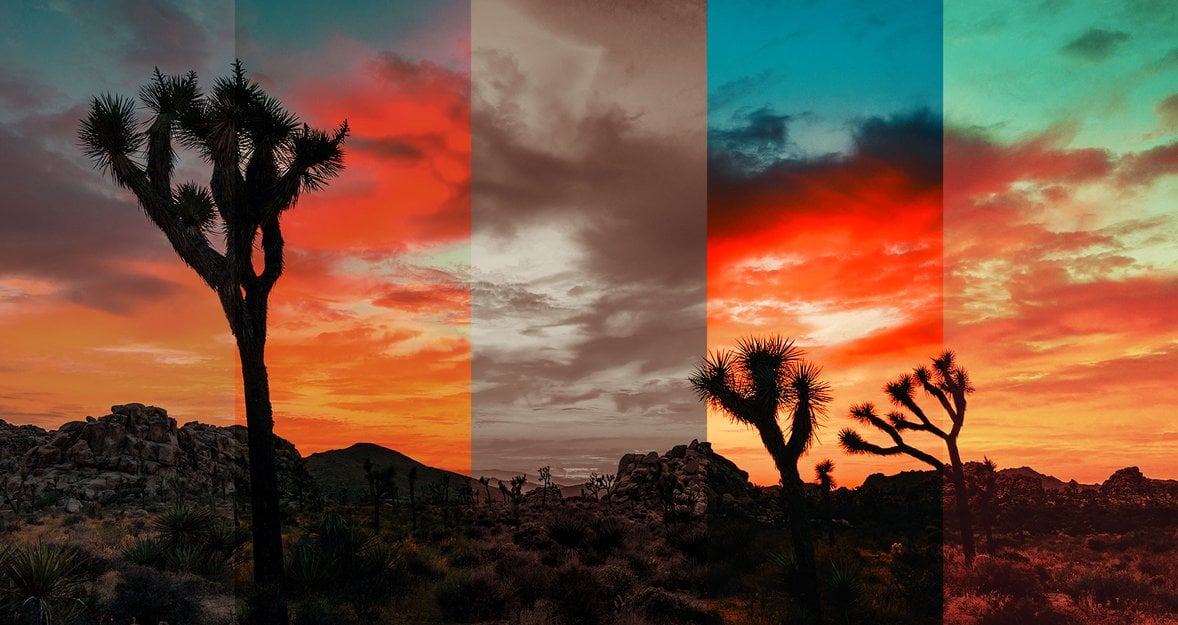
Thanks to Sasha and solotravelgoals for letting me use their photos in this story.