What Is Panning In Photography And How To Capture Motion
October 28, 2025
Panning is the simplest trick to make a photo move, which perfectly shows the panning photography definition. Track your subject, pick the right shutter, and suddenly a runner becomes a line of intent.
Panning is one of those simple tools that turns a static scene into a story about speed and focus. It is not about freezing every detail. It is about choosing what to keep sharp and what to let streak away.
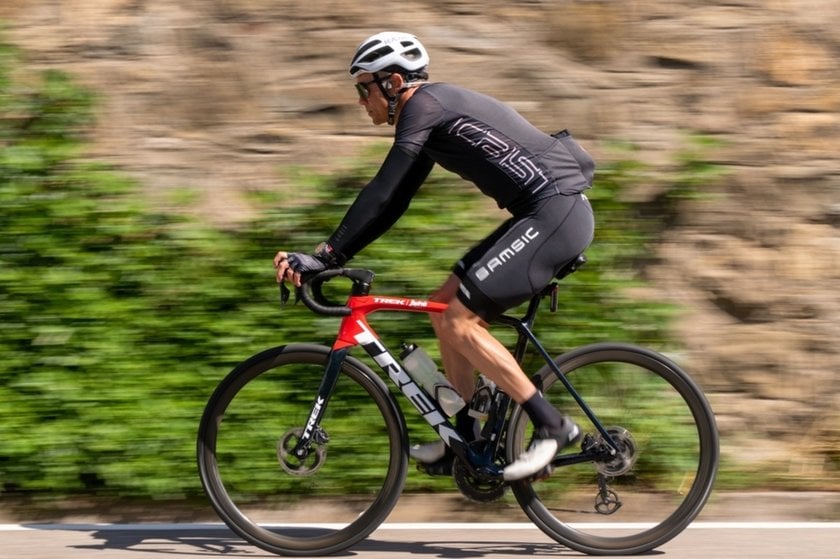
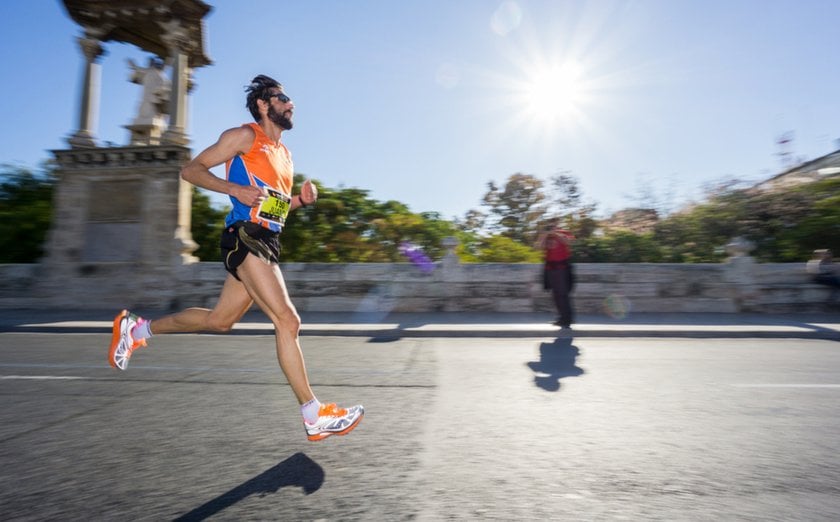
A well-executed motion-follow frame conveys the feeling of moving forward, like the push of a bicycle, the rush of a train, or the glide of a runner. Here, I will explain panning, how to set up your camera, a step-by-step method to practice, and creative uses, so your next motion shot looks intentional and fresh.
Panning Photography Explained
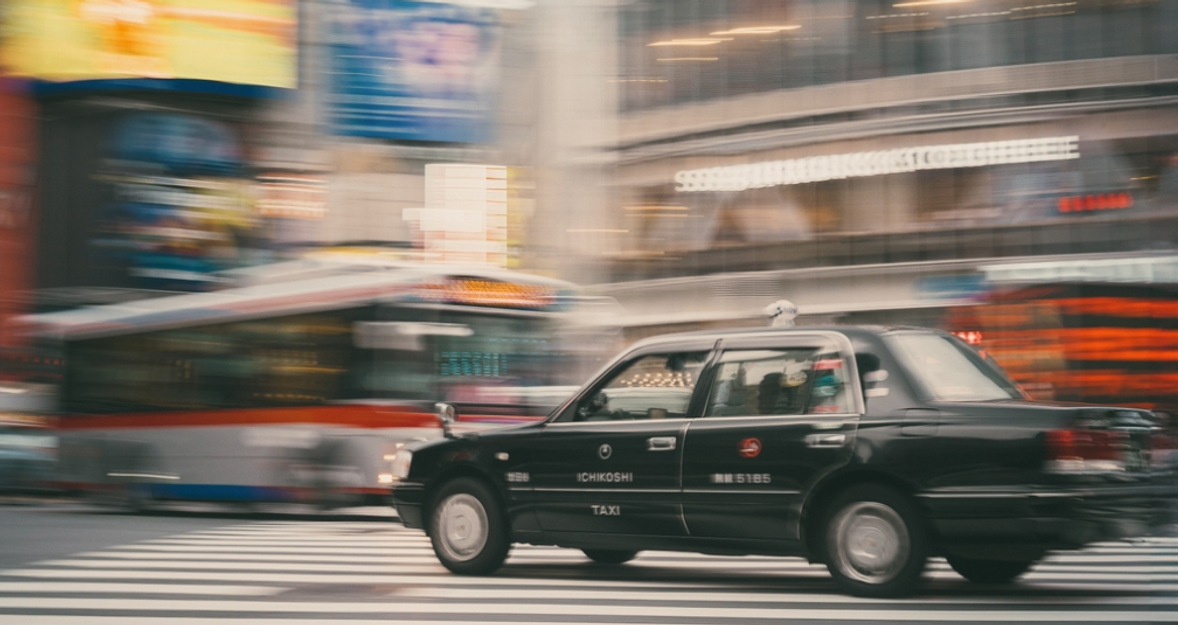
 Panning is a controlled tracking movement of the camera that follows a moving subject while using a slow shutter speed. It literally moves the camera to follow motion, so the main focus stays relatively sharp against a streaked background. Answering what is a panning shot, it’s a frame where the subject is readable, and the surroundings show motion through blurred streaks.
A brief definition of panning photography is a technique for capturing moving subjects by matching the camera's motion to their movement. Photographers often aim to keep one plane of the image sharp while the rest dissolves into lines of motion.
Your AI-Powered Photo Editor for MacOS and Windows
Discover Now!Why Motion Through Panning Works
A panning frame trades background detail for dynamic context. Instead of a tack-sharp scene, the image emphasizes direction, speed, and energy. That blurred background signals movement visually. This is why panned motion photography can be more evocative than stopped-action photos.
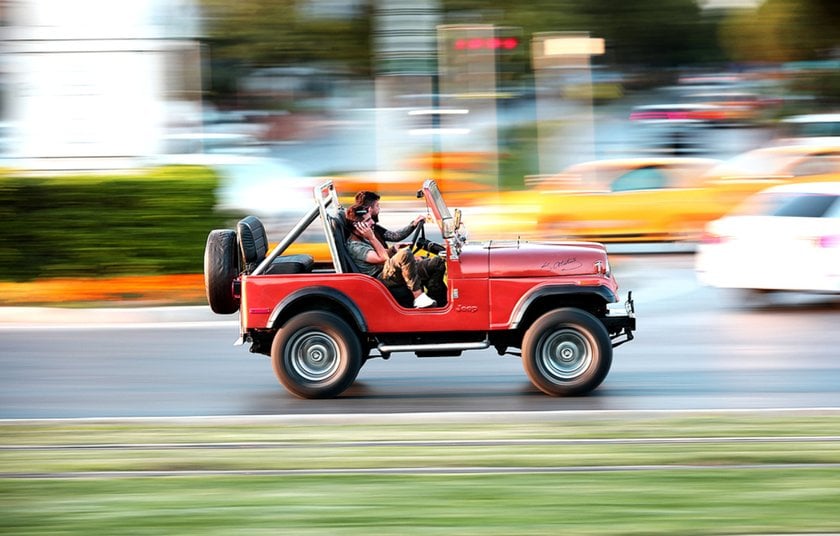
Camera-swept shots also force you to see differently: anticipate where the subject will be, commit to a sweep, and accept some imperfection as part of the aesthetic. For example, a motorcycle photographing on a forest road becomes a streak of green and chrome; a child on a scooter reads sharp with a smear of playground behind them.
Camera Setup for Panning Shots
 Before you swing the camera, get the engine of settings right. Understand camera panning meaning in practical terms: the camera must move smoothly with the subject, and the exposure must be long enough to register background motion but short enough to keep the main focus readable.
Use shutter priority or manual mode.
Start at around 1/60 seconds for slow-motion targets and try 1/125 to 1/250 for faster ones.
Set continuous autofocus and continuous drive mode.
Choose single-point AF and place it on the subject’s head or leading edge.
When you want to practice how to take panning shots on a phone or make long exposures with compact tools, explore how to take slow shutter speed photos on an iPhone. It shows simple phone techniques that translate well to small cameras.
Choosing the Right Shutter Speed for Motion Blur
Shutter speed controls how many background streaks. For bicycles around 15–25 kph, try 1/60 or 1/125. For cars on a track, 1/30 can work but requires steadier hands. Use these starting points:
Pedestrians: 1/30 to 1/60 second.
Cyclists and scooters: 1/60 to 1/125 second.
Racing cars: 1/125 to 1/250 second.
Also, experiment. The same shutter speed gives different results depending on lens focal length and how fast you pan. Combining the right shutter with smooth movement is one of the key camera panning techniques that separates a messy blur from a polished streak. If you need a deliberate streak, use neutral density filters or wider apertures to lengthen exposure. For post-processing motion emphasis, look into a motion blur photo effect to tune streaks while preserving subject detail.
Adjusting Focus and ISO for Sharpness
Sharp subjects need steady panning and correct exposure. Lower ISO reduces noise and helps preserve detail in the focus point. If the subject is dim, raise ISO rather than cutting the shutter speed too much. For focus:
Use continuous AF-C and track a consistent point on the moving target.
Pre-focus when the subject approaches a predetermined mark if AF lags.
Choose a mid-range aperture like f/5.6 to f/8 when depth of field helps hold a moving object in the same plane.
Suppose you want the background to fall away behind a key element, practice techniques to blur background of photo that complement panning. That page shows how background separation helps emphasize the subject.
Step-By-Step Panning Technique to Master Motion
 Here is a reproducible workflow I use in the field. If you’re wondering how to do panning in photography, follow these practical steps.
Choose a moving target that moves steadily and predictably.
Set shutter speed based on subject speed and focal length.
Mount the camera at eye level or hip level, depending on the scene.
Track the object in motion smoothly for a second before pressing the shutter.
Continue the sweep after the shutter fires to avoid jerky stops.
Use this checklist to practice: focus, breathe, follow, fire, and follow through. It sounds obvious, but disciplined repetition is the fast track. Begin with a slow subject like a bicycle to find the rhythm. Keep your eyes on one point on the subject and move the camera with that point. Repeat the motion until the sweep and shutter feel natural.
Finding the Perfect Subject and Background
Pick subjects with a clear silhouette and a predictable motion path. If you wonder what does panning mean, it’s following the main focus so it stays readable while the background becomes streaked motion. Good subjects: bicycles on a straight path, runners on a track, cars on a closed road, birds flying along a shoreline. Avoid chaotic backdrops: trees with busy branches can read as noise rather than motion.


For creative composites, some photographers combine panning frames in stacking software to preserve detail across multiple frames while keeping motion streaks intact. Try combining a sharp frame and a panned frame to get the best of both worlds.
Body Positioning and Smooth Movement Tips
 Your body is the tripod when you pan. Stand with feet shoulder-width apart, with the left foot slightly forward if panning left to right. Relax your knees. Keep the camera tucked to your face for stability. Rotate from the hips, not the arms. Follow a subject for a couple of seconds before firing. Use a steady, even speed rather than sudden starts or stops. If handholding is too shaky, a monopod with a swivel head reduces wobble while preserving freedom of movement.
Common Mistakes to Avoid
 A short list of traps I see beginners fall into:
Shutter too fast. The background is static, and the image loses drama.
Jerky pan. Motion looks broken rather than fluid.
Wrong focus point. The subject appears blurred front to back.
Busy background. Details confuse the streaks and reduce impact.
Overprocessing. Excessive sharpening removes the painterly quality.
To make an image crisper after capture, read techniques on how to make a picture more clear. Use those tips sparingly so you don’t undo the natural blur that gives tracking motion its feel.
Using Panning Creatively Across Genres
Motion-tracking is not only for sports. Here are practical panning photography examples and ideas.
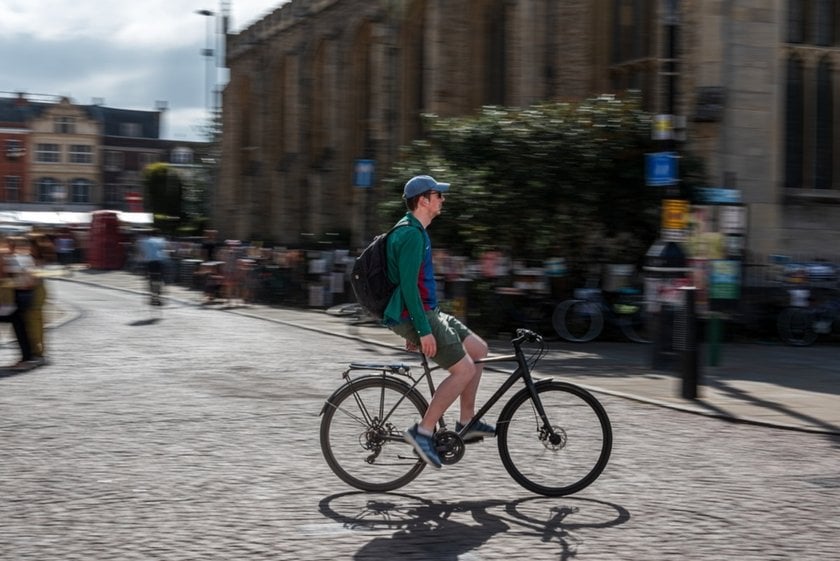
Street photography: Track a cyclist through an alley to separate them from graffiti.
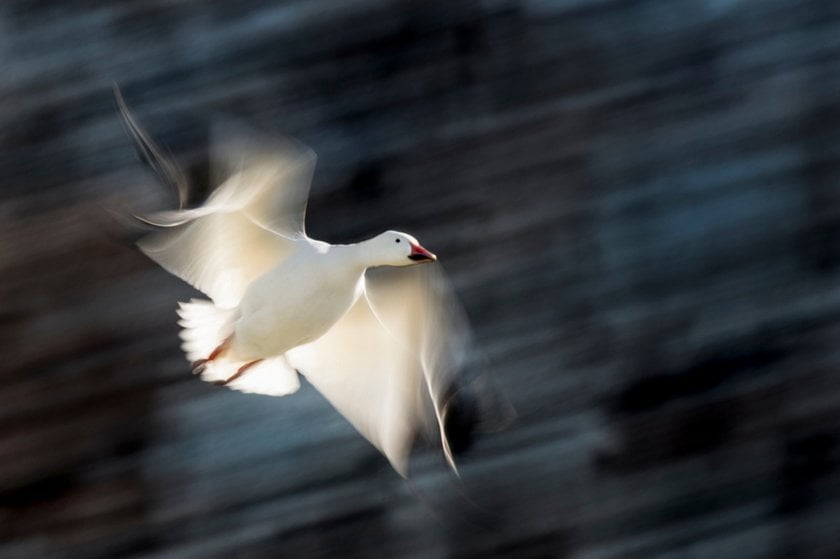
Wildlife: Photograph birds flying across a marsh for graceful streaks.
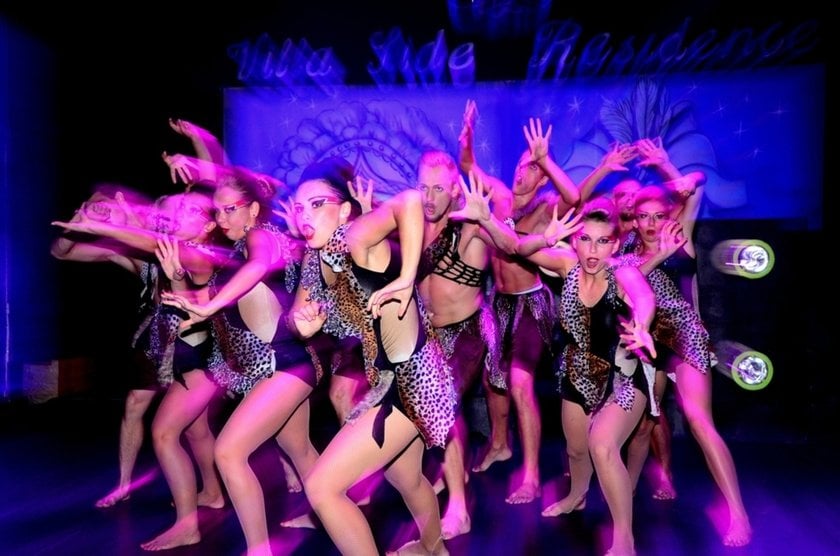
Events: Follow dancers during a twirl to show motion and emotion.
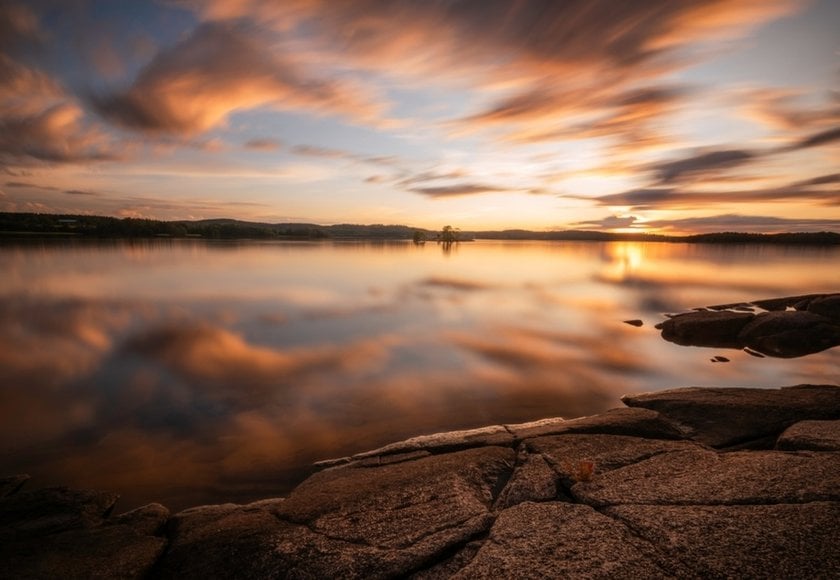
Landscape: Combine a static foreground with passing clouds using slow panoramas.


For photographers wanting to explore stylized motion, panning techniques can merge with deliberate camera movement. Try combining follow-through motion with slight vertical movement for a painterly effect, or bracket motion-tracked exposures to select the best balance of subject clarity and background streak. As an approach, panning motion photography can also work in product shots for dynamic marketing images, where a runner passes behind a shoe display to communicate energy.
Infuse Your Photos with Dynamic Energy Using the Motion Blur
Learn moreWrap-Up
Panning is a deceptively simple technique that rewards practice with vivid, storytelling images. It asks you to slow down physically and speed up your camera logically. If you take one thing away: control the sweep, choose the shutter speed that matches subject velocity, and use steady follow-through. Over time, you will find a personal rhythm and style in these frames.
For readers who want further inspiration or technical steps, try practicing with different moving targets and keep a small notebook of settings that work. A few panning photography tips: start with slower subjects, warm up with practice sweeps, and review your shots to tweak shutter speed and body position.