January 01
2 min. to read
Як зменшити розмір фото без втрати якості

Іноді зменшення розміру зображення стає необхідним. Оригінальні зображення високої роздільної здатності можуть займати багато місця на вашому комп'ютері чи мобільному пристрої, що може уповільнювати продуктивність та спричиняти проблеми зі зберіганням даних.
Хоча більші фото часто означають "високу якість", важливо зазначити, що розмір зображення певною мірою впливає на його якість. Однак часто можна зменшити розмір файлу, не значно погіршуючи візуальну якість фотографії.
Отже, як можна зробити файл із зображенням меншого розміру, і для чого це потрібно? А також, як використовувати редактор зображень для цієї задачі?
Cтиснення зображень та його переваги

Стиснення зображень — це процес зменшення розміру файлу зображення, який можна здійснити за допомогою різних технік. Воно відіграє важливу роль у цифровому управлінні зображеннями та має як переваги, так і недоліки.
Зменшення розміру файлу часто необхідне з багатьох причин. Ось деякі з них:
Для звільнення місця на диску: Файли займають майже весь ваш цінний простір. Ви можете легко зменшити розмір зображення та звільнити трохи місця. Варто також згадати, що для зручності варто обрати найкраще програмне забезпечення для організації фотографій.
Для зручності обміну файлами: Ви хочете надіслати фото як вкладення (через електронну пошту або інший спосіб), але розмір файлу занадто великий для прикріплення. Зменшення розміру файлу дозволить вам легко й швидко завантажити його.
Для оптимізації вебсайту: Ви хочете завантажити зображення на свій вебсайт, але його великий розмір не лише займає багато місця, а й уповільнює завантаження сайту.
Далі ми розглянемо кілька способів, як змінити розмір зображення.
Покрокова інструкція: Як зменшити розмір файлу зображення

Усі описані вище ситуації потребують зменшення розміру зображення. Як це зробити? Розберімось разом. Цей посібник містить корисні поради, як зменшити розмір файлу фотографії, щоб ви могли легко та ефективно зберігати й ділитися своїми знімками.
До речі, якщо ви хочете спростити постобробку своїх найкращих фотографій, обов’язково ознайомтеся з AI-редагуванням фото від Luminar Neo.
Зміна розмірів зображення для зменшення файлу
Найкращий спосіб зменшити розмір зображення — зменшити його розміри. Зазвичай у програмі для редагування зображень можна вибрати опцію Resize Image у панелі меню.
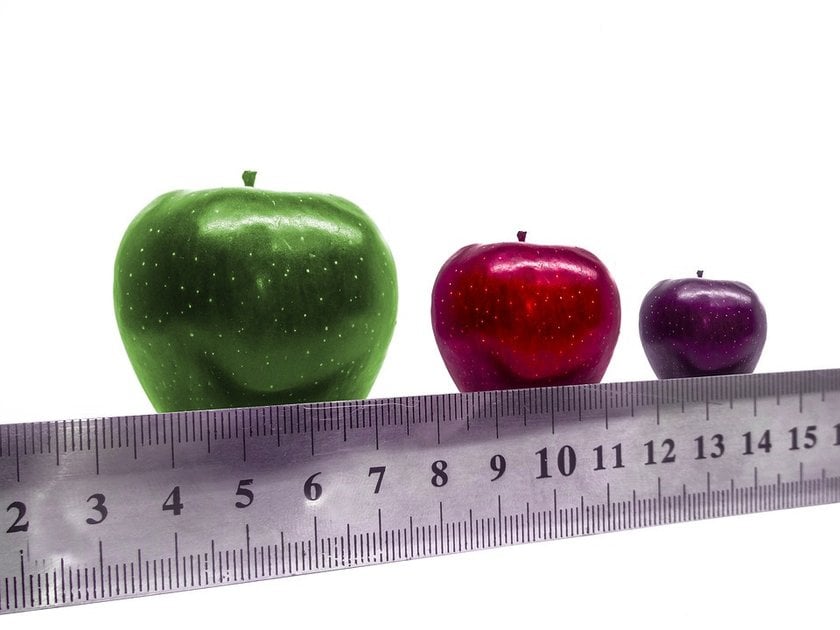
Розмір зображення — це його ширина та висота, які разом визначають загальний розмір і форму фотографії. Ви можете змінити ширину та висоту зображення відповідно до ваших потреб.
Зміна роздільної здатності для зменшення розміру фото
Як зменшити розмір фото цим способом? Є ще один чудовий варіант. Крім зміни ширини й висоти зображення, ви також можете зменшити його розмір, змінюючи роздільну здатність.
Роздільна здатність зображення визначається за допомогою DPI (кількість точок на дюйм). На екрані ПК максимальна кількість точок на дюйм становить 72 DPI. Великі зображення зазвичай мають збільшений DPI. Тож усе, що потрібно зробити, це зменшити DPI відповідно до ваших потреб або до 72, щоб зменшити розмір фото. Цю задачу можна виконати за допомогою будь-якого інструмента для редагування зображень.
Вибір правильного формату файлу для зменшення розміру
Як ще зменшити розмір зображення? Зміна формату файлу може допомогти заощадити багато місця. Деякі формати, такі як .PNG і .BMP, зазвичай більші. Збереження файлу у форматі .JPG може бути корисним.
Все, що вам потрібно зробити, це відкрити файл у програмі, вибрати Save As…, і під час збереження вибрати формат .JPG.
Програмні рішення: Як зменшити розмір файлу фотографії
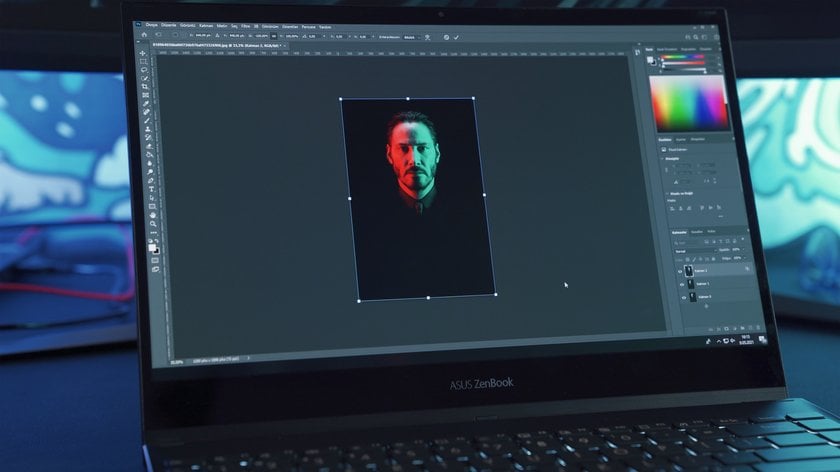
Photoshop: У Photoshop зменшити розмір зображення можна за допомогою опції Image Size. Коли ви обираєте цю функцію, програма запитує нову висоту, ширину та роздільну здатність. Введіть необхідні значення та натисніть Save, щоб отримати файл меншого розміру. Ви також можете зменшувати розмір фотографій за допомогою безплатних альтернатив Photoshop, які доступні на ринку.
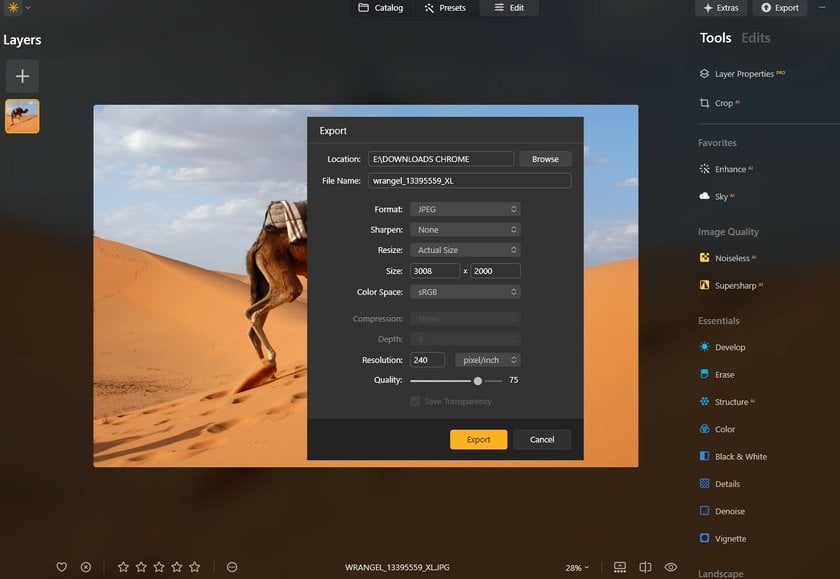
Lightroom: У Lightroom можна зменшити розмір файлу зображення під час експорту. Під час експорту просто відкоригуйте розміри та роздільну здатність у розділі Image Sizing. Ви також можете встановити максимальний розмір файлу, якщо це потрібно.
Онлайн-інструменти: Вебсайти, такі як TinyPNG та JPEG-Optimizer, дозволяють стискати зображення зі збереженням достатнього рівня якості. Ці інструменти прості у використанні й не потребують встановлення програмного забезпечення.
Як зменшити вагу файлу фотографії: Загальні поради
1. Завантажуйте у нижчій якості
Під час завантаження або збереження вибирайте опцію "економія простору" або нижчу якість, щоб одразу зменшити розмір файлу.
2. Обрізайте непотрібні частини
Відріжте зайві ділянки фото. Це не тільки зменшить розміри зображення, а й скоротить загальний розмір файлу.
3. Налаштовуйте роздільну здатність зображення
Знижуйте роздільну здатність фото. Це особливо ефективно для зображень, які призначені для вебвикористання, а не для друку.
4. Перетворюйте формат файлу
Змініть формат зображення на той, що використовує більш ефективне стискання. JPEG зазвичай підходить для фотографій, а PNG — для зображень із прозорістю.
5. Використовуйте інструменти стиснення
Скористайтеся онлайн-інструментами або функціями програмного забезпечення, які стискають зображення без суттєвої втрати якості.
6. Видаляйте метадані зображення
Приберіть непотрібні метадані (наприклад, GPS-інформацію та налаштування камери), які можуть займати додатковий простір.
Чому Luminar Neo вирізняється у зменшенні розміру зображення

Luminar Neo — один із найкращих редакторів фотографій, який робить процес зменшення розміру файлів простим і зручним. Для цього достатньо завантажити файл і виконати декілька дій:
- Відкрийте меню експорту через панель меню або за допомогою комбінації клавіш Shift+Command+E.
- У вікні виберіть опцію Resize. Ви побачите кілька варіантів, наприклад, Original, Short Edge тощо.
- Оберіть потрібний розмір або задайте власні параметри для вашого зображення.
- Натисніть Save, і ваш файл буде збережено у меншому розмірі.
Головною перевагою Luminar Neo під час зміни розміру зображення є його здатність зберігати високу якість фото. Завдяки AI-інструментам, програмне забезпечення майстерно забезпечує баланс між зменшенням розміру файлу та збереженням деталізації, що є критично важливим для професійної роботи.
До речі, після зміни розміру зображення спробуйте використати пресети для редагування фотографій — результат вас неодмінно здивує.
Переваги використання Luminar Neo для стиснення зображень
- Інструменти на базі AI: Використовуйте AI Sharpener та AI Upscaler для збереження чіткості фотографій навіть після стиснення. Це особливо корисно для уникнення втрати деталей.
- Інтерфейс, зрозумілий для новачків: Користувачі будь-якого рівня знайдуть це програмне забезпечення простим у використанні. Ознайомтеся з функціями на сторінці Luminar Neo Tutorial.
- Пакетне редагування: Luminar Neo дозволяє одночасно обробляти велику кількість фотографій, що значно економить час.
- Підтримка різних форматів файлів: Програма працює з багатьма форматами, включаючи JPEG, PNG і TIFF, що дозволяє обирати найкращий формат для онлайн-використання, друку тощо.
- Управління якістю: Під час експорту зображень Luminar Neo дозволяє налаштовувати якість, знаходячи ідеальний баланс між розміром файлу та якістю зображення — важливий аспект як для цифрових, так і для друкованих матеріалів.
Висновок: Опануйте мистецтво зменшення розміру фотографій

Тепер ви знаєте кілька простих і швидких способів змінити розмір файлів для онлайн-зберігання фотографій, надсилання електронною поштою чи завантаження. Кожен метод має свої унікальні переваги залежно від ваших робочих процесів і платформ, якими ви користуєтеся. Оберіть той, що найкраще підходить вам, і діліться своїми зображеннями легко та швидко!
Часті питання
Як зменшити розмір файлу зображення?
Щоб зменшити розмір файлу зображення, збільшіть рівень стиснення. У більшості редакторів зображень це можна зробити через опції “Save As” або “Export As” під час збереження у форматах PNG, JPG чи GIF. Більше стиснення призводить до меншого файлу, що швидше завантажується на вебсторінці. Налаштуйте параметри стиснення для досягнення балансу між якістю зображення та розміром файлу.
Основні способи:
- Обрати редактор зображень: Відкрийте фото у Photoshop, GIMP або онлайн-інструменті, наприклад, TinyPNG.
- Змінити розміри зображення: Зменшіть ширину та висоту фото. Це зазвичай зменшує розмір файлу без значної втрати якості.
- Стиснути зображення: Налаштуйте параметри якості під час збереження. Наприклад, JPEG добре стискається із мінімальними втратами якості.
- Змінити формат файлу: Збережіть зображення в іншому форматі, наприклад, JPEG замість PNG, якщо це доречно.
- Використовувати онлайн-компресори: Завантажте зображення в онлайн-компресор, який автоматично зменшить розмір файлу.
Як зменшити розмір фото на iPhone?
Ви можете зменшити розмір фото за допомогою вбудованого додатка Photos, обрізавши його або зменшивши роздільну здатність. Також можна змінити налаштування камери, щоб робити знімки у форматі HEIC, який економить більше місця, ніж JPEG.
Як зменшити розмір файлу фото на Mac?
На Mac ви можете скористатися додатком Preview. Відкрийте фото, оберіть Tools > Adjust Size, а потім зменшіть розмір чи роздільну здатність. Також існує безліч сторонніх додатків із розширеними опціями стиснення.
Як зменшити розмір фото у Photoshop?
Відкрийте зображення у Photoshop, потім оберіть File > Export > Save for Web (Legacy). Ця функція дозволяє змінити розміри фото та якість. Для мінімізації розміру файлу оберіть формат JPEG із низькою якістю та налаштуйте розміри зображення, якщо потрібно.
Як зменшити розмір фото на Android?
На Android можна використовувати вбудовані інструменти редагування для обрізки та зміни розмірів фото. Крім того, додатки з Google Play Store, такі як Photo Compress & Resize, дозволяють краще зменшувати розмір файлів.
Як зменшити розмір фото для вебсайту?
Використовуйте редактори, такі як Luminar Neo, Adobe Photoshop, GIMP або Lightroom, щоб зменшити розмір файлу за допомогою налаштувань стиснення, зміни розмірів або обрізання зайвих частин фото.


 >
>

