iPhone Macro Photography: How To Make Close-Up Shots
February 12, 2025
This post guides you through using your iPhone to take amazing close-up photos. Read it to learn easy tips and tricks that will make your pictures stand out.
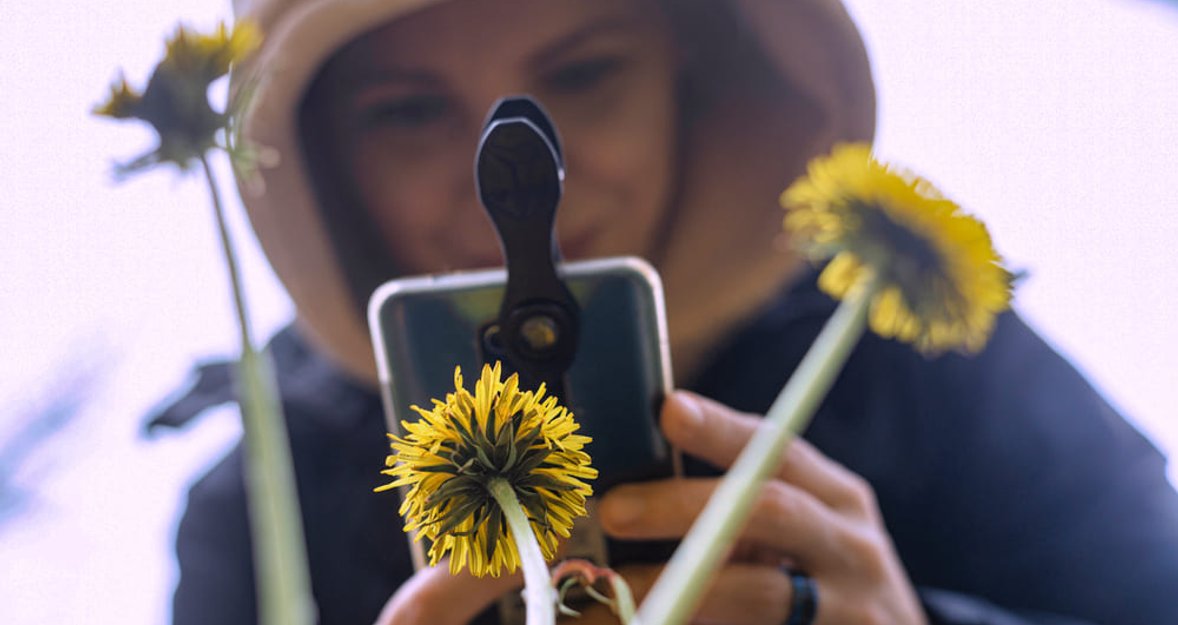
Hello there! Curious about capturing the little details of life with your iPhone? Great! This post is all about that—how to take close-up pictures with an iPhone that bring out the tiny but amazing details we usually miss. From the textures of a leaf to the colors of a pebble, your iPhone is your tool to freeze these moments into stunning photos!
Let’s get started and show you how it’s done, step by step!
What to Take Pictures Of
 Macro photography lets you make big pictures out of tiny things, and you don’t have to go far to find great subjects. Start right where you are — inside your home. Look at everyday items with a fresh eye. A close-up of something like a paper clip, the edge of a coin, or even salt and pepper sprinkles can turn into a cool photo.
Foods like a slice of fruit, a piece of chocolate, or the surface of your morning coffee can also look amazing up close. If you’re up for a little adventure, step outside and explore. Tiny flowers, bugs, or the texture of a leaf are all fantastic choices for macro shots.
When taking these close-ups, be careful not to block the light with your phone, as it can darken your photo. If this happens, simply adjust your position or move around until the light falls just right on your subject. This way, you’ll get bright, clear pictures every time!
You may also like: How to Edit Macro Photos with Luminar Neo: Application Tips and Extens
How to Use Your iPhone’s Macro Mode
 The iPhone’s macro mode feature works on these iPhone models: 13 Pro, 13 Pro Max, 14 Pro, 14 Pro Max, 15 Pro, and 15 Pro Max. To take a close-up photo or video, follow this guide:
1. Open Your Camera App: Just tap on the Camera icon on your iPhone to get started.
2. Choose Your Mode: You can pick either Photo or Video mode.
3. Get Close to What You’re Capturing: Move your iPhone really close—up to about an inch away from your subject. Your iPhone will automatically switch to use the Ultra Wide camera to get that detailed close-up shot.
4. Take Your Shot: Press the big button on the screen (that’s the Shutter button) to take your photo, or press the red button to start and stop recording your video.
3 Key Tips for Macro Shoot
Slow-Motion or Time-Lapse Video
Do you want to try something a bit different, like a slow-motion or time-lapse video? Switch to 'Slo-mo' or 'Time-lapse' mode from the available options. Make sure to tap the 5x button to switch to the Ultra Wide camera, then get close to your subject and hit record!
Turning Auto Macro On/Off
When you’re close enough to an object for a macro shot, a button will appear on your screen saying ‘Auto Macro On.’ You can tap this to stop your iPhone from automatically switching to macro mode. If your shot starts to look blurry, you can back up a bit or tap the .5x button to go back to using the Ultra Wide camera. Tap ‘Auto Macro Off’ to let your phone decide when to switch modes again.
Setting Preferences
If you like your settings a certain way, you can make them stick. Go to Settings > Camera, and turn off ‘Macro Control’ if you don’t want your phone automatically deciding when to use Macro mode. To keep your settings the same every time you open the camera, go to Settings > Camera > Preserve Settings, and turn on ‘Macro Control.’
Some More Extra Tips
 Getting good at macro photography with your iPhone is easier than you might think. Here are some tips to help you capture those tiny details:
For steady focus, tap on the part of the screen where you want the sharpest detail, then hold for a second to lock it in. This keeps your subject crisp while softening the background.
Try to keep the background simple so it doesn't distract from what you're trying to show off. A plain backdrop makes your subject stand out more.
If you're too close, your picture might blur. Find the sweet spot where your lens focuses best and stick to it. If it’s still not close enough, remember you can crop the photo later without losing much quality, especially with the newer iPhones.
If your phone supports it, try shooting in RAW. This format lets you capture more detail and edit more deeply later, giving you the best chance to fine-tune those stunning shots.
After capturing your macro shots, enhance them with Luminar Mobile, an AI-based iPhone photo editor. It utilizes AI tools that make your editing process quick and enjoyable!
Equipment for More Professional Macro Photos: A Checklist
 You can start taking close-up photos with just your iPhone, but two simple additions can make a big difference!
Starting with the Basics
1. Tripod
A little shake can blur a close-up photo easily. If you use a tripod, it keeps your iPhone steady and makes your photos sharp. If you don’t have it, no worries — just rest your phone against something stable like a wall or lay it on a flat surface.
2. Attachable Lenses
Just because your iPhone isn’t the latest model doesn’t mean you can’t capture professional-level close-ups. Here are a few top picks for macro lenses that can elevate your iPhone’s capabilities:
Xenvo Pro Lens Kit: This budget-friendly option includes a 15x macro lens that’s perfect for grabbing those tiny details. It’s robust, easy to use, and clips directly onto your iPhone, ideal for the single-lens setup of older models.
Moment Macro Lens: Step up your game with this premium 10x macro lens. Crafted from aerospace-grade aluminum and high-quality glass, this lens delivers stunningly clear images without distortion.
Apexel Professional Macro Lens: It is great for beginners and budget-conscious photographers, this clip-on lens is both affordable and high-quality.
How to Get Started with Your Macro Lens?
1. Attach the Lens: First, clip the macro lens onto your iPhone’s camera. Make sure it's centered correctly over the lens to prevent any blurry edges in your pictures.
2. Scout for Subjects: Look around for small but interesting subjects — this could be anything from the veins of a leaf to the patterns on a butterfly’s wings.
3. Manual Focus for Precision: Auto-focus may falter at very close ranges, so manually adjusting the focus might be necessary. Tap on your screen to refine where you want the clearest detail.
4. Take the Shot: Once you’re happy with the setup, press the shutter button. For the best stability, lean your phone against something solid or use a tripod if you have one. This will help you avoid any unwanted blur.
If you take many pictures, you can also use an image stacking feature while editing to ensure that your photo shows every little detail! Using a macro lens with your older iPhone is like opening the door to a hidden miniature world!
Adding Essential Accessories
 Here's a rundown of some tools that can elevate your macro photography game!
Lighting
Good lighting is crucial for macro photography. While natural light is often preferred, it isn't always reliable or sufficient. You may find yourself blocking the light, or there might not be enough of it, leading to grainy or blurry photos. To overcome these challenges, consider using additional lighting sources. Options for iPhone photography include:
Portable Ring Lights and LED Panels: These provide even, soft light directly around your camera, reducing harsh shadows.
Flashlights or Camera Flashes: For more directed light, you can use a simple flashlight or a camera flash unit.
If the lighting isn't great for your shot, consider using picture noise reduction. This feature can help clear up any graininess and bring back details to improve the overall quality of your photo!
Diffuser
A diffuser can help soften the light and reduce glare, which is particularly useful in outdoor settings. If you don't want to buy it, a simple sheet of white paper can work in a pinch to soften and spread the light more evenly.
Spray Bottle
Adding a fine mist to plants, flowers, or even certain foods can enhance the freshness and texture of your subject. A spray bottle is perfect for this, allowing you to lightly mist your subject to simulate morning dew or to add an interesting visual effect.
Cleaning Tools
The closer you get, the more tiny imperfections you'll notice, like dust or lint. A fine brush can help clean your subject, while tweezers are great for removing unwanted particles or for adjusting tiny details in your setup.
Rail Slide
Though more commonly used in videography, a rail slide can be invaluable for macro photography as well. It allows for smooth, controlled movements of your iPhone, perfect for creating focus-stacked images where you need to gradually change the focus point across several shots.
The Bottom Line
So, now you know the answer to “What is macro mode iPhone?”. We've explored all the intricacies of iPhone macro photography, therefore, you're well-equipped to capture the tiny marvels around you!
Remember, the key to stunning shots lies in patience and practice. Use these tips, embrace the tools available, and don't be afraid to experiment with settings and accessories to enhance your images!
So grab your iPhone and start seeing the world in its wonderfully minute details!