Essential Ring Photography Techniques
January 19, 2026

This post teaches you how to take and edit stunning ring photos, providing tips on the best equipment and techniques. Read it to learn how to showcase jewelry in a way that catches the eye and enhances sales!
Welcome to the insider's guide to ring photography! Ever wondered how those stunning jewelry ads make rings look so mesmerizing? Today, you're going to learn exactly how to take pictures of rings!
Whether you're documenting a family heirloom or boosting your jewelry business, this post will arm you with simple, effective techniques for photographing like a pro.
Ready? Let’s break down the barriers between you and those perfect, glossy shots — step by step!
What You'll Need for Your Ring Photoshoot
Getting ready for a ring photoshoot involves more than just picking up a camera. Here’s a straightforward guide on the essentials you'll need to ensure your rings look stunning in every shot!
How to Edit Product Photos to Turn Them Into Sales Magnets
Learn moreEssential Gear

Camera with Macro Lens: A DSLR or mirrorless camera paired with a macro lens is ideal. The macro lens is crucial because it allows for life-sized reproduction of small details, essential for showcasing the intricacies of rings.
Tripod: To eliminate camera shake and ensure sharp images, a tripod is indispensable.
Holding Wax or Putty: This helps keep the ring in place and upright, making it easier to photograph from various angles.
Lighting Setup

Lightbox: A lightbox softens shadows and evenly distributes light, which is crucial for highlighting the reflective surfaces of a ring.
Consistent Lighting Sources: Use lights with the same color temperature to prevent color casting.
Reflectors and Diffusers: Tools like white paper or fabric help manage light intensity and reflection, crucial for capturing the true beauty of the ring.
Additional Tools

Jewelry Stands: These are helpful for displaying rings in an appealing way and can enhance the composition of your photos.
Creative Backdrops: Experiment with different textures and colors to make your ring pop. Matte vinyl backdrops can be particularly effective.
With this toolkit, you’re well on your way to producing professional-level photographs that will make any ring look its best. Now, let’s start shooting and bring those stunning details to life!
Advanced yet easy-to-use photo editor
Get Luminar Neo NowCamera Setup Guide for Eye-Catching Ring Photos
 When diving into ring product photography, knowing how to tweak your camera settings makes all the difference. We will share a quick, practical approach to get your camera ready!
Camera Modes and Basic Settings
Switch to Aperture Priority Mode: Set it to f/14 to start. This is your sweet spot for depth, keeping the entire ring in focus while softening the background just enough.
Low ISO for High Quality: Stick to ISO 100 to avoid any graininess.
Fine-Tuning Your Shot
Take a Test Photo: Snap a shot in your current setup. Is it too dark or the colors off?
Shift to Manual: Based on your test shot, switch to manual mode to adjust the exposure more precisely.
Adjust Shutter Speed: Use the shutter speed from your aperture priority test as a baseline, then tweak it up or down. Need more light? Slow it down. Too bright? Speed it up!
Customize for Clarity and Detail
Experiment with Aperture: While f/14 is a great starting point, don’t be afraid to adjust. Want sharper background details? Try f/22. Want to isolate the ring even more? Drop to f/8.
Review and Adjust: Check each shot for focus and exposure. Adjust your settings as you go to capture the ring in its best light.
Pro Tip
Keep Experimenting: Every piece of jewelry and lighting condition is unique. Play with your settings to see what works best for each scenario.
Learn and Adapt: Use your results to refine your approach. Each photo gives you information. Use it to continuously improve.
Using Props in Ring Product Photography
 When setting up a ring photoshoot, using props effectively can make a significant difference. Many jewelers use simple tools like Elmer’s Putty or dental wax to keep rings upright and beautifully positioned. These are readily available at most craft stores and are easy to use. The key is to apply just a small amount — enough to hold the ring but not so much that it shows up in your final photos!
Although some props may leave a slight residue, it typically doesn't stain the ring and can be easily cleaned off once you're done shooting. This small step helps ensure your ring looks its best under the spotlight, appearing suspended or perfectly poised without any support in sight!
Lighting Tips
Here are four lighting setups to consider for your next jewelry photoshoot!
Natural Lighting
Utilizing natural light is the most straightforward approach. Position your photography setup near a window with ample sunlight, or take it outdoors. This method provides a soft, even distribution of light across the jewelry, enhancing its natural beauty.
However, timing is crucial with natural lighting. The 'magic hour' — the first hour after sunrise and the last before sunset — offers a soft, diffused light ideal for jewelry. During these times, the sun is low, avoiding the harshness of midday light. Be mindful that certain gemstones, like sapphires, may show their best colors under specific natural conditions, such as a clear blue sky!
Back and Side Lighting
Backlighting: Lighting the jewelry from behind highlights its clarity and contours, perfect for pieces that resemble glass or have intricate details.
Side Lighting: This technique illuminates the jewelry from the side, creating shadows and highlights that give the piece a three-dimensional look, making it stand out more prominently.


Soft Lighting Using a Lightbox
 For consistent and controlled lighting, a lightbox is invaluable. While DIY lightboxes are an inexpensive option, they require time to set up. Purchasing a commercial lightbox might be more practical for those who frequently photograph jewelry. It simplifies the lighting setup and is especially useful for ensuring uniform light across multiple shoots.
In all these setups, consider using materials like foam core boards, fabric, or white paper as reflectors and diffusers. These can help soften the light further and ensure your jewelry photographs beautifully by enhancing the subtle reflections and textures of the rings!
More Tips for Polishing Your Ring Photos

Take Plenty of Photos: More images increase the chance of a sale, as they help online shoppers get a better feel for the product. Aim for a variety of angles and details.
Choose Your Background Wisely: While a white background gives a clean, professional look, experimenting with different settings can add personality, especially on social media. Ensure you also provide clear, detailed shots on neutral backgrounds for online listings. Remember, you can always change a photo background in post-production!
Keep It Balanced: Ensure your photos are well-balanced and the ring is centrally placed to draw the viewer’s eye directly to the jewelry.
Manage Reflections: For shiny rings, adjust your lighting to minimize glare while highlighting the ring's best features.
Ecommerce Images Editing: Bring your ring photos to life with Luminar Neo, an AI photo editor! With a few clicks, you can adjust brightness, contrast, and color temperature to make each detail shine. Tap into powerful AI tools to effortlessly remove distracting backgrounds or polish them up to perfection. Plus, seamlessly add your brand's watermark or logo to keep your images distinctly yours.
These streamlined tips will help you capture beautiful, engaging ring photos that attract and convert viewers into buyers!
Ring Photography Ideas
Exploring creative ways to photograph rings can enhance the appeal and emotional impact of your images. Here are some inventive ideas to try!
1. Luxury Display Box
 Positioning rings in an elegant display box can add sophistication and context to your photos. This setup allows for broader framing and can evoke a luxurious feel without needing a macro lens.
2. Thematic Backgrounds
 Use different textured or patterned papers as backgrounds to add thematic depth to your photos, making the rings stand out and tell a story.
3. Incorporate Complementary Accessories
 Enhance your photos by including accessories that complement the ring’s style, such as elegant pens, sophisticated watches, or delicate fabrics, to create a rich narrative in your images.
4. Highlight Fine Details
 Focus on capturing the engravings or unique features of the rings, showcasing the exquisite craftsmanship and attention to detail.
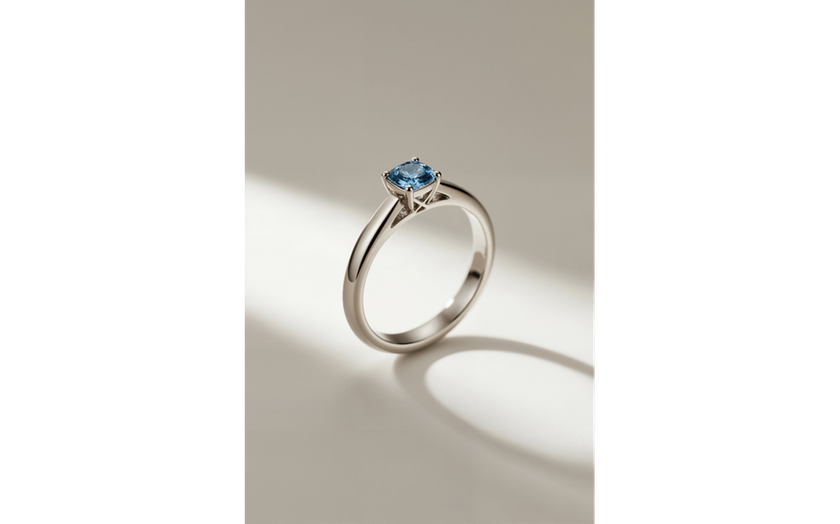
5. Classic White Background
 A white background is not just for weddings; it’s universally effective for making the ring the focal point of your photograph, highlighting its purity and elegance.
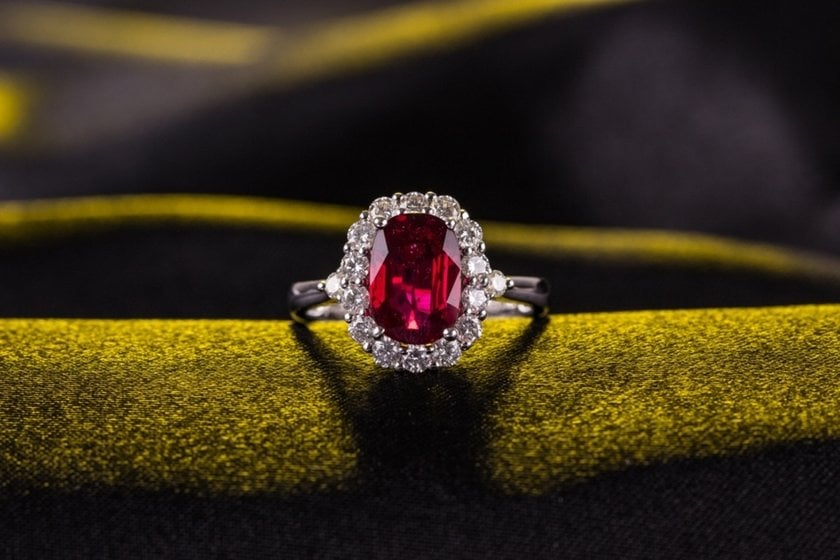
6. Textured Backdrops
 Utilize various materials like leather, velvet, or metal surfaces as backdrops if you’re on location and need a quick setup. These can add depth and intrigue to your shots.
7. Bokeh Effects
 Create a dreamy background with bokeh effects using out-of-focus lights, which works well with small, decorative lighting and a wide aperture to enhance the visual interest of your ring photos.
8. Natural Elements
 Incorporate natural elements like stones, leaves, or wood to add texture and a touch of earthiness that complements any ring.
9. Reflective Surfaces
 Use mirrors or glossy surfaces to create reflections and add a modern twist to your ring photos, making them look sleek and dynamic.
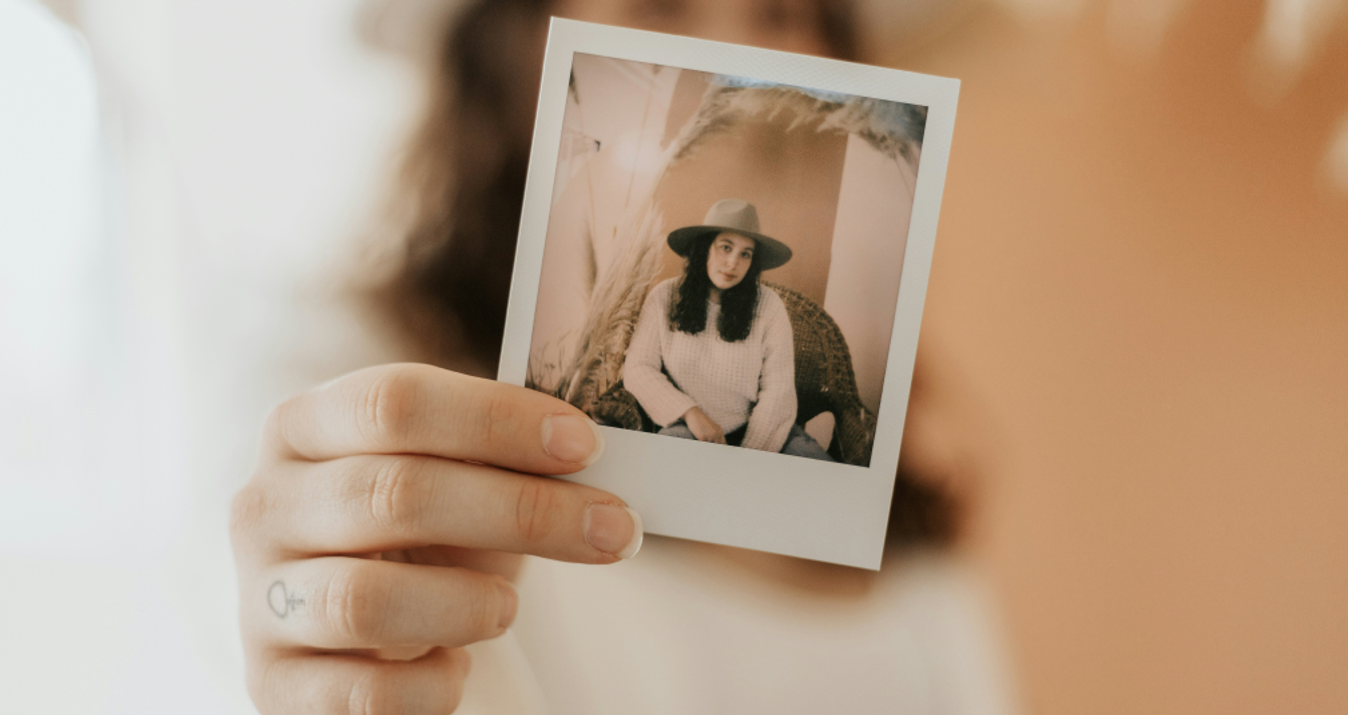
10. Action Shots
 Capture moments of interaction, like a hand reaching for the ring or light playing across its surfaces, to add a dynamic element and convey the allure of the ring.
These creative ideas can help your ring photography stand out, adding layers of meaning and artistry that elevate your portfolio and delight your clients!
Conclusion
With the basics of ring photography covered, from setup to shooting, the final and crucial step is to edit jewelry photos. Using tools like Luminar Neo, you can adjust lighting, remove imperfections, and ensure your photos look polished and professional.
Practice these techniques regularly, and your jewelry photography will consistently impress and engage your audience!