Mesmerizing Portrait Bokeh Effect
When capturing photos, placing the area behind a subject out of focus is often desirable. The Japanese word bokeh is used to describe the aesthetic nature of the blur produced in these out-of-focus areas. Traditionally, to achieve the bokeh portraits effect, it often takes a high-quality lens and involves shooting at a wide-open aperture like ƒ2.0
View plansHow to Elevate a Person’s Look with Portrait Bokeh AI
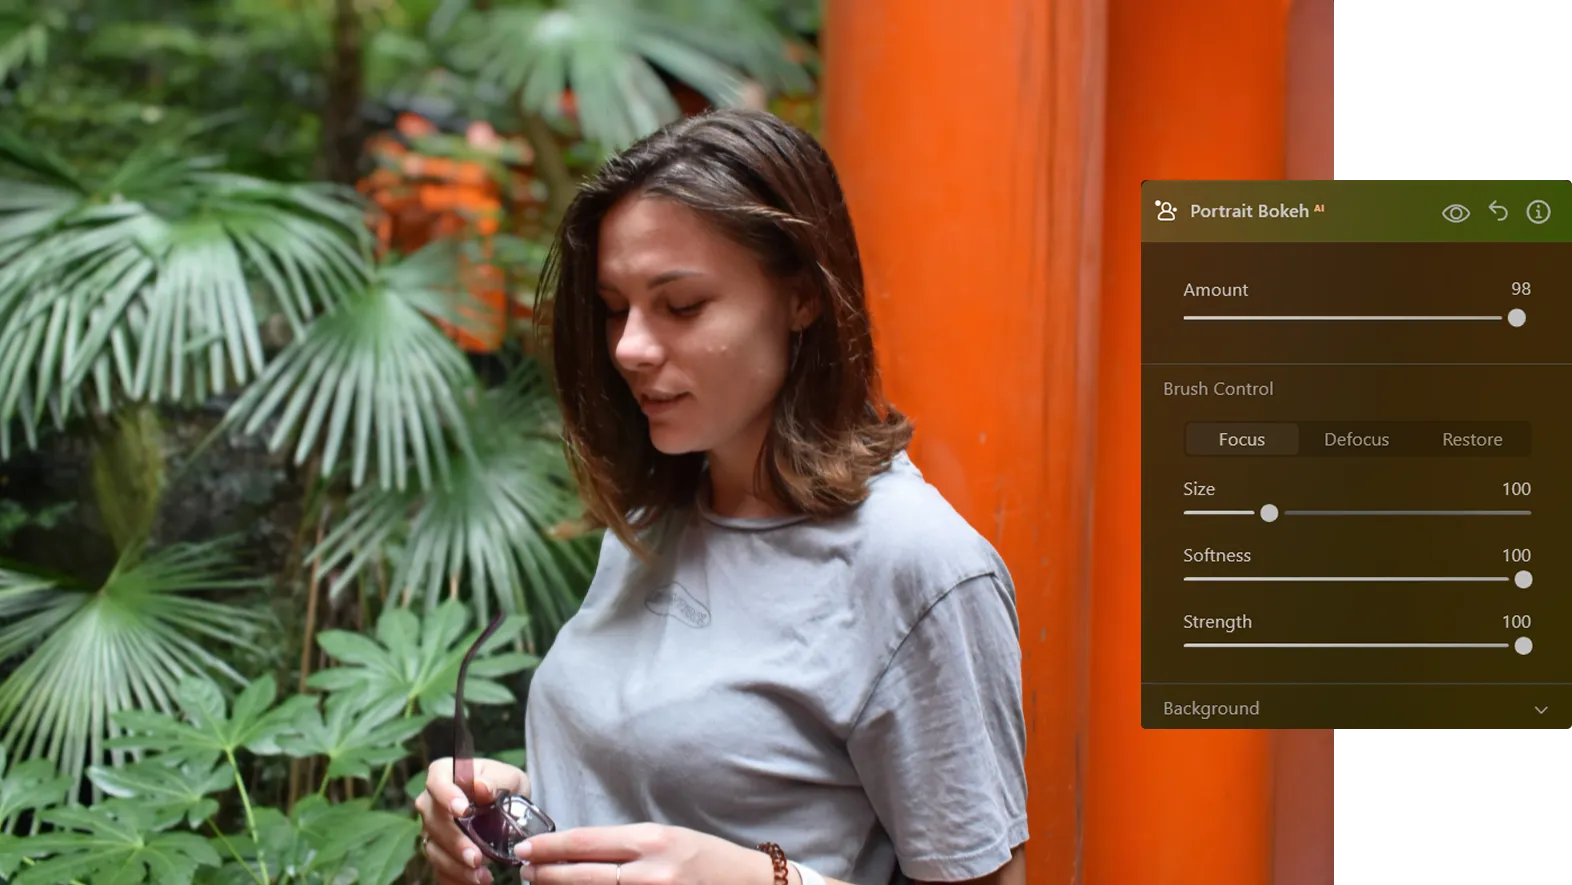
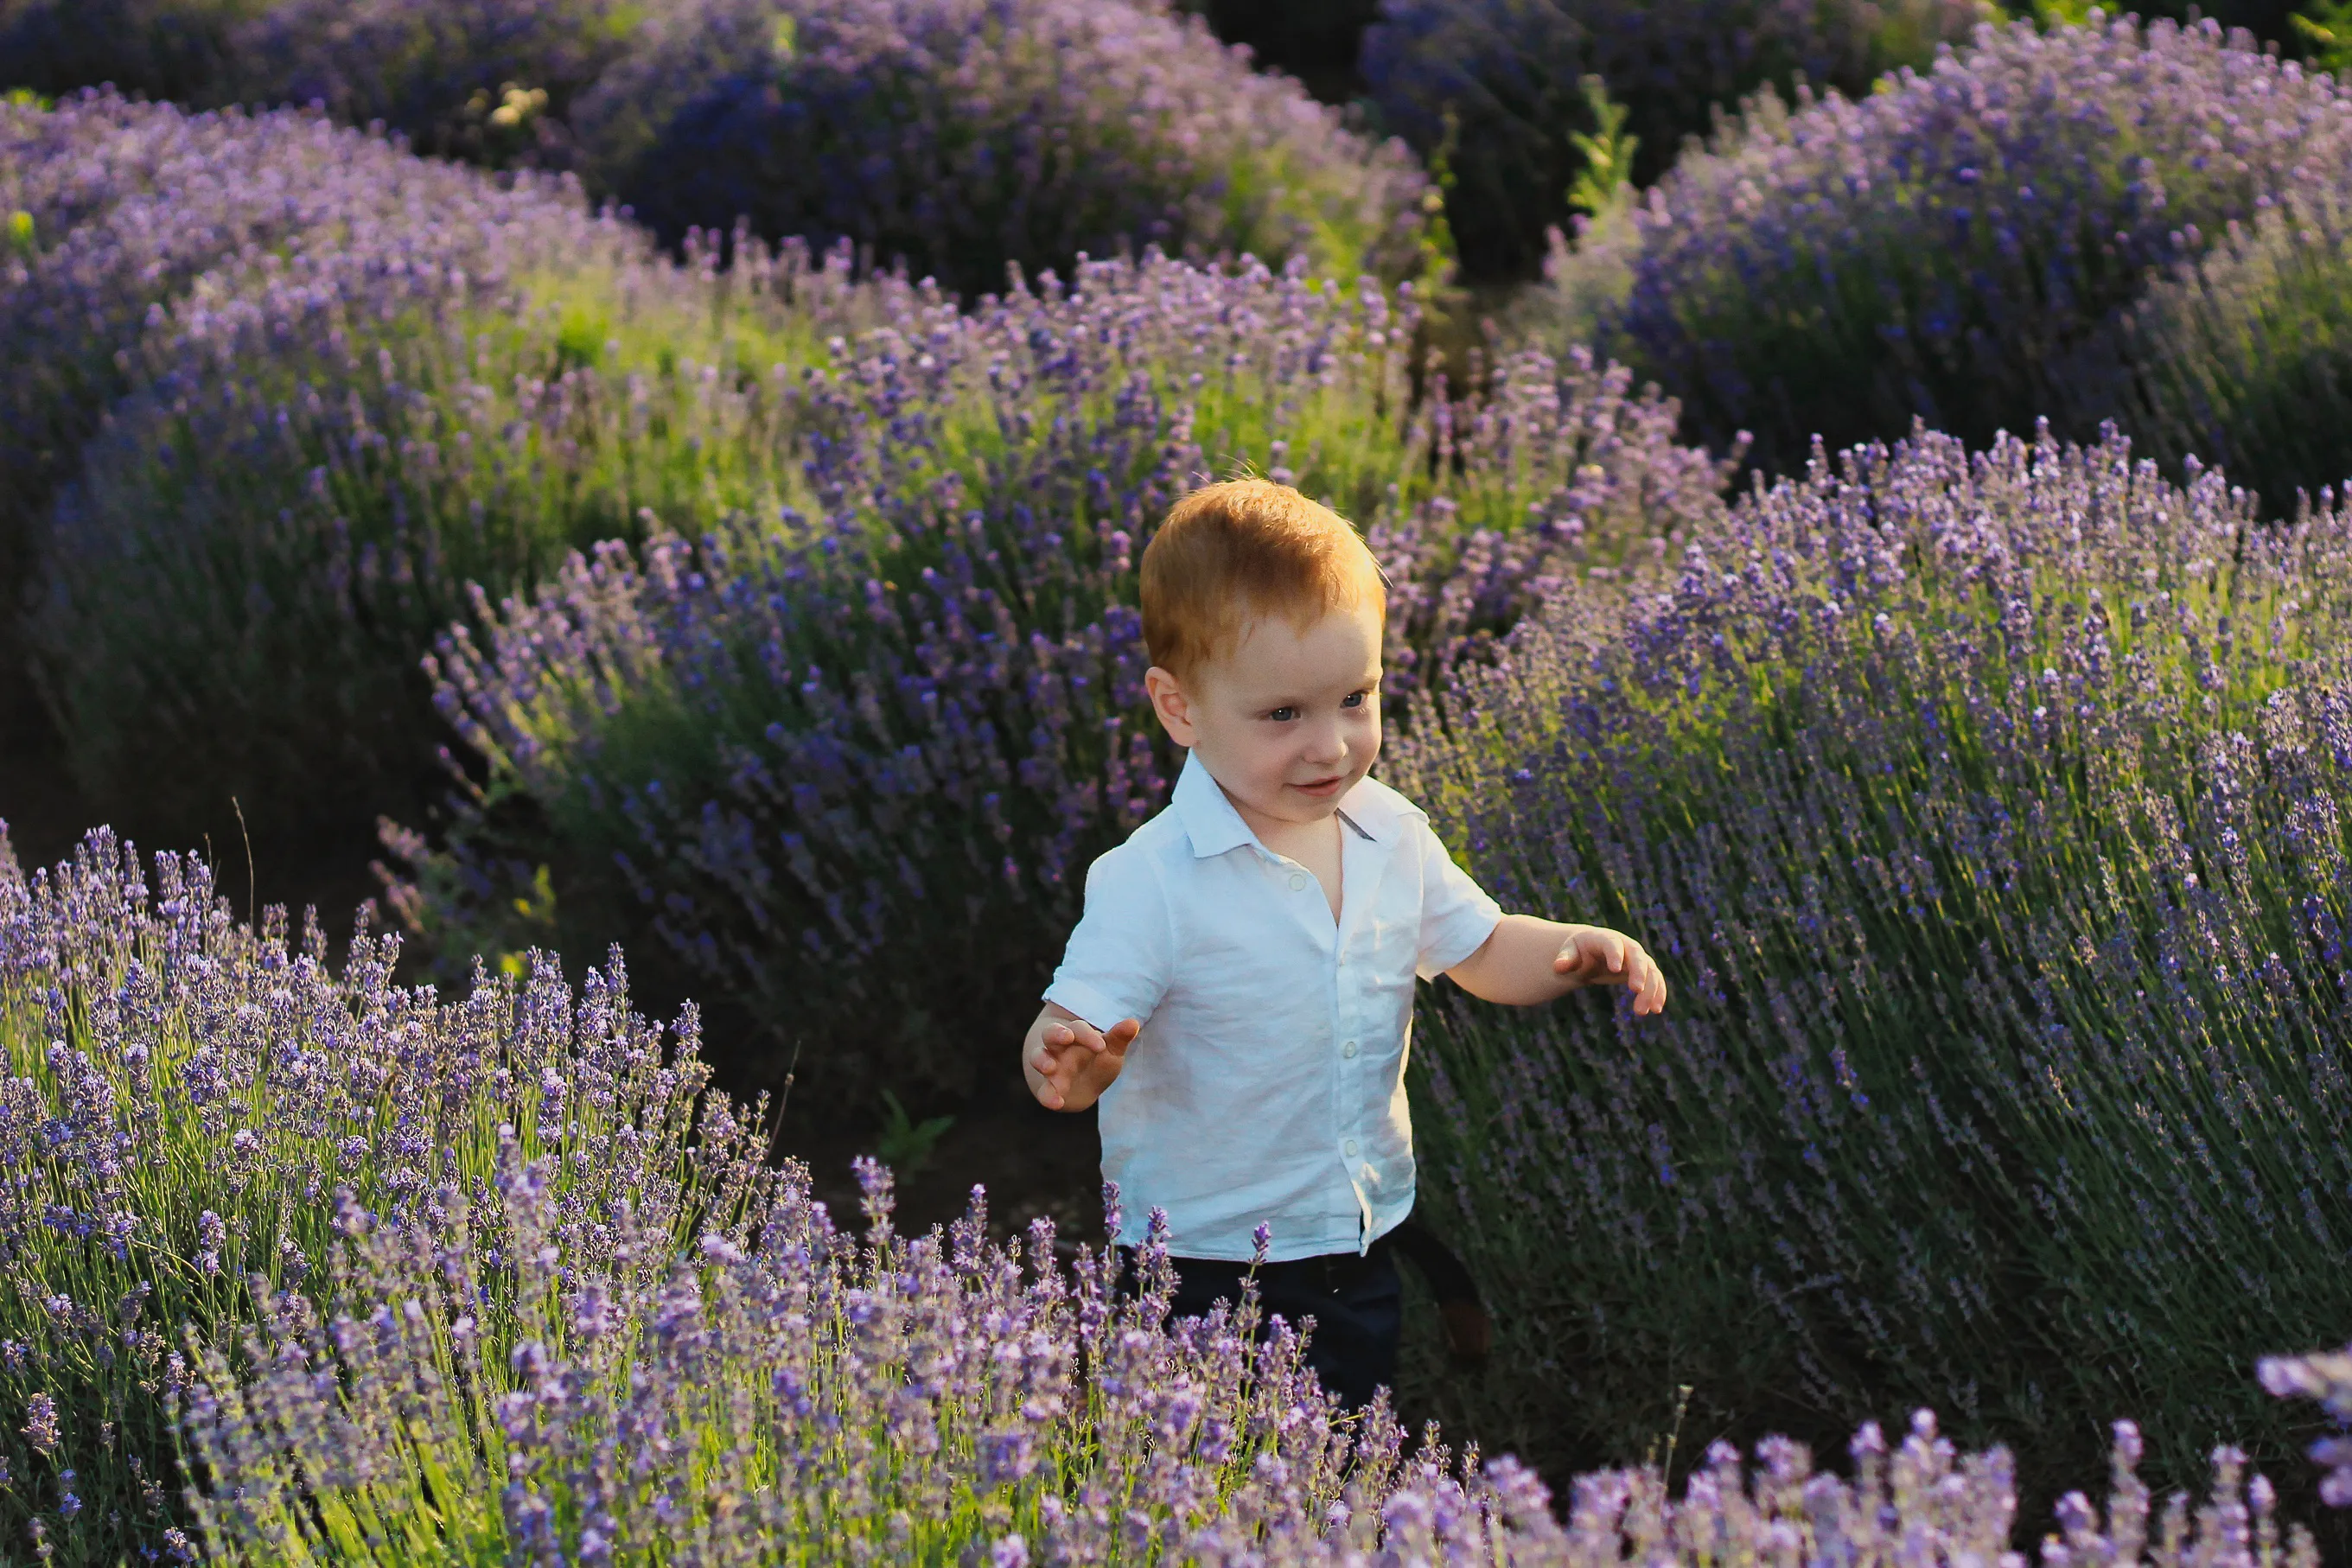
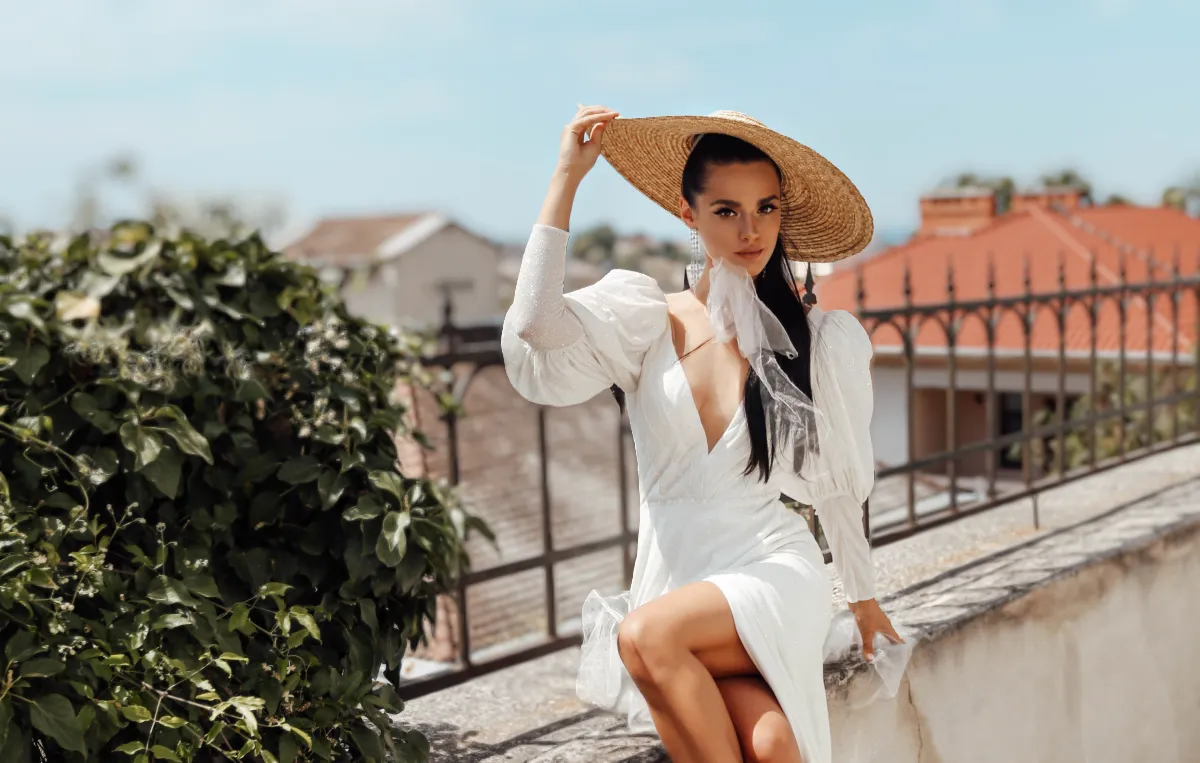
Luminar Neo offers the Portrait Bokeh AI tool to simulate this effect and allow it to be used on most portrait photos.
It works on any portrait image – regardless of the lens used or the lighting conditions.
It works on any portrait image – regardless of the lens used or the lighting conditions.
© Maryna Yurlovska
Why is Portrait Bokeh the Ultimate Portrait Enhancement Feature?
Portrait bokeh is highly regarded as an ultimate enhancement feature in portraits due to its ability to isolate subjects, create visually appealing images, evoke emotions, and enhance overall composition, thereby elevating the quality and impact of the final result.
Try a blur bokeh effect now on your photos!
Try a blur bokeh effect now on your photos!
AI Bokeh Background: the Art of Blurring Perfection
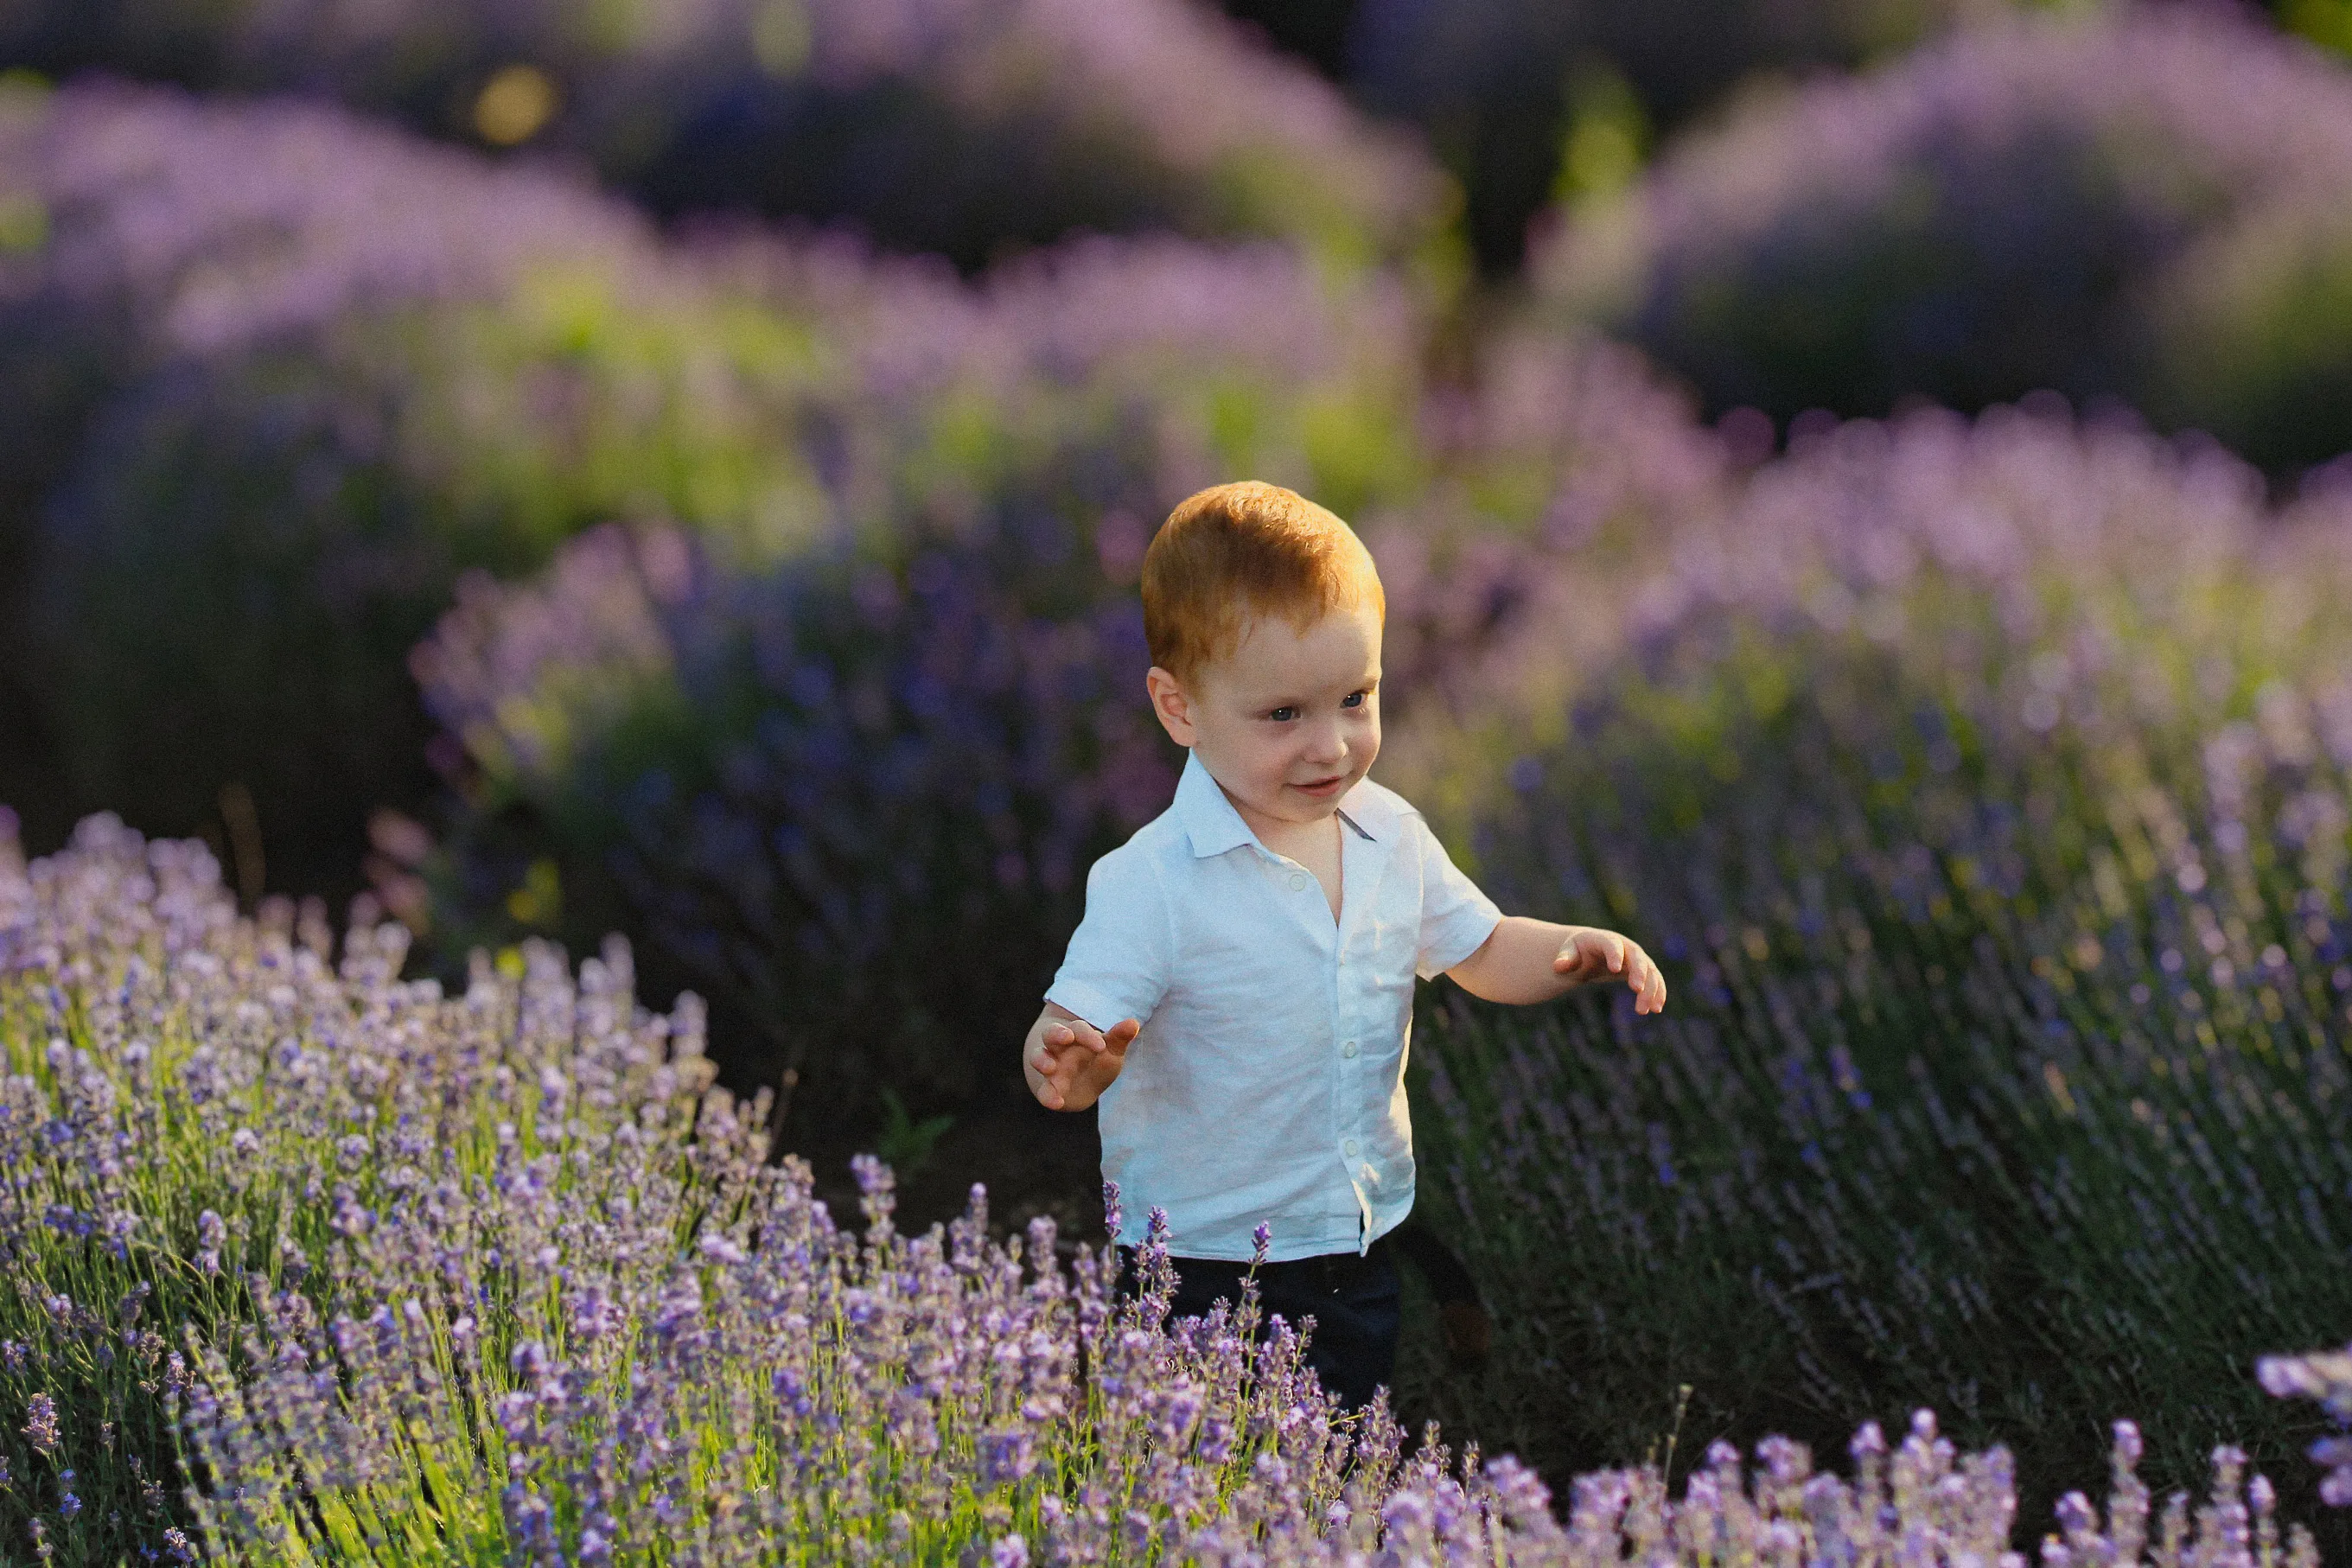
The artificial intelligence under the hood of the bokeh portrait tool recognizes people in the frame, including those in groups or unusual positions, and creates an initial mask that separates them from the background.
Then, by moving the Amount slider, you can adjust the amount of blur in the background, creating a perfect portrait in seconds.
Then, by moving the Amount slider, you can adjust the amount of blur in the background, creating a perfect portrait in seconds.


© theshots.contributor
Add Bokeh to a Photo to Create Emotionally Resonant Portraits
In most cases, the initial mask created by the Amount slider of the background bokeh AI is ready to use. If you want to refine the initial mask, use these controls. This can be useful to refine complex masks, for example, by adding an object held in your portrait subject’s hands.These brushes refine the mask:
© facereader.images
• Focus. Used to define the active area of the mask. The parts of the image that are selected will remain in focus.
• Defocus. Used to identify areas as the background and to remove focus in this area.
• Restore. Painting with this brush reverts back to the original automatically generated mask in the areas where a stroke is applied. It is useful if you want to restore an area to the default selection that was originally created.
Explore Other Features
Luminar Neo has plenty of other features to help you edit faster and easier
AI Portrait Enhancer
.webp)
.webp)
© shutterstock
Try Luminar Neo today and transform your portraits into polished, natural-looking images in just a few clicks.
Blur Backgrounds
© Ksenia Kazak
Effortlessly blur backgrounds to bring your main subject into sharp focus and elevate your image's visual appeal.
Motion Blur Effect
© Lisa
Click now to experience the motion blur effect in Luminar Neo and make your ordinary photos extraordinarily dynamic.
Blur Image
© Ksenia Kazak
Bring your photos to life—discover how easy it is to blur a picture beautifully in just a few clicks!
Add Noise to Image


© mathewbrowne_anglesey
Easily add artistic noise or grain to your images, creating that classic film photography look.
White Background


© reewungjunerr
Focus on your object by replacing the picturesque background with white!
An application & plugin
For macOS & Windows
- High-performance AI editor
24/7 technical support
30-day money back guarantee
Join our communities

Frequently Asked Questions
How to use the bokeh filter with Luminar Neo?
Luminar Neo’s Portrait Bokeh AI tool is really easy to use. It detects people in your portrait, and applies a mask to the background area. You can simply tweak the Amount slider and adjust the amount of bokeh you want to apply to your photo. You can also refine your results with masking.
How do I adjust the bokeh effect AI intensity for the background?
The Background controls help you refine the quality of the bokeh or background blur. These are essential controls to be adjusted to match your personal taste.
- Brightness. Controls the overall exposure of the background. You can lighten or darken the background to further offset your subject.
- Brightness. Controls the overall exposure of the background. You can lighten or darken the background to further offset your subject.
How do I customize the shape of the bokeh highlights?
Explore the other controls in the Background tool.
- Highlights Glow. Adjusts the brightness of the brightest areas of the background, adding a soft glow.
- Warmth. Refine the color temperature of the background by adjusting the amount. A negative value will cool the image by adding a blue tone, and a positive value will warm the image by adding a gold tone.
- Depth Correction. Controls where the out-of-focus area begins in a photo. Moving this slider to the left sets it closer to the camera and moves it further away to the right. As a result, the bokeh effect appears stronger or weaker.
- Edges Correction. Used to expand or contract the soft edges of the mask; helpful in adjusting the fine details in a mask, like hair.
Can I use portrait bokeh to remove unwanted background elements from a photo?
You can blur out small details, but we advise you to use the Erase tool or the GenErase tool to easily remove unwanted background elements.