April 14
16 min. to read
How to Use the Clone Stamp Tool in Photoshop and Luminar Neo for Mac
Almost all photographers face the problem of unwanted objects in their photos from time to time. Whether it’s a stray piece of paper on a desk or a speck of sensor dust ruining a portrait, there are times when part of an image needs to be removed.
Let’s say you’ve just taken a beautiful portrait of your best friend and you’re excited to get back home and start editing. But when you copy the photo to your computer, you realize there’s a tree coming out of your friend’s head! Noticing an unwanted object in a photograph is extremely frustrating, especially if it isn’t easy to recreate the shot. It can be especially frustrating for those who are photographing important events such as weddings.
Luckily, photo editing programs have made it easy to get rid of unwanted objects fast. Is there a tree growing out of someone’s head? A few clicks and — voilà! The tree has been replaced with a beautiful blue sky. Likewise, blemishes can be magically removed with a basic photo retouch. Learning how to use the Clone Stamp tool can drastically change your editing.
What is the Clone Stamp tool?
This tool essentially allows you to copy one part of a photograph and brush it onto a different part. You can change the size, softness, and opacity of the brush. Learning how to use the Photoshop Stamp Tool makes it easy for you to copy and paste different parts of an image regardless of their size. By choosing a soft brush, you won’t get any hard edges that make it obvious the image was edited.
What does the Clone Stamp do?
This tool replaces pixels with pixels, making edits look more seamless than if you were to use a paintbrush tool. It can be difficult to make cloned images look real at first. But once you learn how to use the Clone Stamp tool, you’ll be able to quickly and efficiently edit your images.
Where can we find the Clone Stamp tool?
There are many different photo editors that you can use depending on your needs. In Photoshop you can locate it in the left-side toolbar of the software.
The Photoshop Clone Stamp is arguably the most widely used because of Photoshop’s great reputation, but there are other, simpler programs you can use as well.
One of them is Luminar Neo. It’s a direct competitor to Photoshop and has many of the same features. Luminar Neo has its own Clone tool that can help you easily remove unwanted objects or add clones of objects. Learning how to use this tool in Luminar Neo is just as easy as in Photoshop.
Luminar Neo can be bought for a one-time fee, unlike Photoshop, making it an affordable alternative.
Do you even need the Clone Stamp tool?
Whether you need it or not depends on the specifics of your project. If you want to remove small flaws or repeat elements of an image, this tool can be helpful. But, if alternative methods can achieve your goal or if you don't have a use Clone Stamp in Photoshop, you may not need it.
How to use Clone Stamp tool
To learn how to use the Clone Stamp tool, you’ll need to have photo editing software that offers this tool. Once you’ve picked a photo editor, the next step is to select an image you want to edit. You can choose an image that needs some facial retouching, such as a portrait that has a few blemishes. Or you can choose a landscape that could use a bit more foliage (or animals, or water, or sky). Or you can choose any image that has an unwanted object you’d like to remove. Regardless of your choice, learning how to use the Clone Stamp is quick and easy.
The Patch tool is often used in combination with the Clone Stamp tool in photo editing software. It allows you to select a portion of an image that needs to be fixed or replaced and then replace it with pixels from another part of the image.
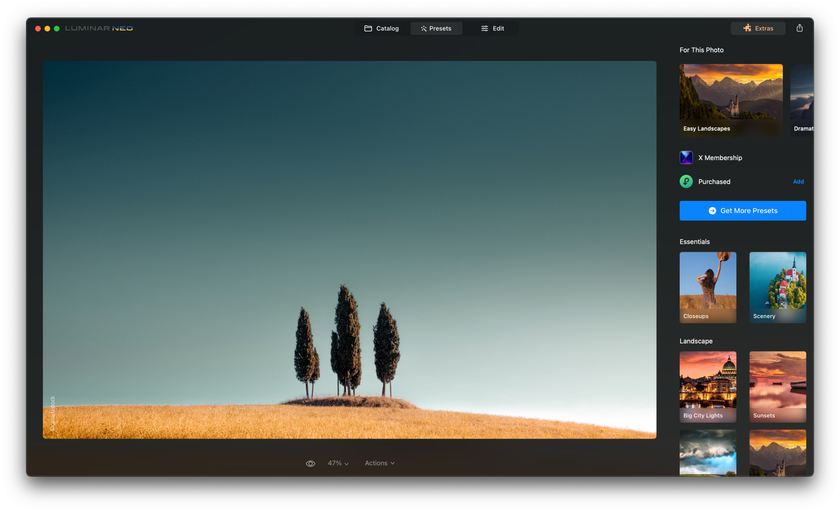
How to use the Clone tool in Luminar Neo
Let’s start by learning how to use the Clone tool in Luminar Neo. I’ve chosen a simple landscape image as an example.
 To find the Clone Tool, click on the Edit menu in the top right of the workspace and scroll down to the Professional section. Once you find the Clone tool, you’ll see three different options under it: size, softness, and strength. To make a simple cut-and-paste clone, keep your softness and strength at 100%. The size of your brush determines the size of the area you’ll copy. Adjust it until the size works for you.
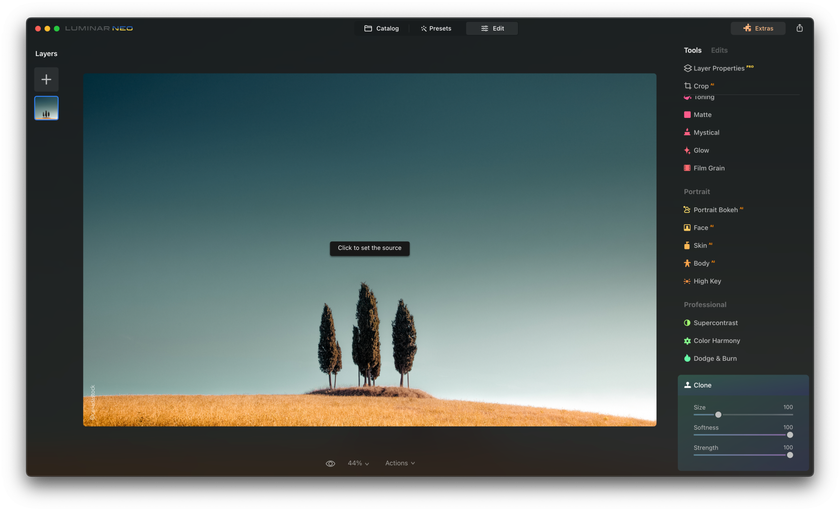 For this image, let’s say you’d like to start by adding a couple more trees to the landscape. When you open the Clone tool, you’ll get a prompt that says “click to set the source.” In this case, I’d like to set a tree as the source to paint that tree over another area of the landscape. When you set your source, it will appear as a target. A large circle will appear over the area you are painting. As you start to paint, you’ll see that the target moves as well.
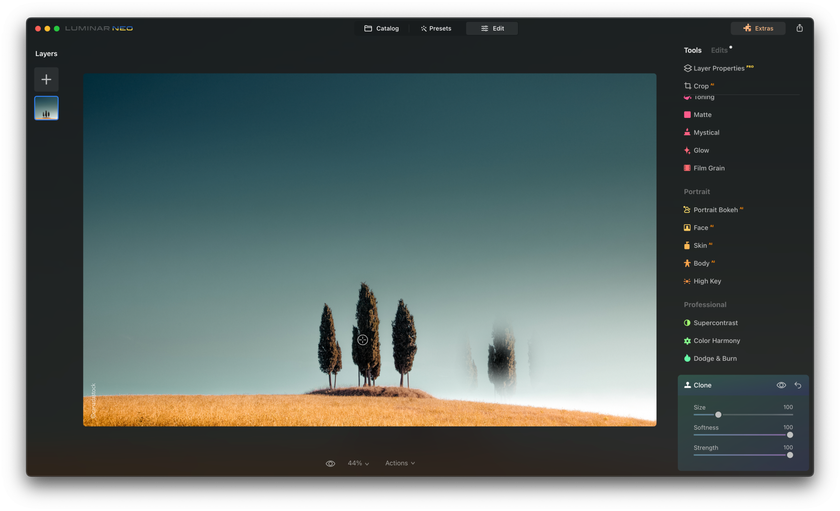 With a couple of clicks, a new tree has appeared in the scene. If you keep clicking in different parts of the scene to paste more trees, you’ll realize the tool doesn’t work this way. It will begin to grab other areas of the image around the tree and start to paint those in. In order to paint the same tree in different areas, you’ll need to set the source every time. To do so, just hold down the Option key and click on your desired source.
 Now we have a landscape with extra trees. But what if instead of adding more trees to the landscape we wished to remove objects? Let’s start with the original image again and use the sky as the source instead of a tree.
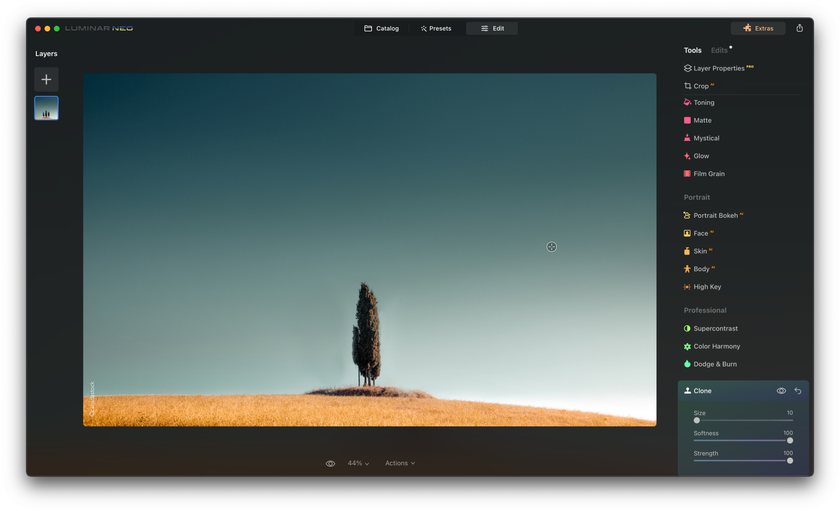 Use the Clone Tool. By choosing different areas of the sky as the clone source, you can easily remove unwanted objects from the photograph. You can apply this knowledge to any scenario. If there’s a blemish you’d like to get rid of, use nearby skin as the source. If you’d like to add more foliage to the background of an image, use the foliage as a source.
Now that you know how to use the Clone to add or remove objects in your photos, go ahead and download a free trial of Luminar Neo and give it a shot yourself!
Other uses for the Clone Stamp tool
The Clone tool in Photoshop and Luminar Neo is designed to clone objects, but it can also heal parts of a photo. If you have an image where some detail is missing — a broken part of a brick wall, for instance — you can use the Clone Stamp tool to fill in the details using these same four steps. This way you can make old and tattered objects look whole.
There are other ways to use the clone stamp tool in Photoshop and Luminar Neo. For example, if you are shooting film, this tool helps remove the dust and scratches that destroy the original image. Just find the clone stamp tool, select the source area, and eliminate the defects with cloned pixels. You can also do this with the spot healing brush tool if the objects are too small. Just set the correct hardness (I recommend using soft round brush) and brush size to make the retouch invisible. The same goes for dead pixels on your digital camera sensor.
Using the Photoshop Clone Stamp tool
Learning how to clone stamps in Photoshop is easy. Let’s open an image with an unwanted object. This simple image of a beach could be fine as is, but let’s say you want to get rid of the person as well as the twig floating in the water. This is easily done with the Photoshop Clone Stamp.
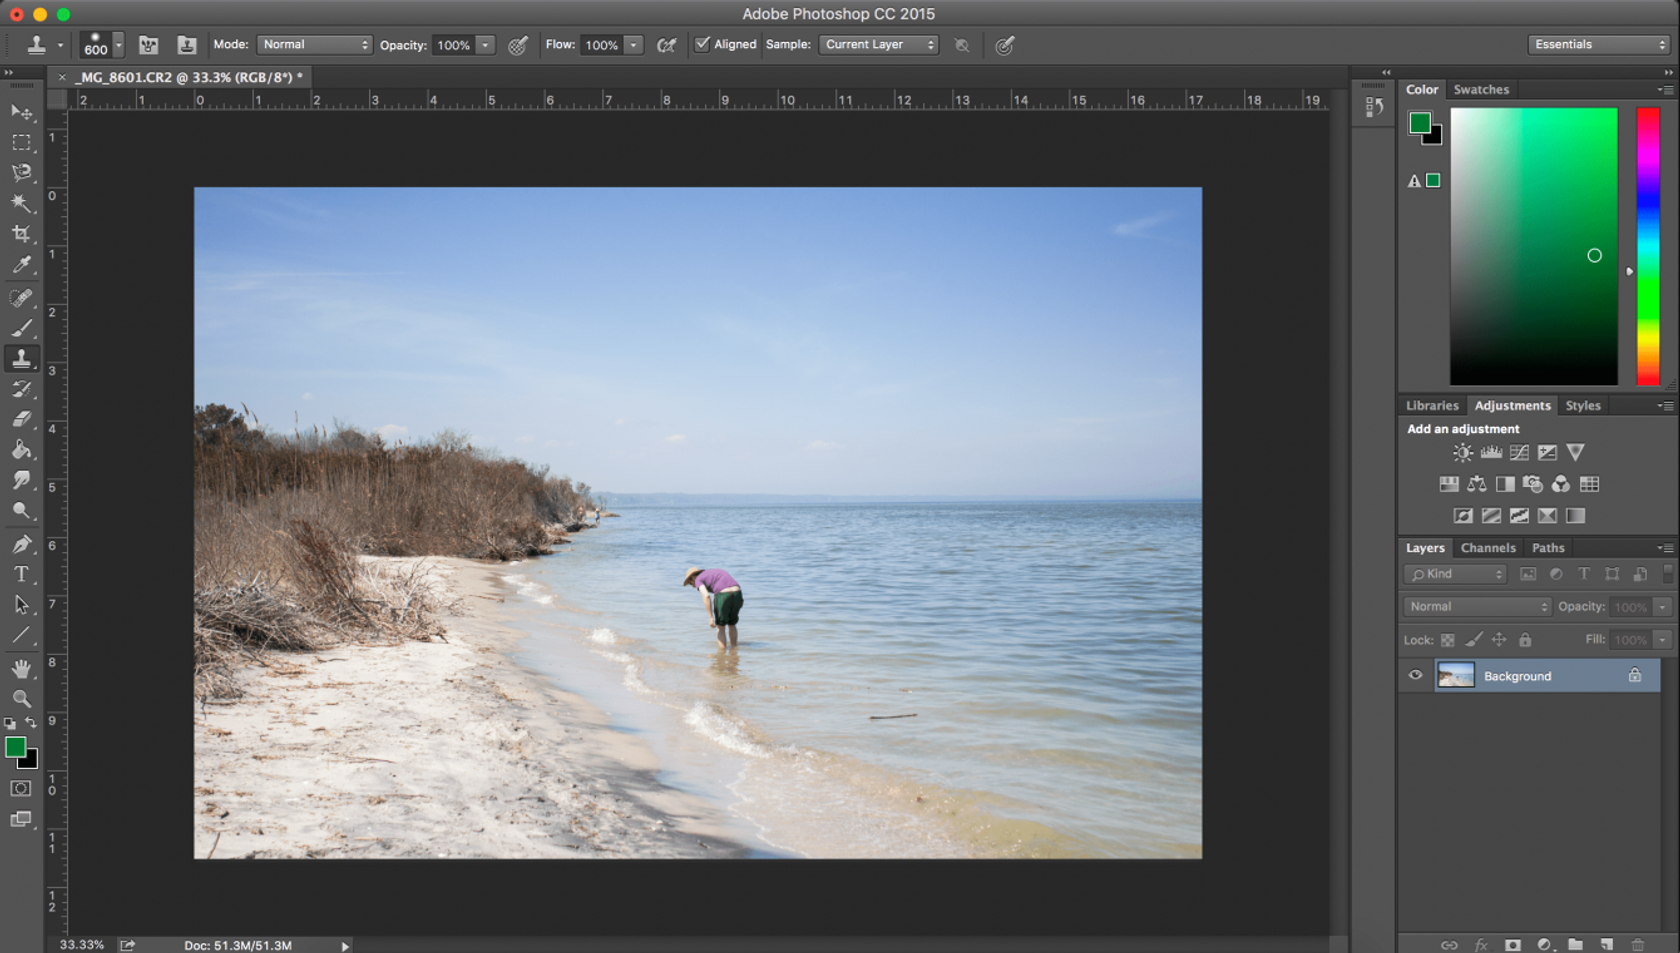
The clone tool in Photoshop can be found on the left side of the screen in the toolbar. The Photoshop Clone Stamp looks like a traditional rubber stamp. It can easily be accessed with the keyboard shortcut S. Just like in Luminar Neo, the Photoshop Clone Stamp acts by choosing a source and then painting that source over a different area of the image.
You can change the size and hardness of the brush, the opacity, and the flow of the Clone Stamp tool in Photoshop. Normally, you would leave the opacity and flow at 100% and adjust the brush size based on your image. For hardness, choose a lower percentage. Using 100% hardness will create sharp edges, while less than that will soften the edges.
You can use the bracket keys on your keyboard to adjust the size of the clone tool in Photoshop just like you can in Luminar Neo. To get rid of both the person and the twig, choose areas of the water to use as your source, then start painting over the unwanted objects.
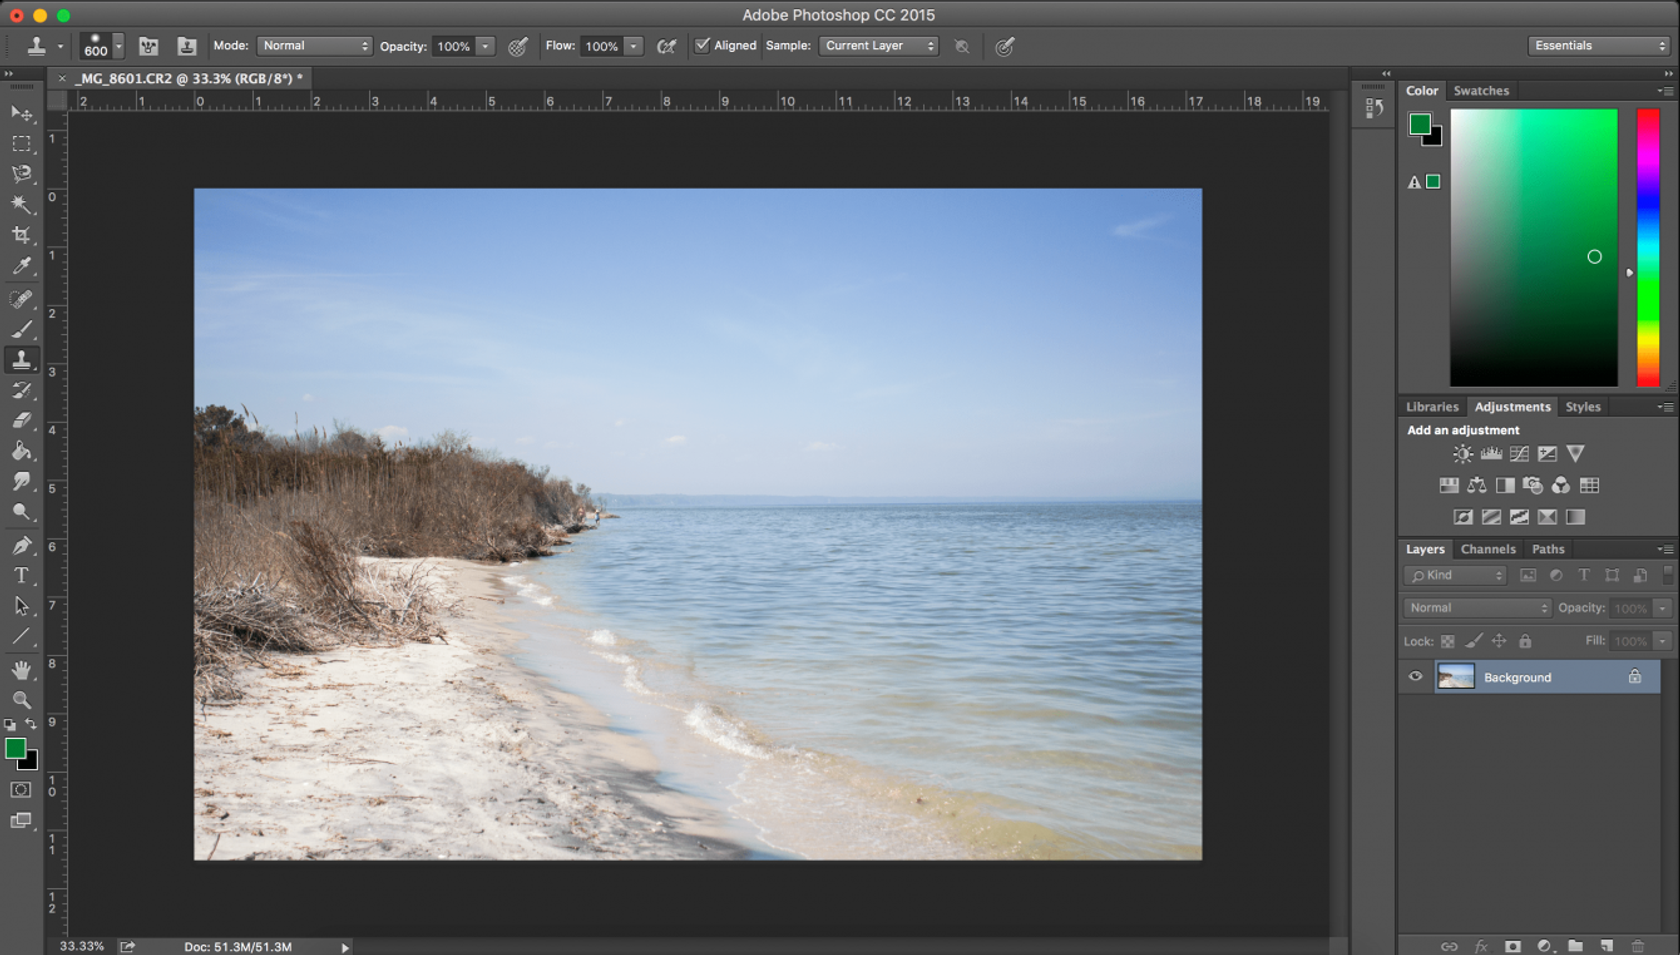
With a few simple clicks, both the person and the twig are gone! The Photoshop Clone Stamp and the Luminar Neo Clone work in the same way and allow the same adjustments to strenght, brush size, and softness (called hardness in Photoshop). And just like in Luminar Neo, in Photoshop you can simply use Option + click to choose a new source. When you begin to paint, the area you’re painting will show up in a large circle, while your source will show up as a cross.
Learning how to use the Photoshop Clone Stamp tool is fun and easy. If you’re ready to bring your post-processing to the next level, download a free trial of Luminar Neo today.
Before we end up cloning (final thoughts)
So now you know everything you need to know about setting the brush and object cloning in bitmap editing software. Using the Photoshop cloning stamp, or a similar tool in Luminar Neo, you can easily remove or clone something from your photo. Just take pixels from the source area and replace them with the part of the frame that you don't like. You can always go back to the original photo to try again if something goes wrong. With proper skill, you can do the job so well that no one will notice the interference in the original picture.
We hope that this article was helpful for you and that you found answers to all your questions. In subsequent articles, we will talk about other tools in Photoshop, Luminar Neo, and other photo editing programs. See you (write you) soon!
 >
>
