November 20
16 min. to read
How to Make a Picture Look Like a Polaroid: Ultimate Guide
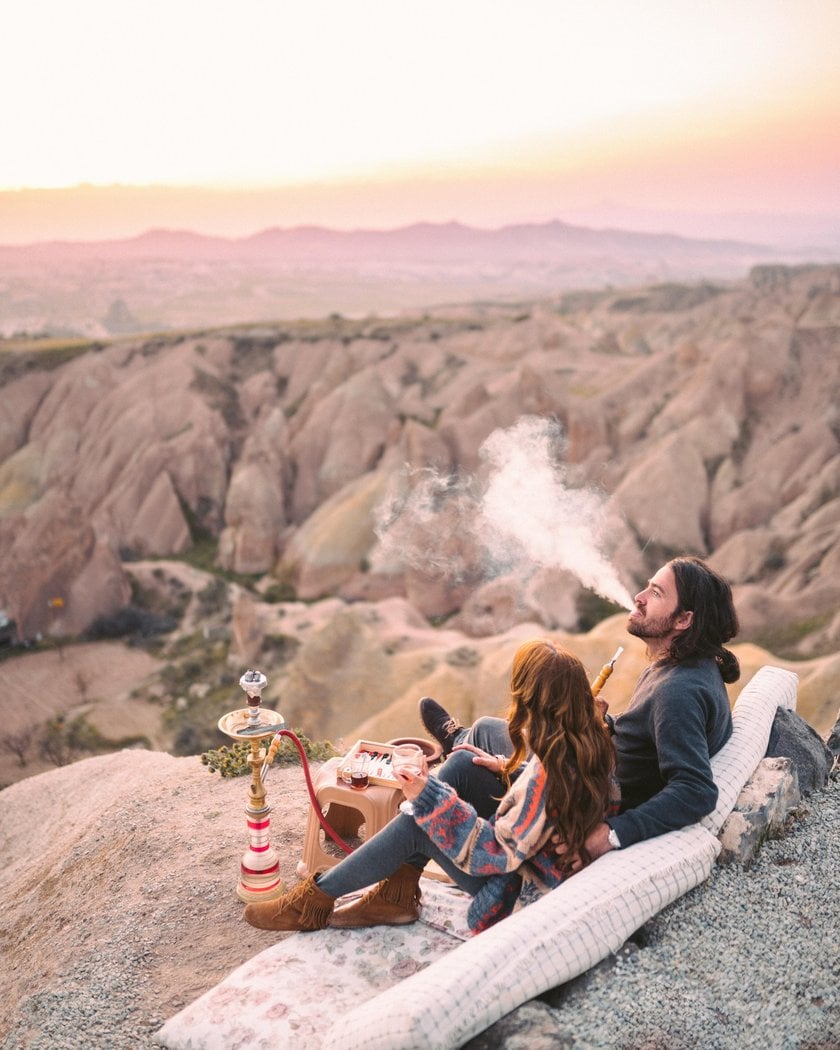
I am a fan of old-fashioned photography. And Polaroid is one of the brightest examples of such pictures. It became known for its unique color reproduction, soft shadows, and light blur, which creates the feeling of sleep on photographic paper. Yes, you will undoubtedly recognize these shots, even if you have never seen photos from the original Polaroid! It's incredibly beautiful, but there are a couple of problems here.
Many instant cameras are being produced today, but this is not the same as a Polaroid. Maybe I'm being picky, but I want the camera to not only shoot retro but also look like true retro. You can’t buy such a toy so easily now: there are just a few in the world left, and they are very expensive.
The second reason is paper. It's pricey, either. So, for now, I choose to do without that luxury altogether. But I still want to post fantastic retro shots on Instagram... If you have the same thoughts, read this article to the end. There is a temporary solution: I will tell you how to turn your pictures into polaroids.
Frame Parameters You Need to Know to Make Photo Look Like Polaroid
What's a Polaroid picture, in fact? Right! It's not just a photo but also a stylish frame that we can't imagine this picture without. Before we get started, it's essential to explore the dimension of a Polaroid film so we can make it as realistic as possible. Of course, you can resize the card if you want (crop, change the aspect ratio, or whatever you want). In this case, the original dimension is just a template to experiment with.
You might think of Polaroid pictures as always being those classic, square-shaped snapshots with the iconic white borders. But, actually, there's quite a variety of sizes available. Just so you're aware, when we talk about the dimensions of Polaroid photos, we’re including that distinctive white border.
Here’s a quick look at some of the common polaroid dimensions:
Mini Polaroids: These are about 2″ x 3 1/2″. Compact and great for capturing little moments.
Original Polaroids: A bit more space to work with here, as they measure around 5.25″ x 6.35″.
Standard Polaroids: A commonly chosen size, these are approximately 2.4″ x 3.9″.
So, no matter your preference, there’s likely a Polaroid size that fits just what you're looking for. The most common are the original Polaroid 600 film and Instax. So, we'll take a look at these two and try to answer the common question, “How big is a standard Polaroid picture?”
The dimension of Polaroid 600
If you're aiming to recreate the classic look of Polaroid pictures, it’s crucial to get the dimensions right. For the photo itself, you’re looking at dimensions of 3.0625 x 3.125 inches. As for the iconic frame that gives Polaroids their distinctive style, it measures 3.4 x 4.2 inches.
The dimension of Instax film
With more modern Instax film, it is a little more complicated since it comes in two formats: square and mini. A square is really a perfect square. The dimensions are:
- the photo itself is 61×61 millimeters;
- photo with frame - 62×62 millimeters.
Mini sizes are:
- the photo itself is 61×46 millimeters;
- photo with frame - 62×46 millimeters.
Three Ways of Making Photos Look Like Polaroids
Okay, we figured out the correct Polaroid ratio. Now let's try to make photos look like polaroids.
How to turn photos into Polaroids using Luminar Neo
You ask me, what is the third way how to turn pictures into polaroids? Well, I saved the best for last. This is the Luminar Neo program.
Step 1: Installation & Setup
Download and install Luminar Neo on your computer.
Launch the software and import the photo you wish to edit.
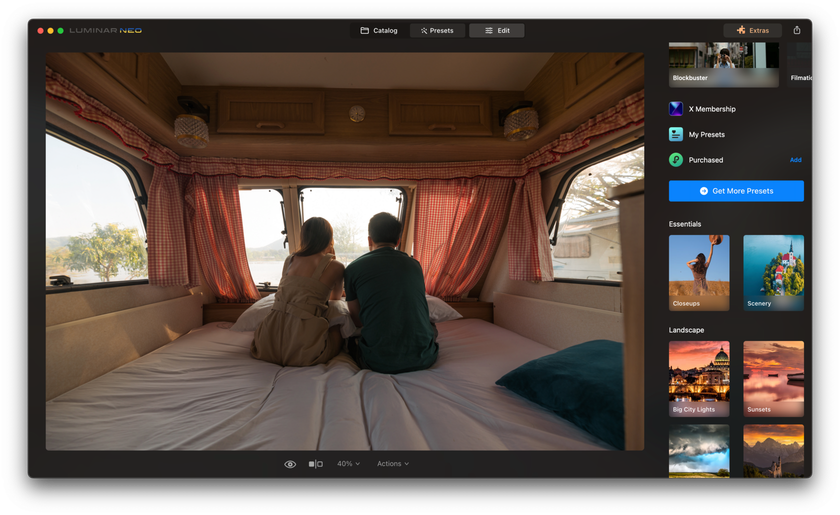
Step 2: Select a Vintage Preset
Navigate to the presets section.
Browse through the library of over 60 vintage presets.
Choose a preset that resembles the Polaroid filter effect you have in mind.
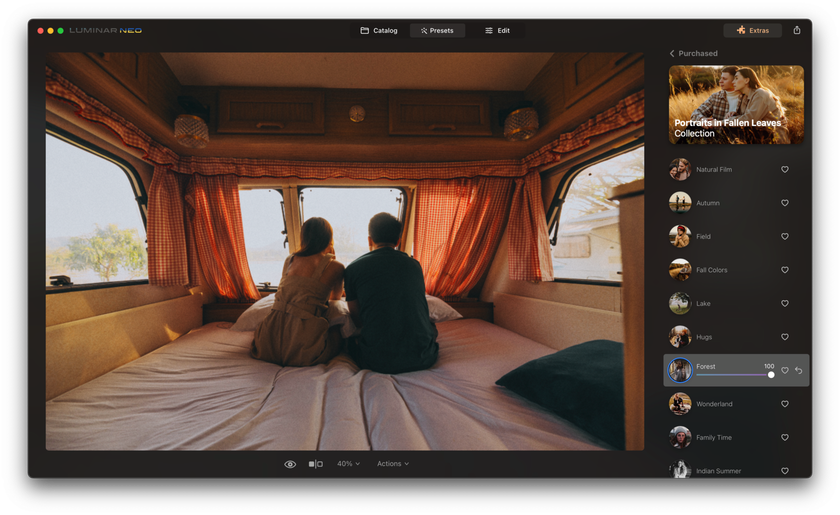
Step 3: Tweak the Preset
If the selected preset doesn’t fit perfectly, don't worry.
Adjust the preset's intensity and settings until you're satisfied with the look.
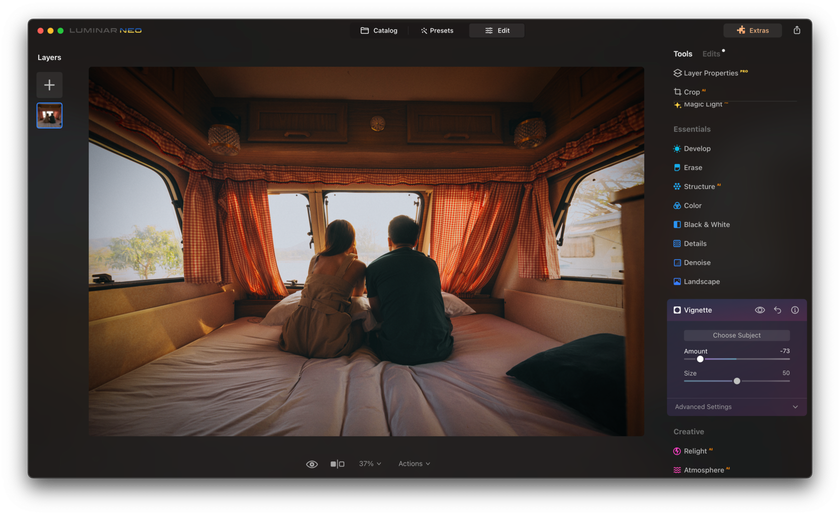
Step 4: Dive into Detailed Adjustments (Optional)
Beyond the preset's settings, Luminar Neo offers control over every image detail.
Adjust curves, saturation, temperature, and contrast as needed.
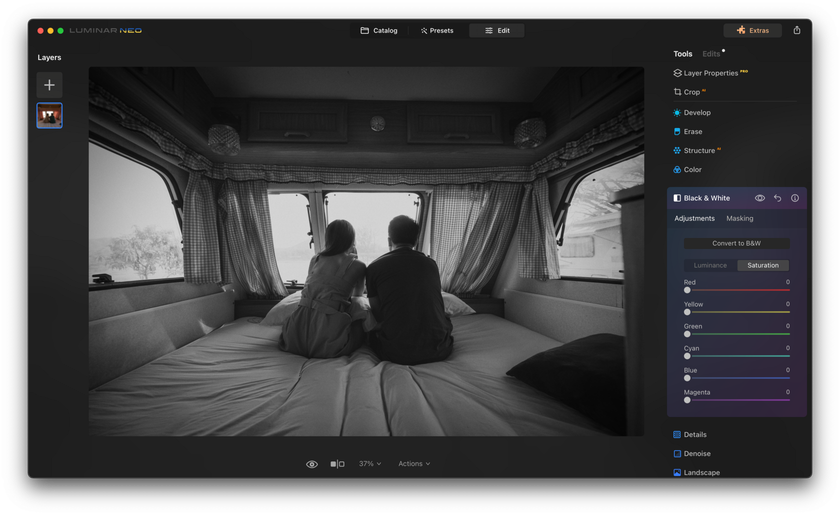
Step 5: Experiment with Black & White Filters (Optional)
Check out the "Black-and-White" function to give your photo a vintage documentary style.
These filters can add drama and depth to your image.
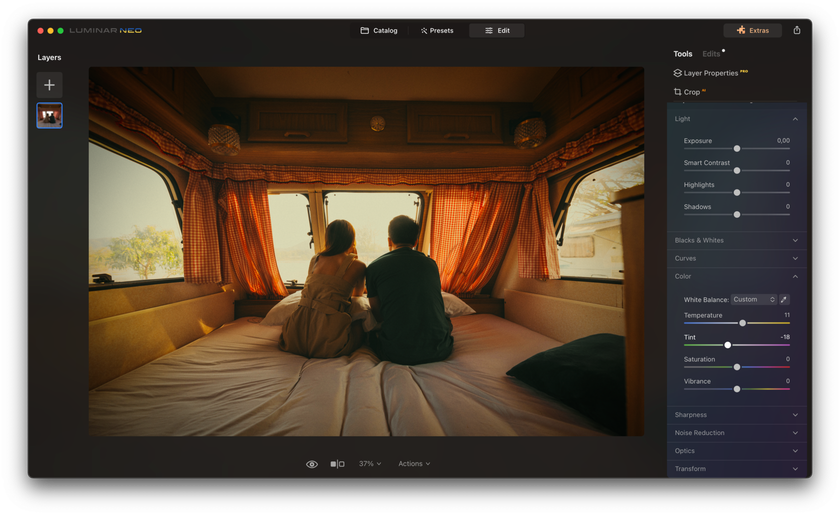
Step 6: Utilize the HSL Controls
Dive into the "HSL" (Hue, Saturation, Luminance) controls to adjust individual colors in your image.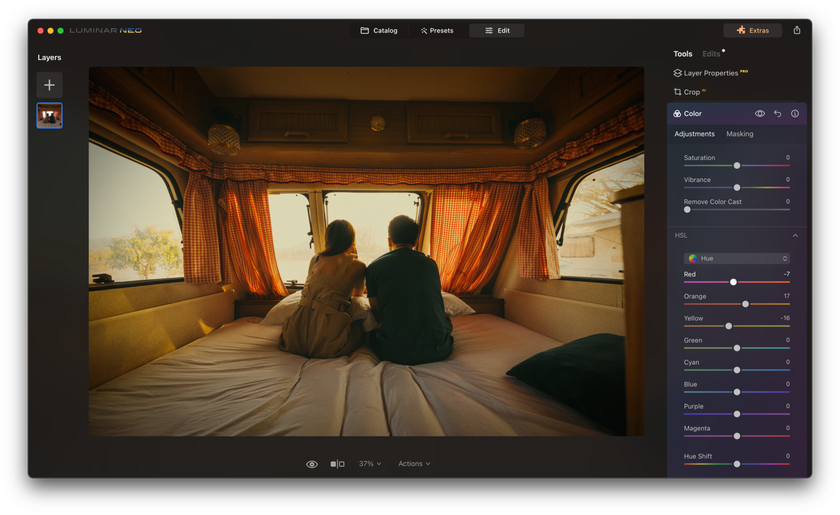
Step 7: Add Textures & Film Defects
Use intelligent texture mapping to introduce film-like textures.
Adjust the transparency to create popular film defects for a more authentic vintage look.
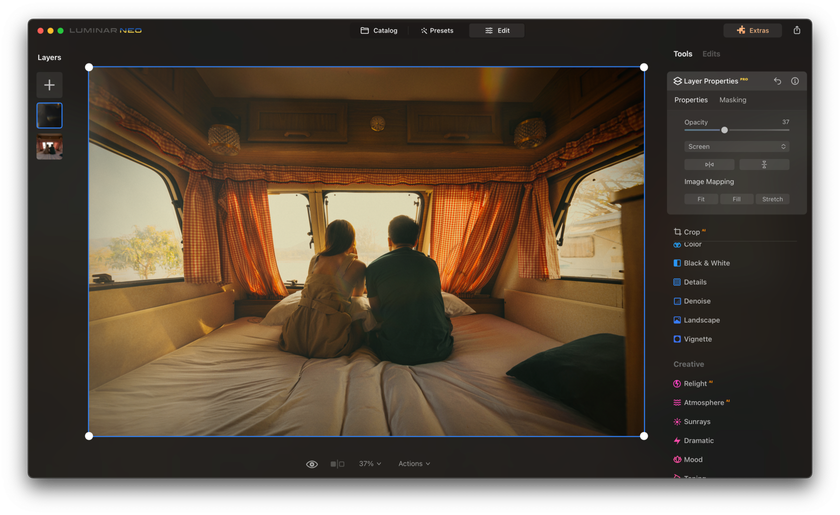
Step 8: Add a White Border
Create a new layer and fill it with white.
Resize the white layer to 2800x3600 pixels for a Polaroid look, leaving thicker bottom and equal side/top borders.
Position the photo on top and merge if needed.
Step 9: Finalize & Export
Once you're satisfied with the edits, save or export your photo.
Share your newly created Polaroid or vintage photo with friends, family, or on social media!
Using free mobile apps
Where there is demand, there will always be supply. So it's no surprise that the easiest way to get your old-fashioned photos is with one (of the many) free polaroid picture maker. In this case, you don't even need to know the frame dimensions. Just a few easy steps, easily share… You already know that something is wrong here, right?
I will not name these applications so as not to advertise them but also so as not to devalue the efforts of their developers. However, I do not recommend using this method, no matter how convenient it may seem. There are several reasons for this.
- Even though it's free, the apps have a lot of ads, which makes them very inconvenient to use.
- Often, this is not about photo processing but about using a regular polaroid filter. In addition, it also adds a lot of unnecessary inscriptions and stickers on top. And it looks unconvincing, but it will do for stories on social networks.
Basically, it exists, it's easy to use, and it's the fastest way, so you can use it. But I won't.
Turn pictures into polaroid with Photoshop
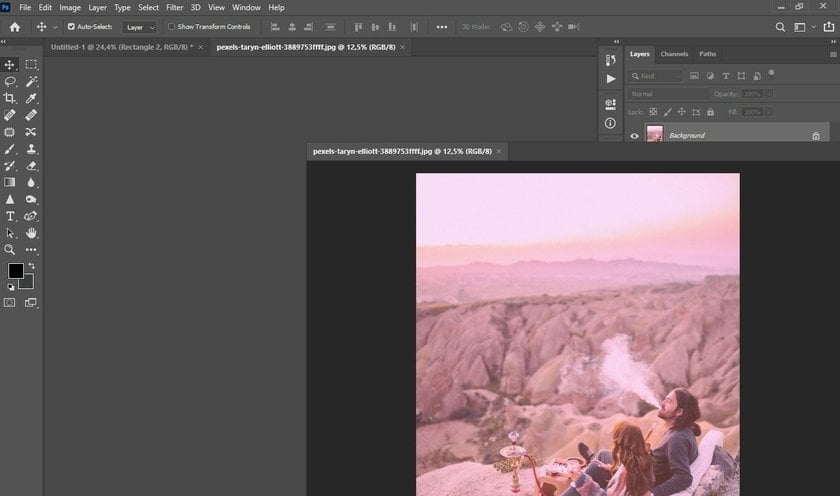
Step 1: Open Image in Photoshop
Although there is no pre-made Photoshop Polaroid effect, you can still achieve this look using basic photo editing tools. First of all, open your photo in Photoshop. You need to adjust curves:
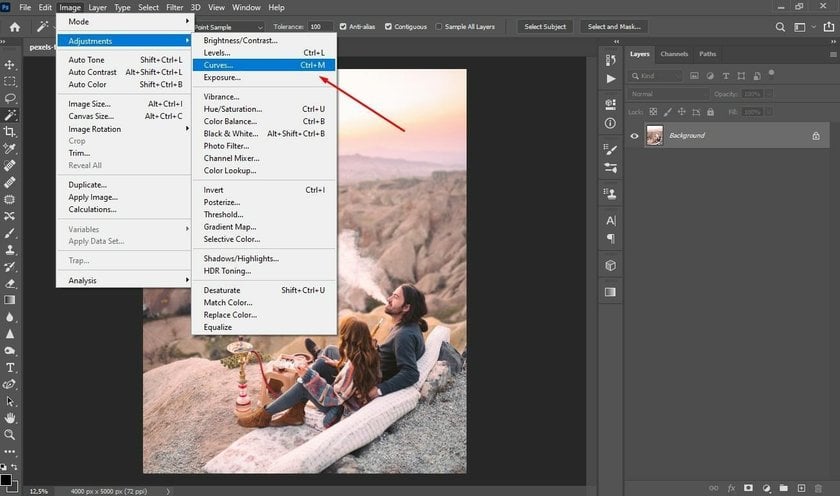
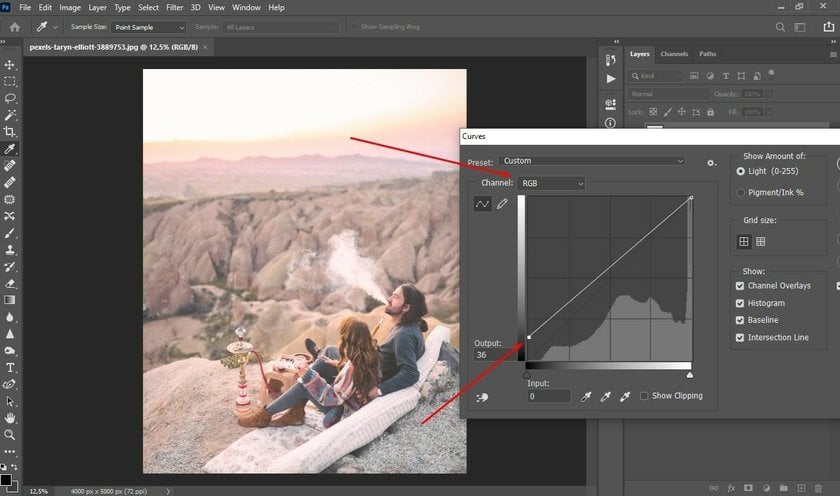
Step 2: Adjust Curves for Faded Look
Polaroid film has a signature faded look.
In the RGB channel, drag the bottom left dot slightly upwards to reduce contrast.
Step 3: Tweak Color Channels
Adjust the red and green channels to capture the Polaroid effect.
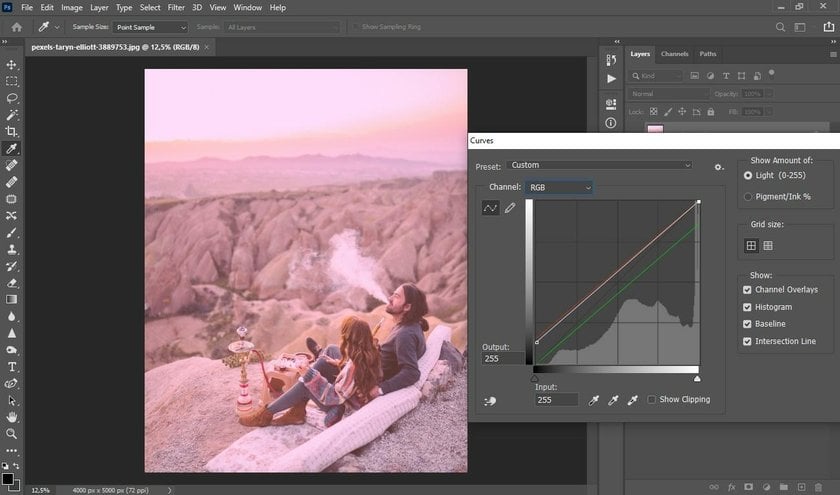
Note: This is an experimental step; your adjustments might differ based on your image.
Step 4: Add Retro Grain
Navigate to "Filter → Noise → Add Noise..."
Adjust the slider until the grain is subtle but noticeable.

Zoom in to observe the grain effect closely.
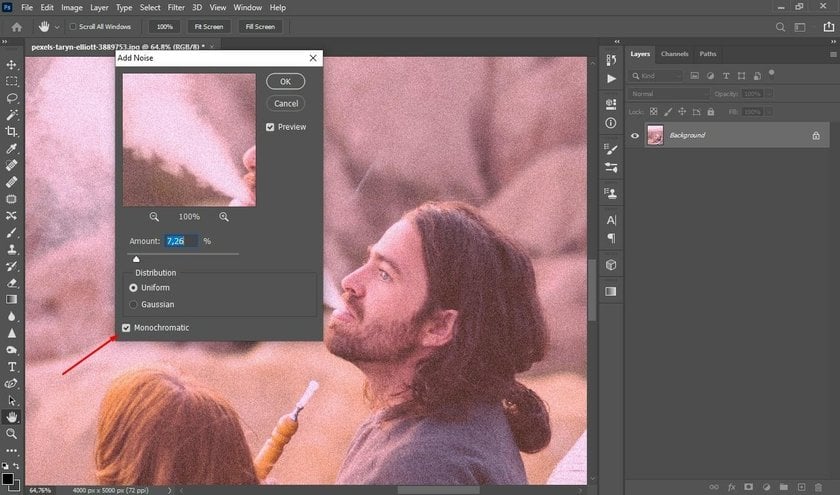
Tip: Opt for monochromatic noise for a subtler grain.
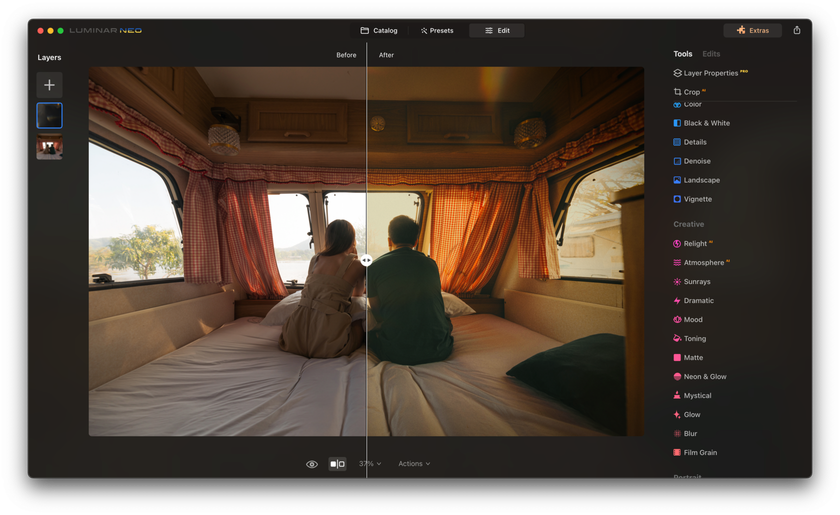
Step 5: Comparison
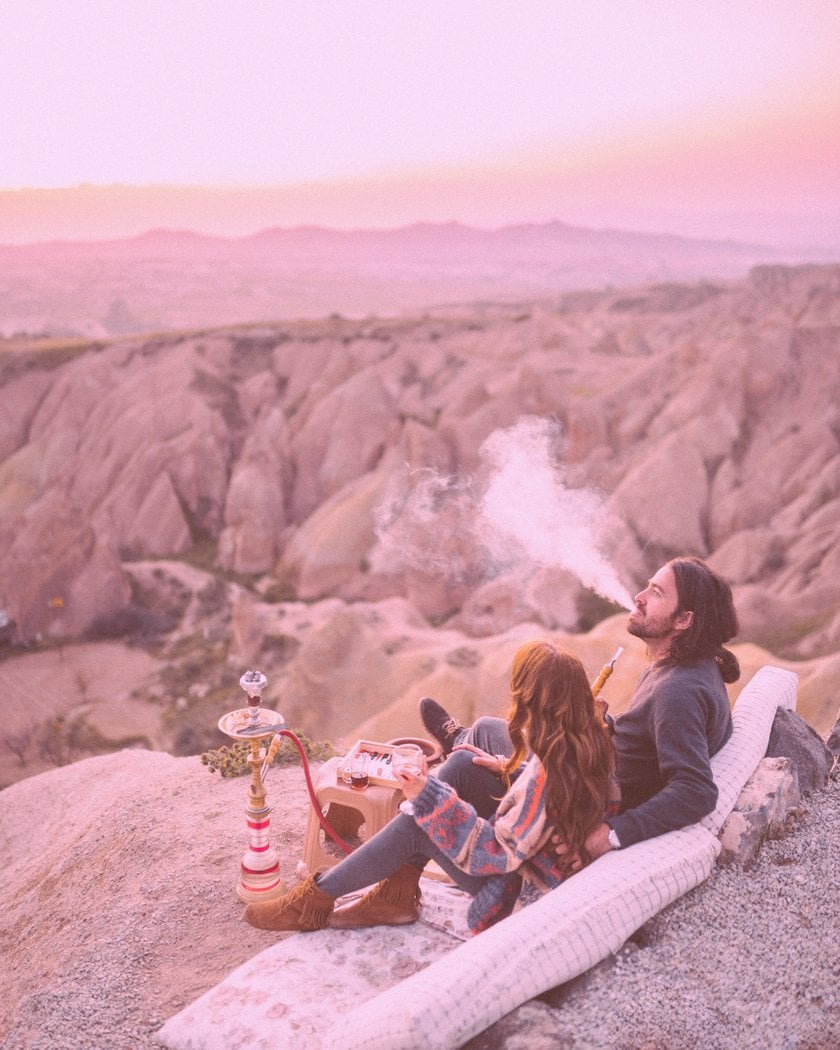
Compare the edited photo with the original to appreciate the Polaroid transformation.
Step 6: Create a Frame
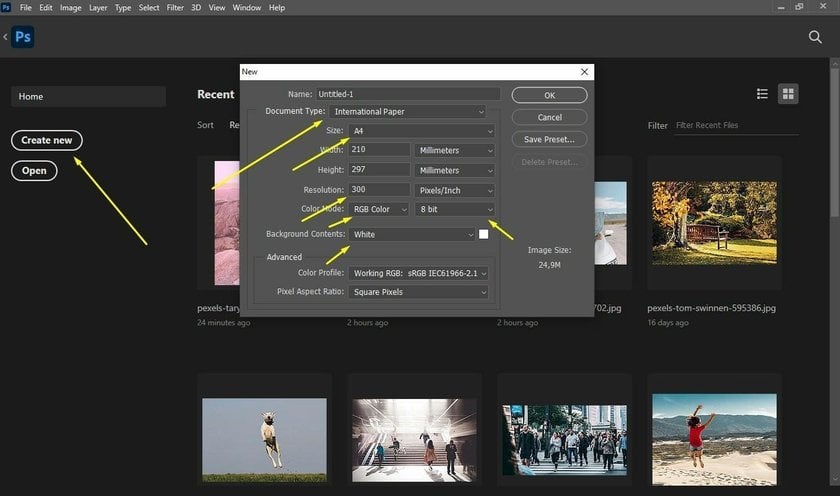
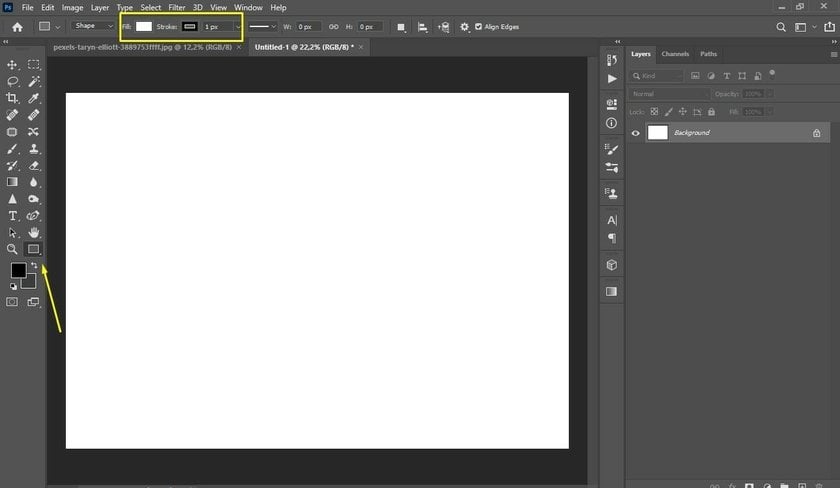
Click the house icon at the top-left.
Select "Create New" to open a blank sheet. Ensure you have the settings as illustrated in:
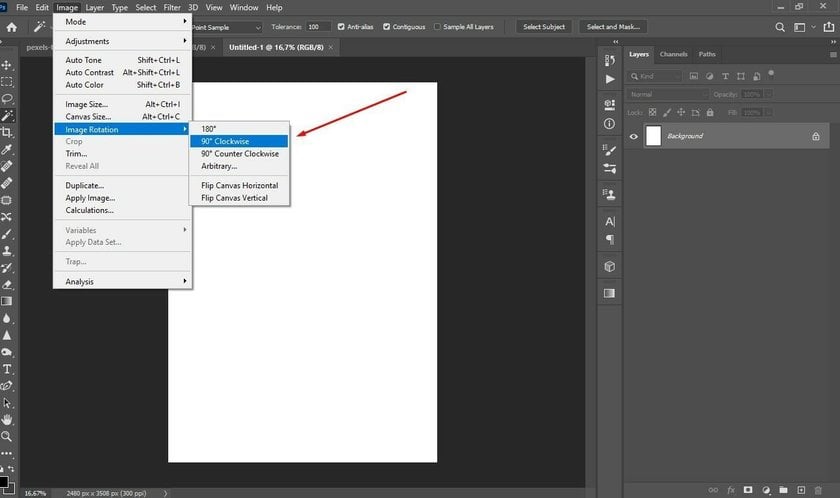
Rotate your canvas to a landscape orientation.
Use the Rectangle tool to set the white fill and a one-pixel black stroke.
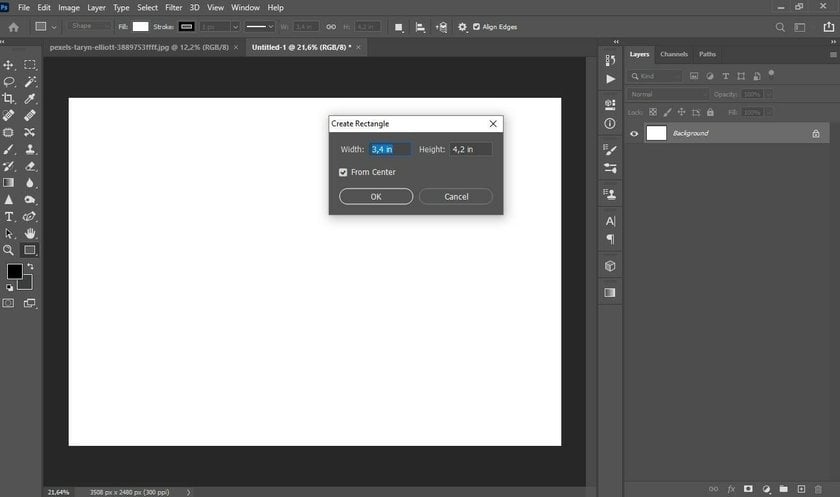
Step 7: Determine Dimensions
Design the outer frame with dimensions 3.4 x 4.2 inches.
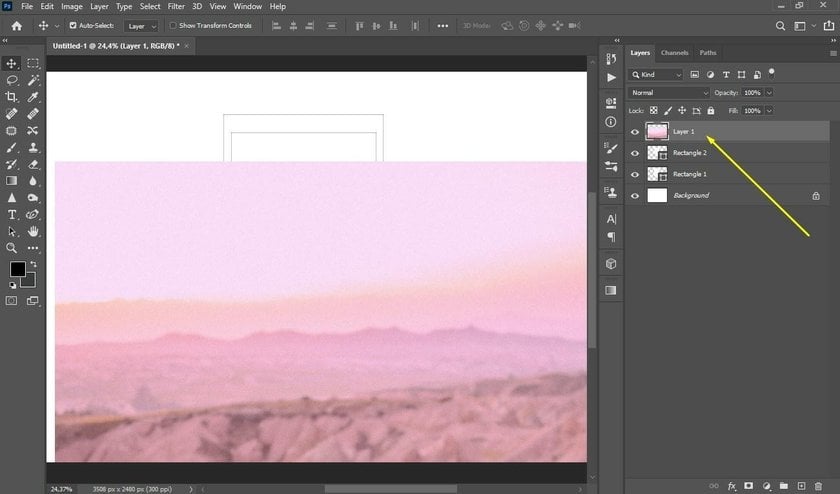
Create an inner rectangle with dimensions 3.06 x 3.12 inches on a new layer.
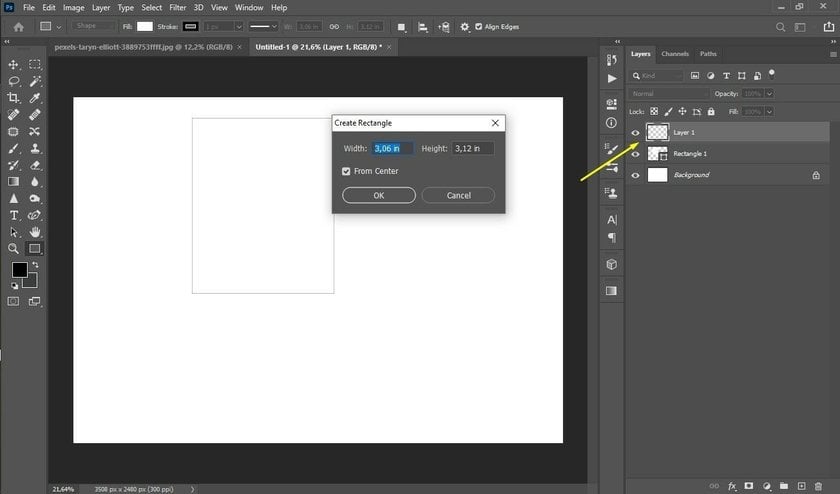
Center the smaller rectangle within the larger one.
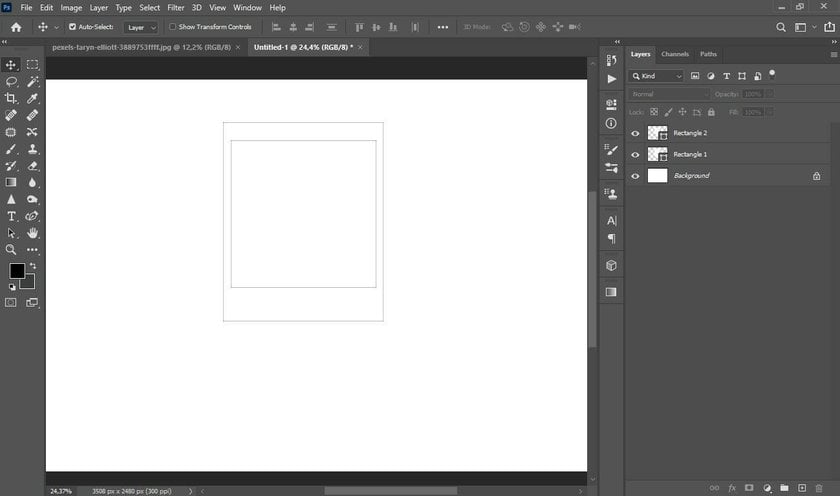
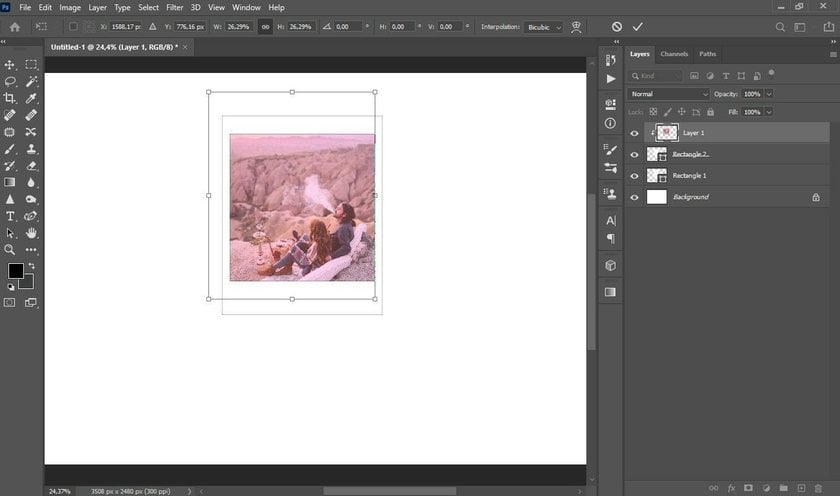
Step 8: Integrate the Photo
Drag your edited photo onto the template.
Ensure the photo layer is positioned above others.
Right-click the photo layer, select "Create Clipping Mask," and resize the photo with Ctrl + T.
Step 9: Finalize Frame Color
Opt for an off-white frame for web displays.
Adjust the fill color in the Rectangle Tool Options Bar.
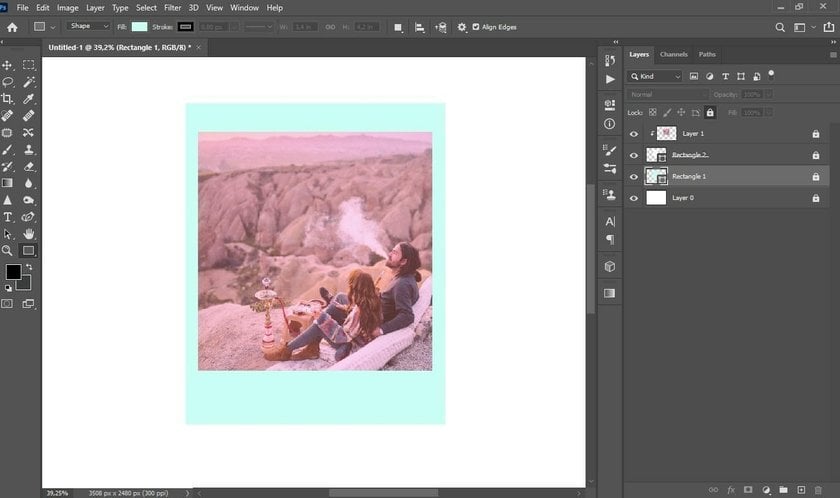
OK, it's all over Now! Now you know how to make your photo look like a Polaroid in Photoshop!
I showed you how to make a printable image exactly the same size as the original Polaroid, but you can also take those proportions and make the Polaroid picture bigger so you don't lose quality when you post it online.
On a Final Note
Like any other art, photography is designed to evoke a storm of emotions in the audience and not be technically perfect. The vibe of old photos with all the scuffs, grain, scratches, and other imperfections is an excellent example of how powerful this can be. And especially now, when most photos are too perfect, and modern cameras do not allow you to do something wrong.
There is another way how to make your pictures look like polaroids, and I think it's the best one. This one is to buy a real Polaroid because this vibe is second to none.
FAQ
What size is a Polaroid photo?
Polaroid photo size is approximately 3.1 x 3.1 inches for the actual image, with the total size including the white border being 3.5 x 4.25 inches.
What are Polaroid photo dimensions?
Polaroid photos come in various sizes, depending on the film type. Here are the dimensions for the most common Polaroid film formats:
Film Type | Photo Area | Total Area |
Polaroid SX-70, 600, and i-Type Film | 3.108 x 3.024 inches (7.894 x 7.6801 cm) | 4.233 x 3.483 inches (10.752 x 8.847 cm) |
Polaroid Round Frame Film | 3.024 inches (7.68096 cm) | 4.233 x 3.483 inches (10.752 x 8.847 cm) |
Polaroid Go Film | 1.851 x 1.811 inches (47 x 46 mm) | 2.623 x 2.122 inches (66.6 x 53.9 mm) |
Is it possible to give a photo a Polaroid appearance?
Yes, it's entirely possible to give a photo a Polaroid appearance. This can be achieved through several photo editing software applications. The process typically involves adjusting the color balance, adding a grainy effect, and creating a specific Polaroid frame around the image. Depending on the software, there might be built-in presets or filters that can quickly transform a regular photo into a Polaroid-style image.
Which app is suitable for creating Polaroid-style photos?
While there are many apps available that can create a Polaroid effect, we highly recommend using Luminar Neo. Luminar Neo offers a combination of artificial intelligence technology and vintage presets, making it easy to achieve an authentic Polaroid look. It also provides detailed controls for those who wish to fine-tune their photos further.
How to Turn Pictures Into Polaroids?
Launch Luminar Neo.
Click 'Add Photos' to upload your image.
Select a preset that gives a vintage or Polaroid effect under the 'Presets' panel.
Use the 'Edit' tab to adjust brightness, contrast, and saturation for a vintage look.
Navigate to the 'Creative' tab, select 'Matte', 'Glow', or 'Film Grain' effects to mimic Polaroid style.
Use the 'Crop & Rotate' tool to square format; then add a white border for the standard Polaroid size.
Save your edited photo with a custom name.
 >
>
