How Sky Replacement Works In Photoshop Step By Step
January 07, 2026

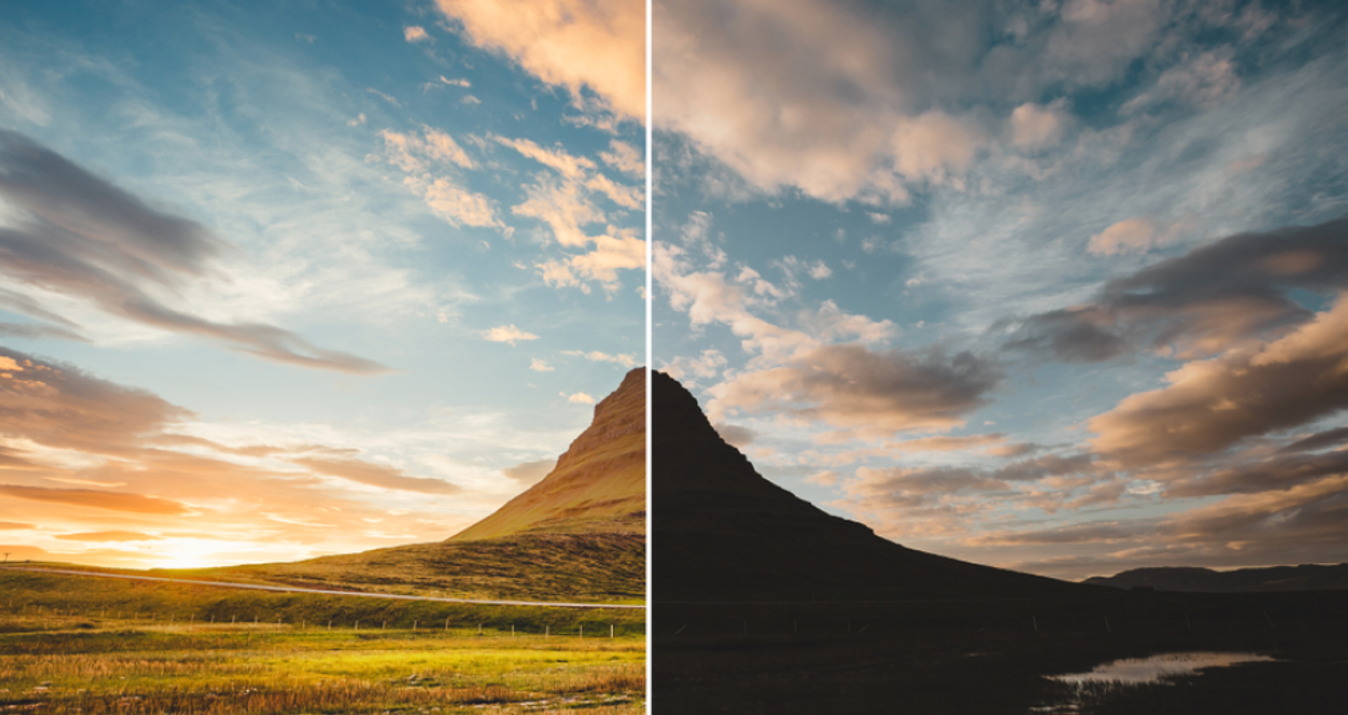
Discover how to use Photoshop’s Sky Replacement without breaking realism.
So you wake up on a fine morning and realise it is the perfect weather to go shooting, with clear blue skies forecast and beautiful light on the cards. You grab your camera, head out, and trek to your favourite photo spot, only for the weather to suddenly turn on you. Those clear blue skies are now a dull grey expanse, completely undermining what could have been a great shot.
This has happened to me far too many times, and I used to think those photos were completely unusable. Thankfully, technology has moved on to help us out in situations like this. That dull and boring skyline can now be replaced with almost anything you like. Clear blue skies, soft clouds, or even dramatic sunsets can be added to your image, rescuing the shot and saving all that time and effort you put into capturing it.
There are several ways to approach sky replacement, and in this article we are going to focus on how it works in Photoshop. While the process itself can be as simple as a single click, there are a few important things to consider and prepare for if you want convincing results, as the biggest challenge to keep in mind is realism.
When Sky Replacement Works Best (and When it Struggles)
 Unfortunately, not all shots can be rescued in one click with Photoshop’s Sky Replacement tool. It is also important to understand what is happening behind the scenes, as this will help you achieve better results.
How It Works
So firstly, what is the Sky Replacement tool doing? It uses AI to analyse your image and detect the sky region. From there, it generates a sky mask. Once your new sky layer is added, Photoshop provides additional adjustments such as tone and lighting corrections to help the new sky blend more naturally with the original image.
What Works and What Doesn’t
Now let’s look at whether your image is suitable for using the Sky Replacement tool. It works best with clear horizons such as landscapes, seascapes, and simple skylines. Busy or cluttered horizons, especially those with lots of buildings or fine tree branches, can lead to inconsistencies where the tool struggles to separate sky from foreground.
Lighting is another important consideration. Even lighting across the image will generally produce better results with a mixed lighting and colour casts once again creating inconsistencies. Realism also plays a key role. You need to consider what makes sense for the scene. For example, replacing a midday sky with a dramatic sunset will immediately raise red flags, as the lighting direction and shadow length will not match those of a genuine sunset image.
One of the biggest challenges for Photoshop’s Sky Replacement tool is reflections. At the moment, it does not automatically replace sky reflections in lakes, glass, or windows. These areas will require manual correction if you want a believable result. This can be tricky, but it is essential if realism is your goal. We will cover a few tips for handling this later, so let’s move on and look at how to get started with your sky replacement.
Your AI-Powered Photo Editor for MacOS and Windows
Discover Now!Prep Before Sky Replacement
 he best results will always come from starting with a solid foundation. For that reason, you should complete your base edit first, correcting exposure, highlights, and overall tones, and even finishing any colour grading you plan to apply. I do this because it makes it much easier to judge which skies will suit my vision and blend naturally with the overall mood of the photo. You can also use this stage to address any inconsistencies in lighting and tones, neutralising the image to create a more balanced starting point.
It is important to finish your edit before using sky replacement because the AI works directly with the image you give it. With a well balanced photo, the AI will have a much easier time analysing the scene and producing a realistic result without unnecessary complications.
Once you are happy with your edit and the balance of tones and lighting, it is time to replace the sky in your image, so let’s take a look at how to do that next.
How to Use Photoshop’s Sky Replacement Tool
With your photo’s edit complete, it is time to head to Edit > Sky Replacement. The first step is choosing a sky that best suits your scene. There are three built-in categories to choose from: Blue Sky, Spectacular, and Sunsets. Once you have selected a sky that fits your image, you can begin adjusting the settings to make the blend feel more realistic.


Edges
 There are two tools designed to help refine the edges of your new sky. Shift Edge helps define where the sky sits along the horizon. I have found that this slider rarely needs much adjustment, as pushing it too far can cause the new sky to bleed into elements such as mountains, buildings, or trees.
Fade Edge is particularly useful. Your original sky may still be faintly visible around the horizon line as the new sky blends into it, and this slider controls how soft that transition appears. This is another reason why choosing a suitable sky to begin with is so important. Experiment gently here to find what looks most natural for your image.
Sky Adjustments
Photoshop gives you several controls to help the new sky match your scene. The Brightness slider is especially useful for aligning the sky with the overall lighting of your image. Midday blue skies often need very little adjustment, but sunsets usually benefit from some subtle tuning.
The Temperature slider allows you to warm or cool the sky to better match the mood of the scene, which is particularly effective for sunset and golden-hour looks. Scale lets you adjust the size of the sky so it feels proportionate within your composition.
  Finally, there is the option to flip the sky horizontally. This can be useful for experimenting with different looks, but be mindful of how it may affect the perceived direction of light in your image.
Seamless Sky Replacement with One Click
Experience now!Foreground Adjustments
The first setting here is Lighting Mode, where you can choose between Screen and Multiply. Personally, I rarely switch away from Multiply, but Screen can be useful in certain situations depending on the original exposure of your image.
Foreground Lighting and Edge Lighting are designed to help integrate the new sky with the rest of the scene. Foreground Lighting adjusts how much influence the sky has on the brightness of the foreground, while Edge Lighting focuses specifically on the transition area where the sky meets the horizon.
Lastly, the Colour Adjustment slider allows you to correct any colour mismatches introduced by the new sky. This will vary from image to image, so small, careful adjustments usually work best.
The Issue With Reflections
As mentioned earlier, Photoshop has yet to add a feature that can detect reflections of the sky within a scene and replace them automatically. This means the process has to be handled manually, and it is absolutely necessary to do so. If reflections are left unchanged, the realism of the image will quickly fall apart.
To fix this, you need to duplicate the sky layer and blend it into the reflective area by flipping it vertically and masking it in carefully to sell the mirrored effect. Further adjustments such as distorting or warping the layer, depending on the type of reflection you are working with, will also be required. Once this is done, you will need to fine-tune brightness, contrast, and colour to help the reflection sit naturally within the scene.
This is all rather advanced and complicated and beginners will really struggle with this step to convince viewers of the realism in their photo. Because of this, you may want to consider alternatives for images that rely heavily on reflections, such as landscapes featuring lakes or wet surfaces.
Luminar Neo is an AI photo editing software with a sky replacement tool that offers a good deal of creative control while also automatically detecting areas where reflections should appear.  This means you don’t have to worry about any manual masking, flipping, or warping, as it is all handled for you with just one click.
You also have access to a wide range of sky options, including blue skies, sunsets, dramatic cloud formations, and starry night scenes. With greater choice, automatic reflections, and additional refinement tools, this approach can save a significant amount of time while helping you maintain a convincing and realistic result.
The Bottom Line
Photo trips ruined by weather are becoming a thing of the past now that we have the power to replace an entire sky with just one click. Drab grey skies can now be swapped for bright and sunny vistas or even stunning sunsets.
Before getting started, remember that you need to complete your base edit first. This allows you to balance exposure and tones properly and gives you a clearer idea of what type of sky will blend best with the overall mood of the image. From there, you can add your new sky and make any necessary adjustments to help sell the realism of the composite.


If you run into issues with reflections, Photoshop will require manual adjustments. In these situations, it may be worth considering alternatives such as Luminar Neo, which can also replace skies with a single click while automatically handling reflections. This saves a great deal of time and helps deliver convincing, high-quality results.