April 14
23 min. to read
How to Combine Pictures for Several Different Effects
Every photographer should know how to merge photos into collages and combine photos into unique and amazing pictures. Find out what photo editing software you can use for this and how they can help you combine images.
Photographers have been combining photos since the dawn of photography. They combine photos to achieve creative effects, but they also combine photos to fix errors and improve the quality of their images.
Today, digital photography and photo editors offer innovative ways to combine two photos. Many digital cameras allow you to combine multiple exposures in one frame, but it isn’t always easy to do and the results are hard to predict. Combining images with a good software package is easier and gives you more control over the process.
Depending on your photographic style and purpose, you can use different methods to combine images. For example, you can overlay a texture image over a portrait to create a special effect, or you can combine two images with the same composition but with different exposures. You can merge photos to create collages or you can combine photos to create a surrealist tableau. Here’s everything you need to know about how to combine images and what image editors can help you do so.
How to combine photos and textures
Applying a texture to a photo can create a mood and transform the photo into a work of art. You can use a predefined texture offered by your image editor or create your own texture. It might be a close-up of wood grain, sandstone, burlap, or anything similar. Still, most photographers use predefined textures; image editors tend to offer many of them and regularly update their libraries.
There are simple tools that offer the possibility to combine photos with predefined textures. In many (for example, in most image editors apps for iPhone), all you have to do is choose an image and the texture you want to apply. If you’re in a hurry, you can use this option. But if you have time for proper post-processing, use software that works with layers.
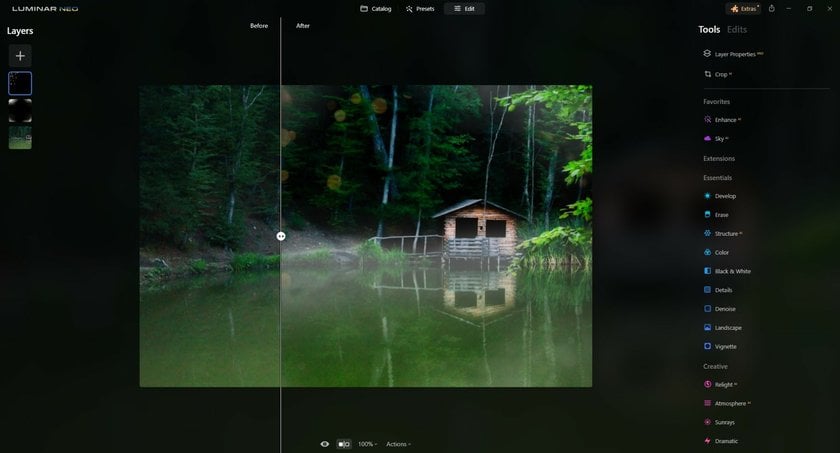
Adobe Photoshop, Gimp, and Luminar Neo are some options. These image editors allow you to create different layers for your image and your texture. You can experiment with different textures in the same project and choose between many blending modes. This quick video tutorial teaches you how to combine images with textures in Luminar Neo.
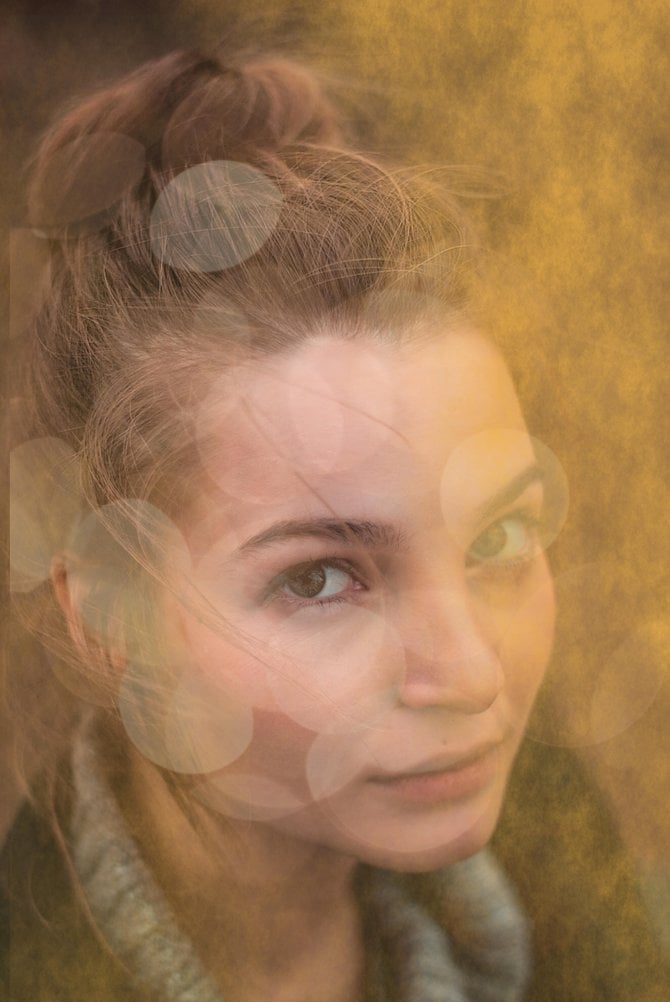 Photo by Almos Bechtold on Unsplash
How to combine two pictures
If you want to combine two pictures from your portfolio, you need to use layers. Each picture will have its own layer. You can adjust the pictures individually and then choose the blending mode and opacity level.
Working with layers is easy and efficient. You can control how each layer looks and how the final image will look. You can enable and disable individual layers and try different approaches in the same project. Learn how to work with layers in Luminar Neo watching this informative video.
1. How to combine two pictures with the same composition
Knowing how to combine two images can help you deliver photos with perfect exposure even when you photograph scenes with a wide dynamic range.
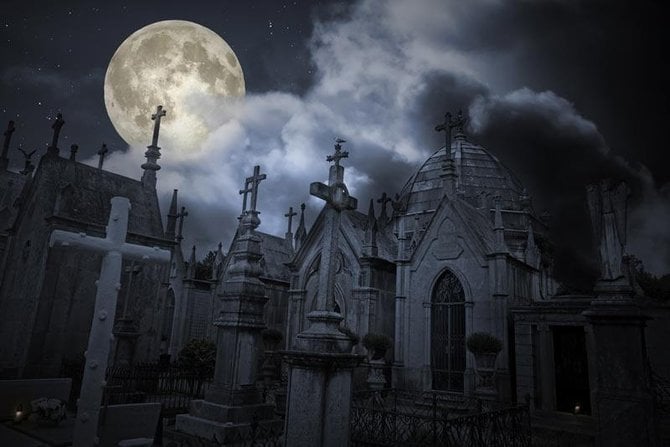
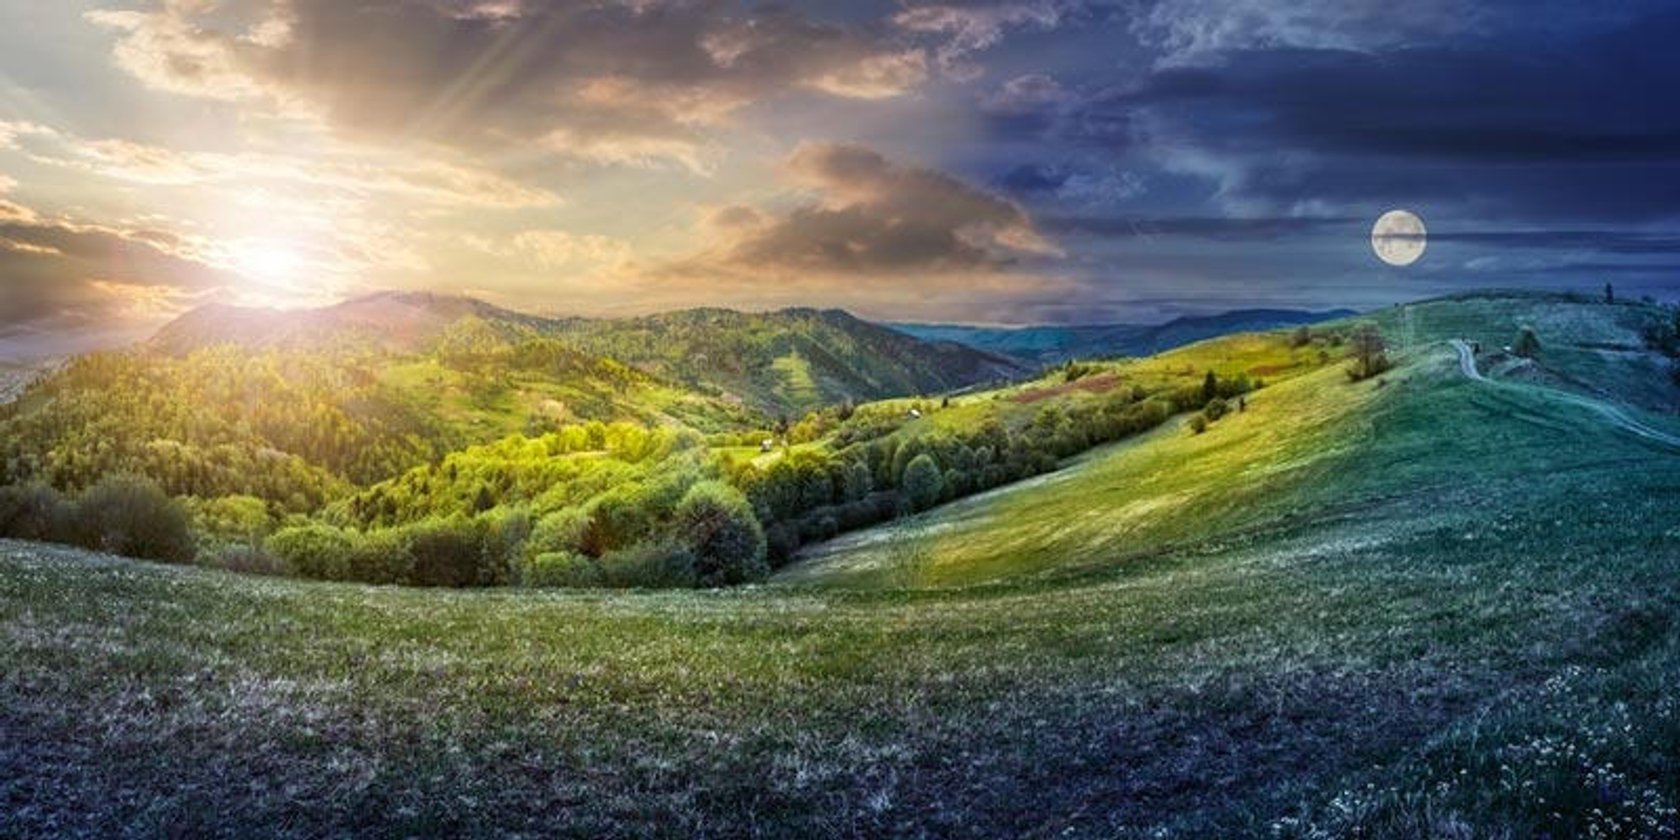
For example, a sunset landscape might need different exposure values for the sky and for the rest of the scenery. You’ll also likely need multiple exposures when shooting at midday on a sunny day, when the sky is flat and almost colorless but the rest of the landscape has vivid colors. Shooting the moon at night also requires different exposures for the moon and for other elements in the picture.
To avoid having underexposed and overexposed areas in your image, you can take two identical shots using different exposures. Then use an image editor to combine the pictures. You can also increase the dynamic range of an image by blending bracketed exposures with HDR software.
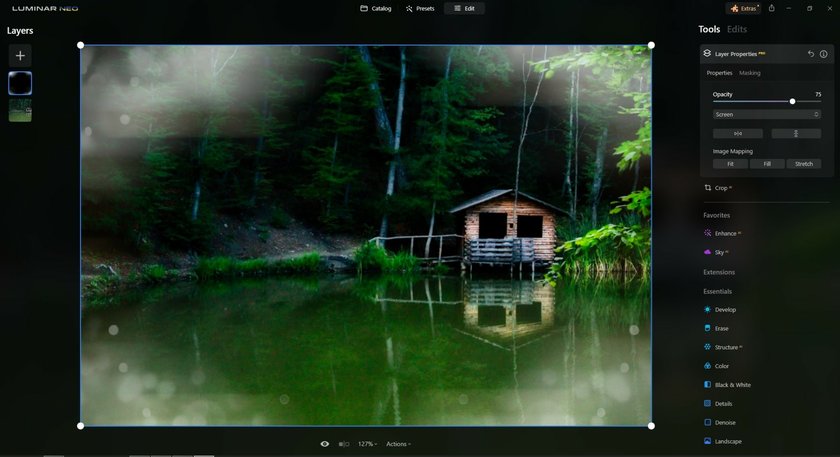
Combine two images in Luminar Neo
Begin to learn this technique using two images and then advance to overlaying multiple photos in Luminar Neo. Windows users can combine two images by following these steps:
- Open the base image.
- Add a new layer for the second image by selecting Add New Image Layer.
- Select Gradient Mask from the Brush menu of the new layer.
- Choose the area from the base image that you want to replace with a selection from the second image and press Done.

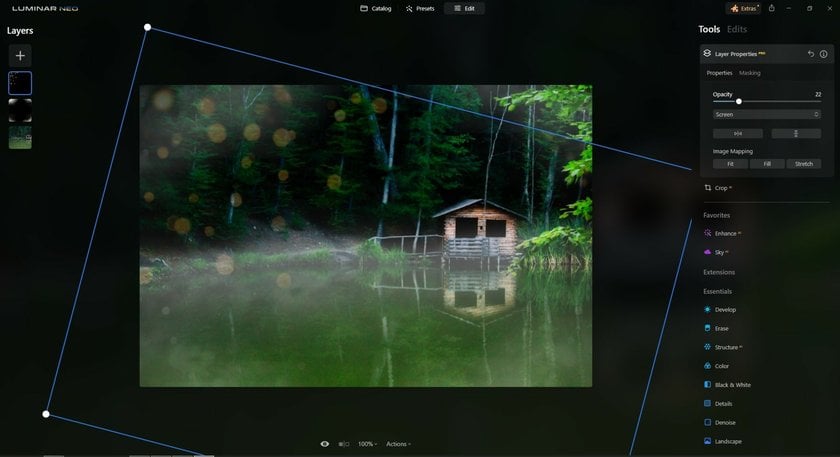
By now, you’ll already see the two images together, but you’ll need to make some small adjustments.
- From the Tools menu, choose Free Transform and change the second image until it fits perfectly. You can change dimensions, orientation, angle, etc.
- Choose the blend mode that gives you the effect you want. Most of the time, the Normal blend mode works just fine, but experiment with others too. The results can be quite different.
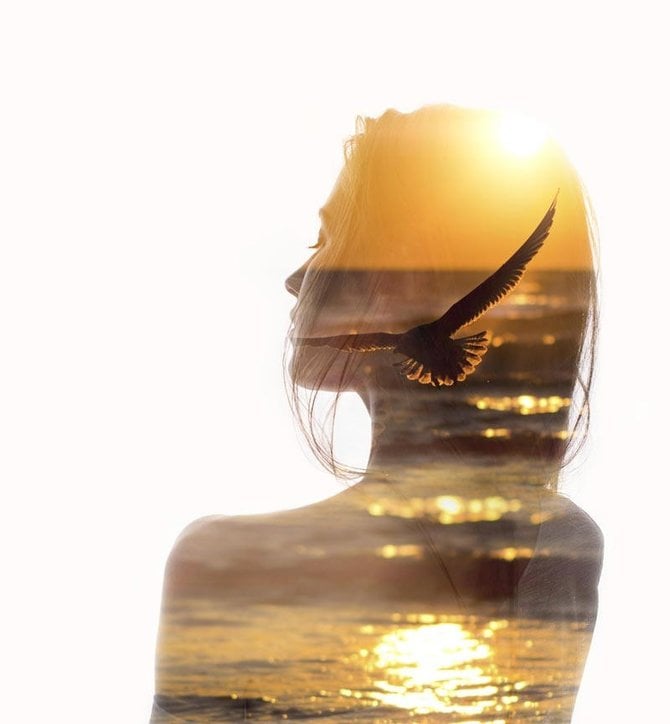
Find out more about double exposure and how you can improve your photos by learning to combine what’s best in two similar images.
If you want to replace the sky in an image with the sky from a completely different image, here’s a great video tutorial about how to do this with Luminar Neo. When you see an awesome sunset or a cloud formation you like, shoot a good photo of it and add it to your library for later use.
If you haven’t used Luminar Neo already, it’s time to download it and try it for free.
2. How to combine two pictures with different compositions
Some image editors offer the possibility to combine any two images. Adobe Photoshop and GIMP, for example, provide complex selection tools to select elements from an image to add to a base image. This can be time-consuming. It also requires patience and skill because the quality of the selection determines the final visual impact.
Nevertheless, it’s useful to know how to combine photos with different compositions because the results can be impressive. David LaChapelle is famous for his “kitsch pop surrealist” photographs, in which he combines pictures of celebrities with fairylands and even Biblical landscapes.
Choose images with the same resolution and the same light source. It will be easier to blend photos subtly if they look similar and have the same style. But this isn’t a rule, and many photographers create abstract compositions in which you can clearly see the components. Then learn how to combine two pictures using your favorite software.
 Combine two images in Photoshop
 Combine two images in Photoshop
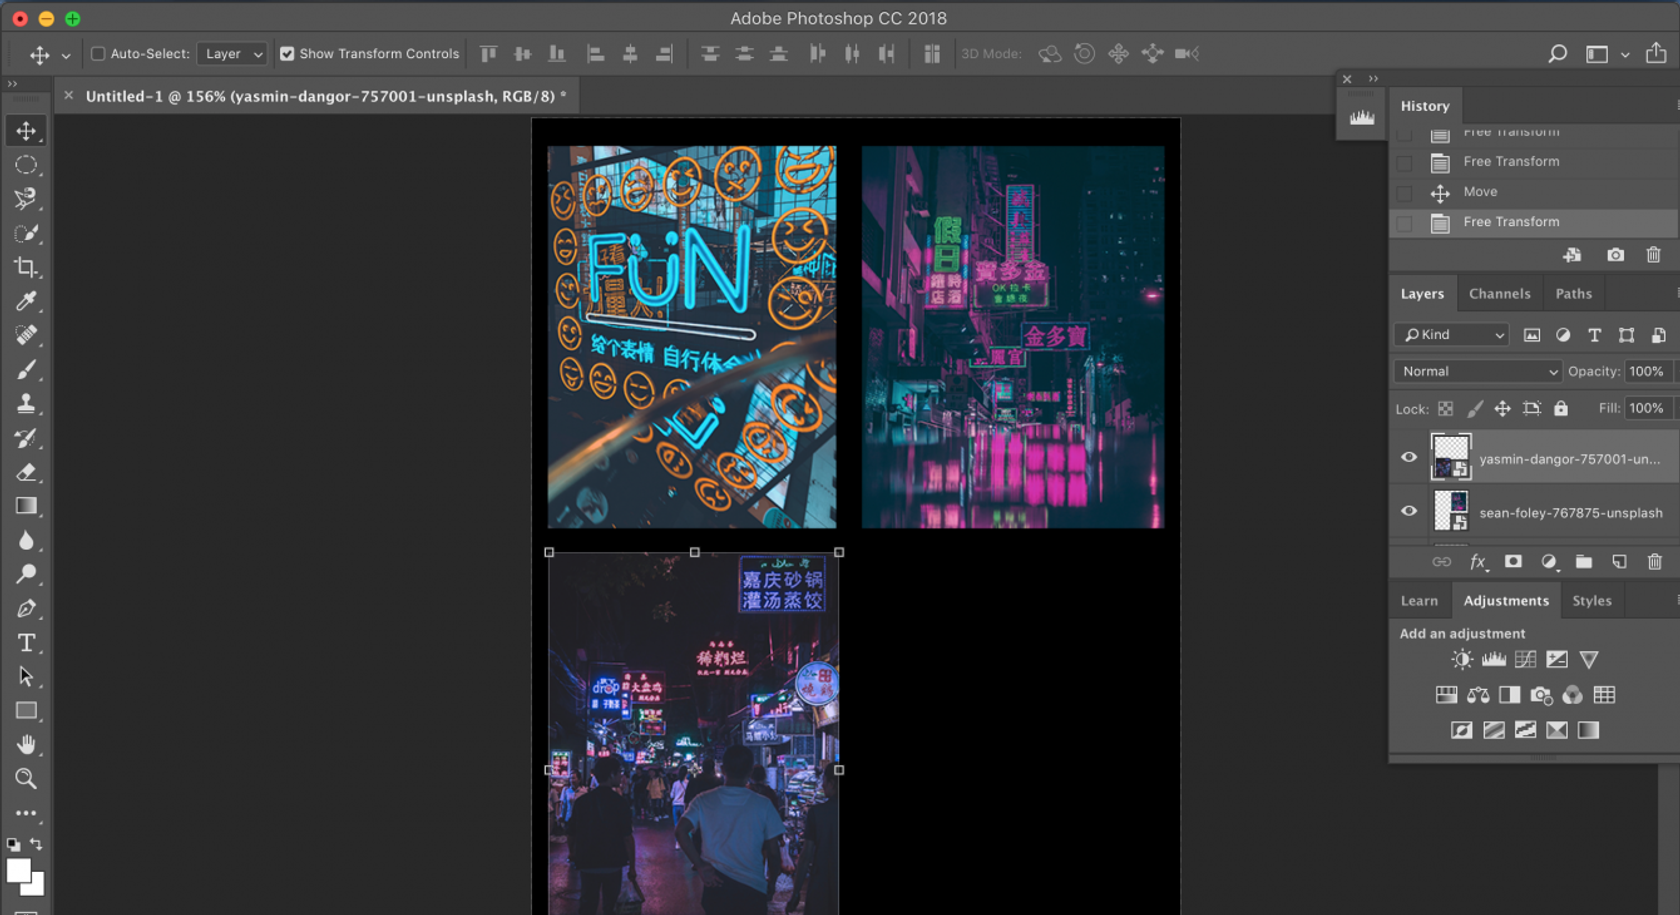
If you use Adobe Photoshop, you probably know that it has a lot of great tools for image manipulation. It’s so popular that “to photoshop” has even become a verb. But Adobe Photoshop isn’t easy to learn, although there are many courses and books about it. Here are the steps you need to follow to combine two images using Photoshop:
- Open the two images you want to combine and decide which will be the base.
- In the second image, use a selection tool to select the part you want to add to the base image. You can use the Free Select tool to hand-draw the selection, the Fuzzy Select tool to select an area of a specific color, or the Rectangle or Ellipse Select tools to select an area of a specific shape. Make the selection clean and precise.
- Copy the selection.
- Move to the base image and paste the selection you’ve made into a new layer. Position it in the right spot. Use any transform tool you need to make the selection fit your needs.
- Blend the new addition using a layer mask.
- Set the opacity level.
- Set the blend mode.
How to merge two photos in Photoshop
Merging photos is the technique of putting images next to each other. When you merge photos, you don’t necessarily blend them together; instead, you can arrange them in a collage. This technique is used to make mockups for magazines, photo albums, photomontages, and creative works. Raoul Hausmann (1886–1971), one of the pioneers of photomontage and the founder of the Berlin Dada group, can be one source of inspiration.
Before using Photoshop to merge two images, you need to decide what type of collage you want to make. If you want to do a photomontage in the Hausmann style, you can combine your images as mentioned above without blending them very well. Even the selections can be chunky and gritty. Then add textures and dramatic effects.
If you want to merge photos for a photo album, follow these steps:
- Choose the images you want to use.
- Draw a template on a piece of paper deciding the size and placement of each image.
- Open all images in Photoshop.
- Create a new image with the dimensions you need. If you want to use images at their original size, you’ll have to create a new image large enough for all of them to fit. Otherwise, you’ll need to scale the images. Make sure you keep the aspect ratios fixed.
- Select each image (Ctrl+A), then copy and paste it into the new image, creating a layer for each.
- Use the Move tool to move the new layers into position.
- If your images overlap, you can change the order of layers by simply dragging them.
Merge two photos on a smartphone
Sometimes it can be easier to merge images directly on your smartphone and share a collage instead of a series of shots. There are many apps that do that. You can try the original image editor for iPhone or try Image Combiner, PhotoMixer, PhotoGrid, and Adobe Photoshop Mix for Android.
All of these apps offer predesigned templates, but you can also create your own. Then you can simply choose images from your gallery and let the app merge photos. Save and share the result.
 PhotoMixer
How to merge photos to create a panoramic shot
If you don’t have a camera that does panoramic pictures, you can always create panoramic shots in post-processing. To merge photos into a panoramic image, you need to use software that works with layers, like Photoshop or GIMP.
To make sure your pictures can be merged into a panorama, take them using a tripod and make sure they all align. Each picture should overlap with the previous by about 25–30%. This assures better blending when you merge them. And don’t forget to work fast, as shooting conditions might change.
After you have all the parts of the panoramic image, learn how to merge two images in Photoshop. When merging a panorama, you’ll have all your images in a line, overlapping.
Whether you choose to combine photos or to merge photos, the result is always outstanding. Technology gives you a lot of useful tools to work with. You can even plan your photos in advance and take sky pictures or texture pictures to use later.
Combine photos with creativity and build narratives that will amaze the world. Editing shouldn’t take you more time than the photo session. Use an image editor you can master quickly and take advantage of its preset libraries. Luminar Neo is a great choice. If you haven’t used it already, now is a good time to download it and try it for free.
Combining Two Pictures into One Using Blending Mode
Blending modes in Photoshop (or most graphic design software) allow you to control how two layers interact with each other. Here's how to put 2 pictures together to make one by using these modes:
Open Both Images in Photoshop: Go to File > Open and select the images you want to blend.
Place the Images on Separate Layers: If they aren't already, make sure each image occupies its own layer. You can drag one image onto the other using the Move Tool to accomplish this.
Resize or Reposition if Necessary: Use the Move Tool (shortcut: V) and the Transform commands (Ctrl/Cmd + T) to adjust the positioning or size of the images so they align according to your vision.
Select the Top Layer: Click on the layer of the image you want to be "on top" in the Layers Panel.
Change the Blending Mode: At the top of the Layers Panel, you'll see a dropdown menu that defaults to "Normal." This is where you select your blending mode. Click on this dropdown to see a list of all the available blending modes. Some popular ones for combining images are "Multiply", "Overlay", and "Soft Light", but you should experiment to see which one gives you the desired effect.
Adjust Opacity (Optional): If the effect of the blending mode is too strong, you can reduce the opacity of the top layer to make it more subtle. This is done using the Opacity slider at the top of the Layers Panel.
Mask & Refine (Optional): If you want only certain parts of the top image to blend with the bottom image, you can add a layer mask to the top layer (by clicking the mask icon at the bottom of the Layers Panel). Then, use a black brush to hide areas or a white brush to reveal areas.
Flatten and Save: Once you're satisfied with the blend, you can go to Layer > Flatten Image to combine the two layers. Save your work by going to File > Save.
Experimentation is key when blending images. Different images will work better with different blending modes, so don't be afraid to try various combinations to achieve the desired result.
Conclusion
Whether you choose to combine photos or to merge photos, the result is always outstanding. Technology has equipped us with an array of versatile tools to finesse our photographic endeavors. Planning ahead is the key. Capture sky images or intriguing textures today; they might serve as the perfect overlays tomorrow.
Combining photos opens the door to unparalleled creativity, allowing you to weave narratives that captivate and astonish. The art of editing shouldn't overshadow the joy of the photo session itself. It's essential to pick an image editor that's intuitive and rich in features, but doesn't have a steep learning curve. Luminar Neo fits the bill perfectly. If you haven't ventured into its vast array of capabilities, consider this your invitation to download and explore it for free.
With tools like Luminar Neo, answering the question of "How do you put two photos together?" becomes not just simple, but an enjoyable part of the creative process. Dive in and let your imagination run wild.
FAQ
How can I combine two photos on an iPhone?
You can combine two photos on an iPhone using various apps. One of the most popular is "Layout" from Instagram, which allows you to select multiple photos from your library and combine them into different layouts or collages. Another option is the native "Shortcuts" app, where you can create a custom shortcut to merge photos.
Is there a way to put two pictures together on an iPhone without using an app?
The iPhone doesn’t have a built-in feature to merge photos directly in the Photos app. However, you can use the built-in "Shortcuts" app (which comes pre-installed on many iPhones) to create a workflow that combines photos. Alternatively, you would need third-party apps like "Layout" or other photo editing apps to combine pictures.
How can I merge two pictures into one on an Android device?
On an Android device, there are several apps available on the Google Play Store that allow you to merge or combine photos. Some popular choices include "PhotoGrid", "PicsArt", and "Adobe Photoshop Mix". To merge photos, simply download one of these apps, open it, select your desired photos, choose a layout or merging style, and save or share the final combined image.
What's the method for combining two pictures into a single image online?
There are many online photo editor tools and websites that offer photo merging or collage-making functionalities. Websites like "Fotor", "Canva", or "PhotoJoiner" allow you to upload multiple images and combine them into one. Simply navigate to one of these websites, follow their on-screen instructions (usually involving uploading your photos, choosing a layout or design, and making any desired adjustments), and then download or share the final combined image.
 >
>
