June 12
13 min. to read
How To Take Product Photos With iPhone For Quality Shots
 Not long ago, small business owners had to hire professional photographers or invest in expensive camera equipment to showcase their products. Now, thanks to the quality of mobile phone cameras like the iPhone, you can take care of it all yourself.
With just your iPhone, you can create high-quality product photos and post them directly online, whether for social media, websites or digital ads. No extra gear needed. In this guide, we will show you how to take professional product photos with an iPhone. Let’s get started!
Step 1: Prepare Your Product
 Before opening the camera app, take a moment to consider the following:
Composition: There are several composition styles used in product photography. Think about which one works best for your product and the message you want to convey.
The Product: Consider the size, shape and colour of the product. These factors will influence how it fits within your chosen composition and how it interacts with the other elements in the frame.
Props: Props can help your photo stand out and add more visual interest. Choose them carefully so they relate to the product’s purpose, theme, or ingredients (if applicable).
If you are thinking this sounds expensive for a simple product shot, don’t worry. All of this can be achieved using everyday items around the house. And when it comes to lighting, the good news is that the sun provides high-quality, natural light for free. Later in this article, we will explore how to use both natural and artificial light to get great results.
Learn more: Commercial Photography: Everything You Should Know About It
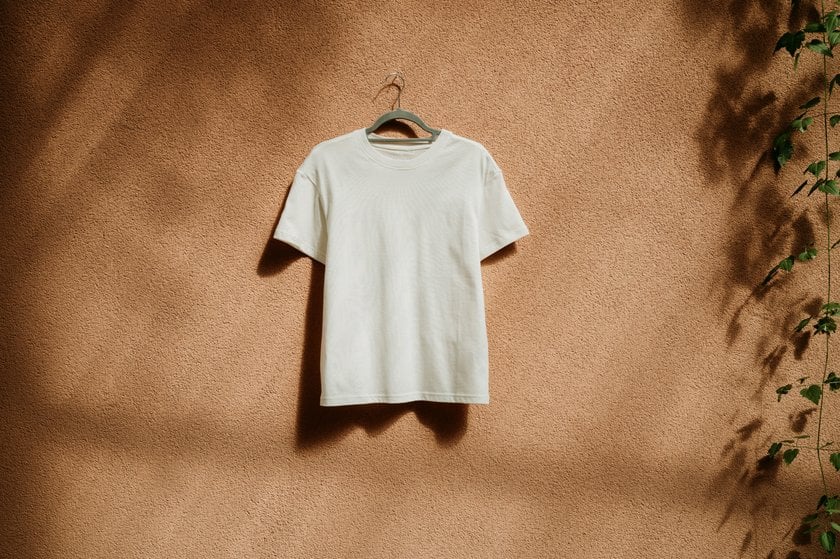
Step 2: Set Up Your Background
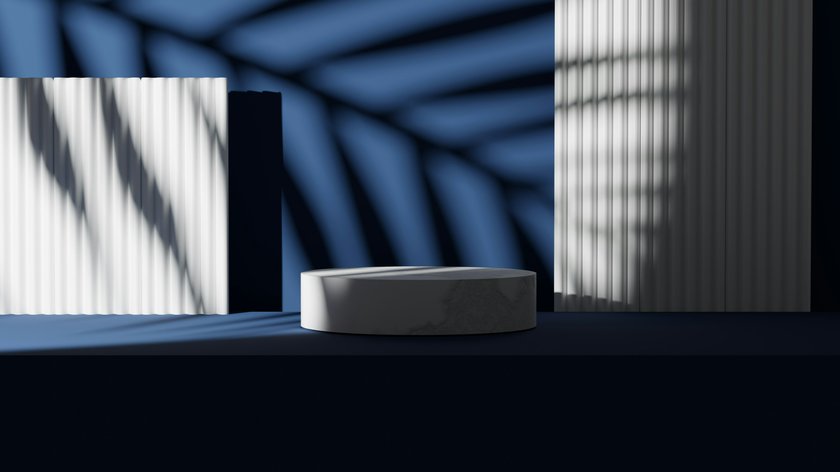 Let’s begin building your iPhone product shots, starting with the background. A background should never distract from the product. It should support the overall theme or colour scheme and feel cohesive. Clashing colours should be avoided, which you can check by identifying the dominant colour of your product and finding complementary tones using a colour wheel.
Here are some ideas for backdrops you can use:
Plain Backdrop | White backdrops are a classic choice that keep all the focus on the product. They work especially well for clean, minimal product shots. |
Coloured Backdrop | Use coloured paper or card for a solid background that introduces a subtle mood or matches brand colours. |
Textures | Tabletops, tiles, or textured surfaces like wood and stone can add depth and visual interest to your image. |
Fabrics | For a softer or more styled look, choose fabrics that work well with your product. Linen, cotton or textured cloths can add warmth and variation. |
Images | One creative technique involves using a printed photo as a backdrop, such as a lush green field or cloudy sky. Alternatively, display the image on a monitor behind your product for a digital-style backdrop. |
Step 3: Find Good Lighting
 Now let’s break down the difference between natural and artificial lighting for your product photo.
Natural Lighting
Position your product near a large window and make sure it is evenly lit. The weather will play a major role in the quality and style of light you get:
Bright Sunshine: For vibrant and bold lighting, shoot on a sunny day. This will produce high contrast and strong shadows. Be mindful that those shadows aren’t falling across your product. That said, deep shadows have become a popular stylistic choice in recent years.
Cloudy Days: Think of the clouds as a giant softbox. They diffuse the sunlight, giving you flat and even lighting, the kind studio photographers love. An added benefit of cloudy conditions is that colours will appear more saturated, as bright sunlight can sometimes wash them out.
Artificial Lighting
This refers to any electrical light source. The main advantage is full control over your lighting setup without depending on the weather. However, it does come at a cost.
Key Light: Your primary light is known as the key light. You can use it on its own or combine it with natural light. For more guidance on positioning your light, check out our in-depth guide to studio lighting.
Fill Light: A second light can be used to soften or eliminate shadows created by the key light. That said, there’s a more affordable alternative covered below.
Background Light: Some studios add an extra light aimed at the background. While not essential, it’s worth knowing about if you want to experiment further with your setup.
Reflectors
An inexpensive and highly effective way to improve your lighting setup is to use reflectors. These can be purchased for under $10 or made at home using white card or even a nearby white wall. Use reflectors to bounce light back onto your product or to reduce shadows in specific areas of the frame.
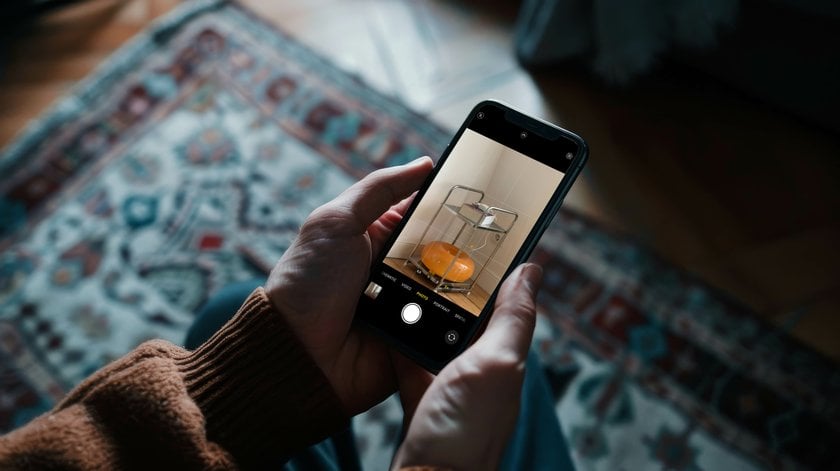
Step 4: Position Your iPhone
 Now we move on to composition. Use websites like Pinterest for inspiration on how to arrange your image. Whether you are placing the product on a platform or using a flat lay composition, the position of your iPhone will be crucial.
Consider a tripod to make product photography using an iPhone easier. It helps you get consistent shots and keeps your hands free to reposition the product or any props.
The product should be immediately recognisable as the main subject, and important features such as the brand logo should be clearly visible. One helpful tip is to use the rule of thirds to place key elements. With two horizontal and vertical lines dividing the frame into thirds, the intersections are ideal points to position details like logos. Placing the logo in the centre works well too, especially if you're going for a clean and minimal look.
Step 5: Adjust iPhone Camera Settings
 The next step is to prepare your iPhone camera settings for product photography. The default settings will give you decent results, but your iPhone is capable of much more, so it's worth unlocking that extra potential.
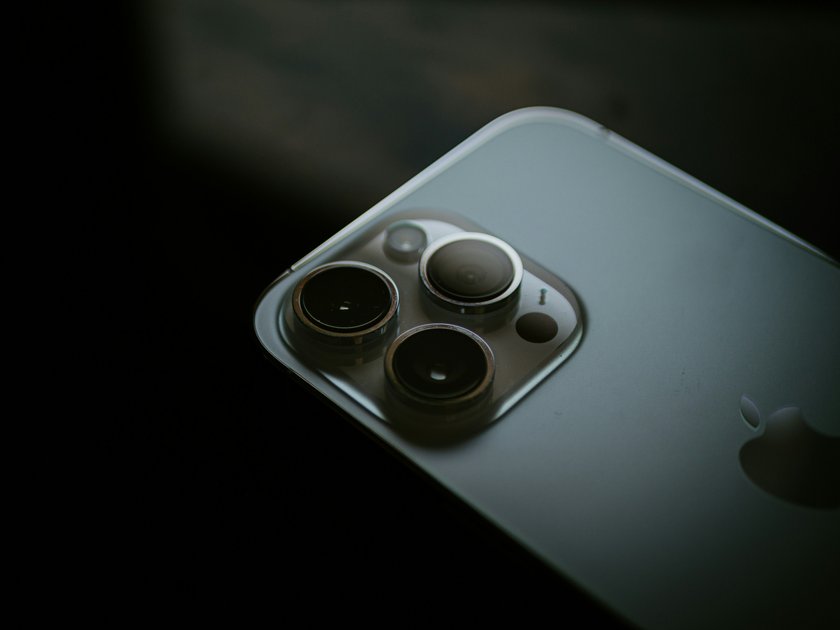
Lens
The best quality image will come from the 1x lens (the main wide-angle lens). As you zoom in digitally, you may notice a drop in image quality. If you need to get closer to the product, do so manually by moving your phone rather than zooming in.
Grid Lines
You may remember we mentioned placing the logo along the intersections in the rule of thirds. To help you visualise this more easily, enable grid lines in your settings. This will make it easier to compose your shot.
Using ProRAW or HEIF Max
These settings allow you to capture higher-resolution images with more detail and greater flexibility for editing. RAW files are larger, but they retain more information, especially in shadows and highlights. ProRAW also gives you a flatter image, which is ideal for post-processing.
Lock Focus and Exposure
The final step is to make sure your product is both sharp and properly exposed. Tap and hold on your subject in the Camera app until AE/AF LOCK appears. Then swipe down to lower the exposure using the slider. You want to avoid overexposure, as this can blow out details in bright areas.
If you are shooting in formats like Apple ProRAW, you will also benefit from increased dynamic range, which allows you to bring back detail in darker areas when editing.
Step 6: Edit Your Photos
 The final step in your product photography journey is editing your photos. There are some key areas to focus on, and a few different ways to go about it, so let’s take a look.
iPhone Editing
Open your camera roll, locate your image and tap the adjustment icon at the bottom of the screen. Here, you can apply filters, styles and make manual adjustments to your photo. You’ll find all the essential tools, including contrast, sharpness and colour adjustments.
Luminar Mobile
 For more in-depth editing, Luminar’s iPhone image editor app will help you get even more out of your image. In addition to the essential adjustments, you’ll have access to advanced features such as Detail and Relight tools.
The Detail tool, for example, is particularly useful as it allows you to adjust small, medium and large details separately, giving you more precision and control. If you want a fast result, the Enhance AI tool offers a quick and simple way to achieve a professional finish, helping you get your photo ready to share in no time.
The Bottom Line
 There we have it. Taking professional-looking product photos is absolutely achievable with your iPhone. With the right know-how, setting up your shot with suitable lighting, a clean backdrop, and carefully chosen props will go a long way in elevating the quality of your images.
Of course, a lot of the work comes down to how you set up your phone and the editing you do afterwards. Make sure your settings are correct by switching to Apple ProRAW or HEIF Max, and use manual exposure controls to ensure important details are not lost.
Once your shots are captured, edit them using either the iPhone’s built-in tools or a third-party app like Luminar Mobile for more advanced control. So have fun, get creative with your iPhone product photography, and share your results with the world!
 >
>
